


Page 9For technical questions, please call 1-800-444-3353.SKU 67847
Work Piece and Work Area Set Up
Designate a work area that is clean 1.
and well-lit. The work area must not
allow access by children or pets to
prevent injury.
Locate the Compressor on a at 2.
level surface to ensure proper pump
lubrication and to prevent damage to
the unit. Keep at least 12” of space
around the unit to allow air circulation.
Route the power cord from the 3.
compressor to the grounded wall
outlet, along a safe path without
creating a tripping hazard or exposing
the power cord to possible damage.
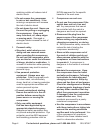
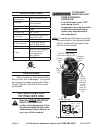
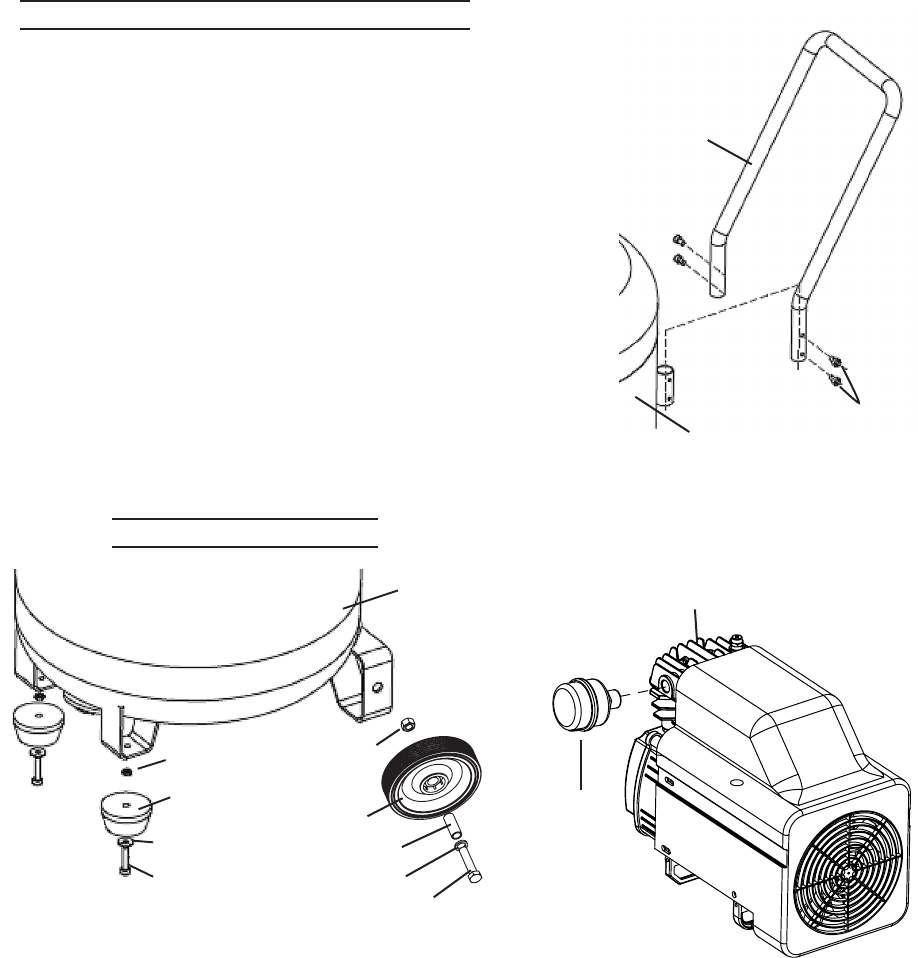
Assembly/Mounting
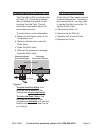
Figure 2
Bolt (64)
Hex Nut (65)
Tank (70)
Wheel (63)
Screw (69)
Nut (24)
Foot Pad (67)
Washer (68)
Washer (64b)
Sleeve (64a)
1. Attach the Wheels (63) to the Tank
(70), using the Bolts (64), Washers
(64b), Sleeves (64a), and Hex Nuts
(65). Attach the Foot Pads (67) to
the bottom of the Tank (70) using the
Screws (69) and Washers (68).
Figure 3
Handle (72)
Bolts (71)
Tank (70)
2. Slide the Handle (72) into the two
slots on the top of the Tank (70) and
secure in place with four Bolts (71).
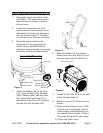
Figure 4
Air Filter
(6)
Cylinder Head (7)
3. Thread the Air Filter (6) onto the side
of the Cylinder Head (7).
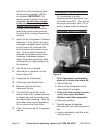
Break in the new Air Compressor as 4.
follows:
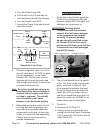
Make sure the Power Lever is OFF a.
and the unit is unplugged. Insert a
male coupler (sold separately) into
the female Quick Coupler (76) and
fully open all regulators and valves.
Plug in the Power Cord.b.