


29
SAW BLADE MOUNTING AND DISMOUNTING
WARNING: * To prevent an accident or personal injury, always turn off the trigger
switch and disconnect the power plug from the receptacle before
removing or installing a saw blade.
If cutting work is done in a state where the bolt is not sufficiently
tightened, the bolt can get loose, the blade can come off, and the lower
guard can get damaged, resulting in injuries.
Also, check that the bolts are properly tightened before plugging the
power plug into the receptacle.
* If the bolts are attached or detached using tools other than the 10mm
box wrench (standard accessory), excessive or improperly tightening
occurs, resulting in injury.
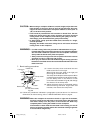
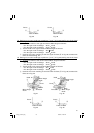
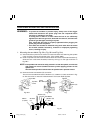
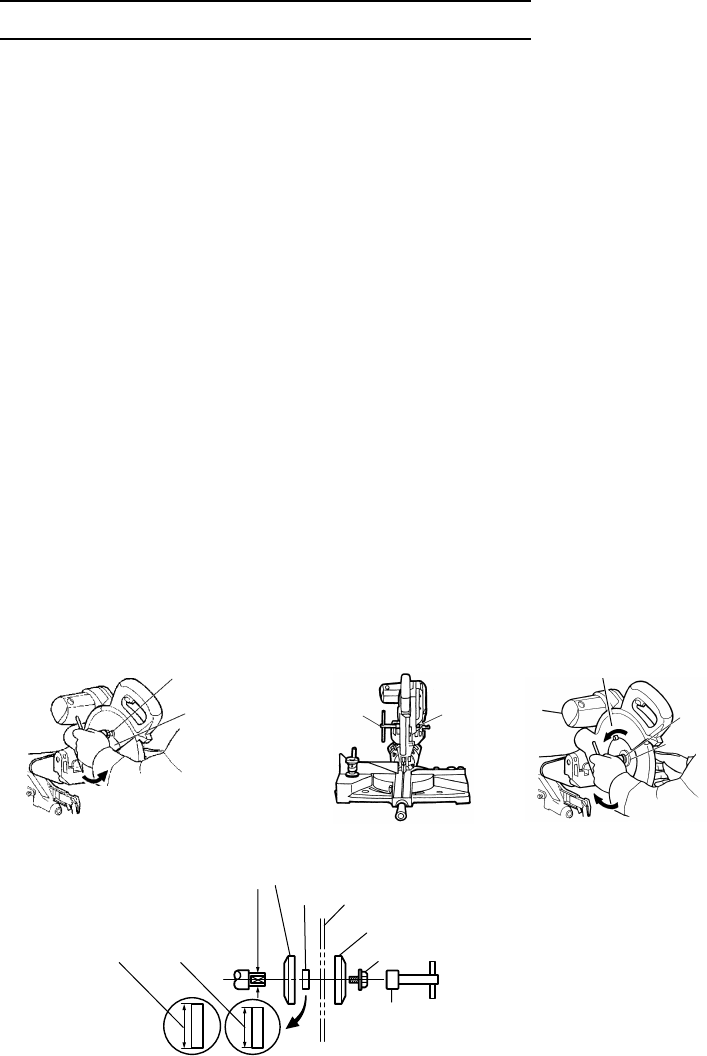
1. Mounting the saw blade (Fig. 50-a, Fig. 50-b and Fig. 50-c)
(1) Use the accessory 10mm box wrench to loosen the 6mm bolt fastening the spindle
cover and then remove the spindle cover. (Only model 240V)
(2) Press in spindle lock and loosen bolt with 10mm box wrench (standard accessory).
Since the bolt is left-hand threaded, loosen by turning it to the right as shown in
Fig. 50-c.
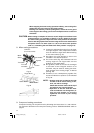
NOTE: If the spindle lock cannot be easily pressed in to lock the spindle, turn the bolt
with 10mm box wrench (standard accessory) while applying pressure on the
spindle lock.
The saw blade spindle is locked when the spindle lock is pressed inward.
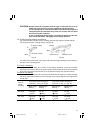
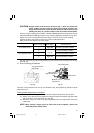
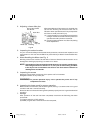
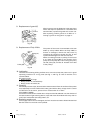
(3) Remove the bolt and washer (D) and collar.
The color has outside diameters of 25.4mm (1") or 30mm (1-3/16") as shown in Fig.
51. Use the collar to meet the inside diameter of the saw blade applied.
Fig. 50-a Fig. 50-b Fig. 50-c
6mm Bolt
Spindle
Cover
Loosen
10mm
Box Wrench
Spindle
Lock
Bolt
Loosen
Washer (D)
Tighten
30mm
(1-3/16")
Box Wrench
Bolt
Washer (D)
Saw Blade
Collar
Washer (D)
15.88mm
25.4mm
(1")
Fig. 51
01Eng_C10FSH_Eng 3/29/07, 12:30 PM29