


11
English
PREPARATION BEFORE OPERATION
Make the following preparations before operating the power tool:
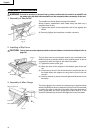
1. Installation
The table saw must be properly secured to a sturdy workbench, stand or cabinet.
Casters (if provided) on the workbench, stand or cabinet must be locked during operation.
If there is any tendency for the table saw to move during operation, this must be corrected immediately.
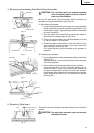
(1) Place the table saw in the desired location.
Make certain that is (or will be) adequate space on all
sides of the table saw for the workpiece.
To allow maximum flexibility for sheet material and
long boards, 9 foot (2745 mm) clearance is
recommended on all sides of the table saw.
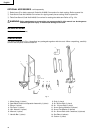
(2) Secure the four set plates to the saw base at its four
corners with four 8 × 20 mm bolts (with/washers) and
four 8 mm nuts.
Square the table saw to the workbench, stand or
cabinet. Make certain that all controls are easily
reached and there is at least 6-11/16" (170 mm) behind
the rear of the table to allow for the saw blade guard
assembly.
Temporarily mark the location of the four base corners
and set plate of the table saw.
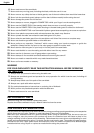
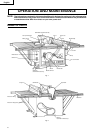
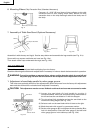
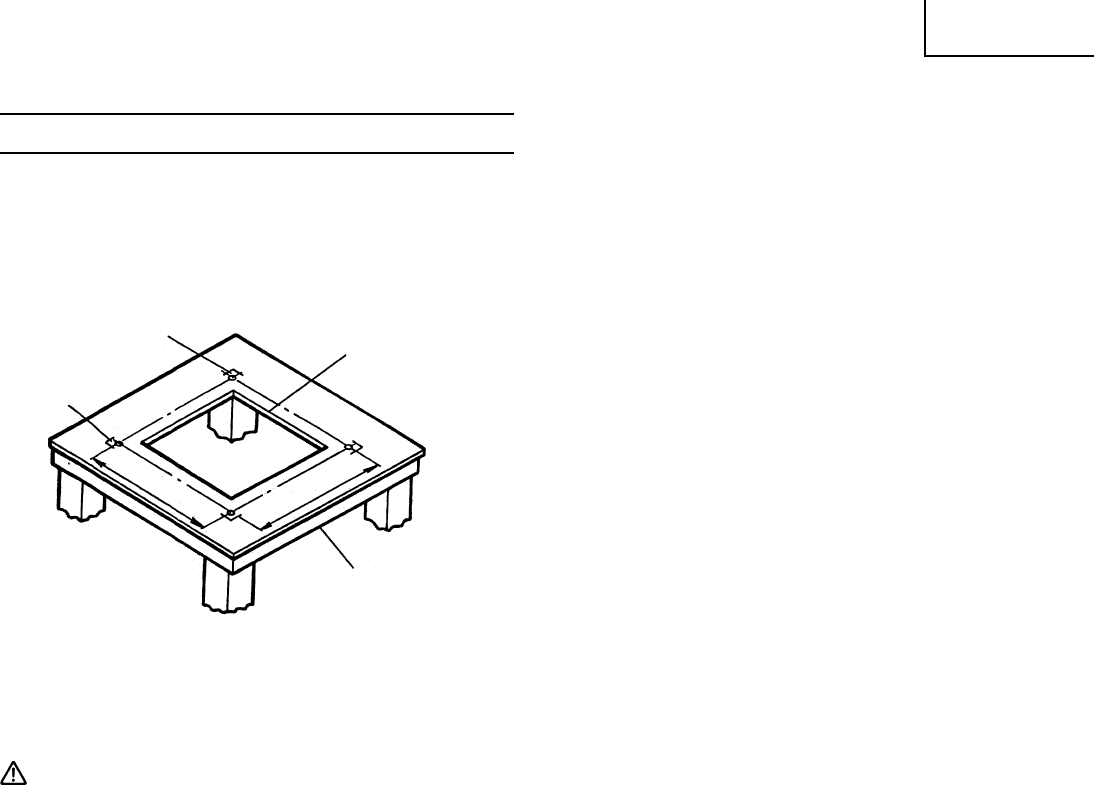
(3) Remove the table saw, and locate a 11" (279 mm) or 12" (305 mm) square centered between the marks
locating the body shell. Cut out and remove the square. This opening allows sawdust to fall out of the
body shell.
CAUTION: Failure to provide this opening can result in insufficient cooling air to the motor causing
premature motor failure and a possible fire hazard.
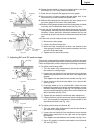
(4) Replace the table saw, aligning it with the marks made above. Trace hole positions on the four set plates
on the workbench, stand or cabinet with a pencil or the like.
(5) Remove the table saw, and drill a 5/16" (8 mm) hole in each location marked. Remove all sawdust or
chips.
(6) Replace the table saw in the marked location. Check to see that the table saw does not lock on the
workbench and all four set plates are in contact with the top of the workbench, stand or cabinet.
(7) Using suitable length four 2" (50 mm) bolts, nuts, and flat washers (not provided) secure the table saw to
the workbench, cabinet or stand. Place a spring washer and flat washer on the bolt, place the bolt through
the hole in the set plate and the top of the workbench stand, or cabinet. Add another flat washer and a
nut. Do not tighten the nut yet. Repeat this operation for the other three locations.
Tighten all nuts securely.
(8) Check the sturdiness of the resulting assembly.
5/16" (8 mm) Holes
12" (305 mm) Square
Cut Out (center)
Set Plate
Locating Marks
Work Bench, Stand
or cabinet
Fig. 5
15-3/4" (400 mm)
17-23/32" (450 mm)