


307-735 23
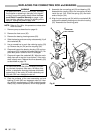
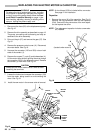
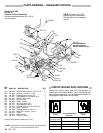
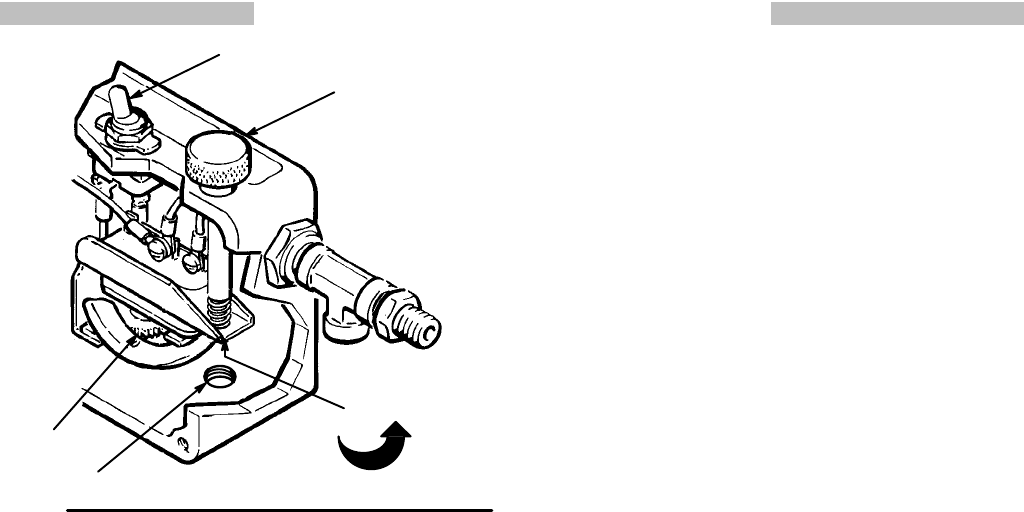
PRESSURE
CONTROL ADJUSTMENT
Fig
22
ON/OFF
SWITCH
A
B
D
TIGHTEN
C
4. Open
the needle valve slightly
. T
urn
the pressure con
-
trol
knob (A) to the minimum setting.
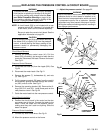
5. Plug
in the sprayer and turn the switch ON. Increase
the
pressure setting just enough to start the sprayer
.
Prime
the hose, being sure to eliminate all
air from the
system.
6. Open
the needle valve a little more––enough to allow
the pump to run continuously––and turn the pressure
control knob to maximum. Now, very slowly start to
close the needle valve, but don’t close it all the way.
Observe
the pressure at which the
pump stalls, which
should
be approximately 2750 psi (190 bar).
NOTE: The
slower the pressure is
raised, the easier it is
to note the exact stall pressure. Closing the
needle
valve quickly causes the pressure to
rise
too
fast which gives a false reading.
If the pressure is lower than 2750 psi (190 bar):
Unplug the sprayer. Relieve pressure. Insert the
wrench and untighten the pressure adjustment nut
1/8
turn or less, then repeat steps 5 and 6.
If the pressure is higher than 2750 psi (190 bar):
Unplug the sprayer. Relieve pressure. Insert the
wrench and tighten the pressure adjustment nut 1/8
turn
or less and repeat steps 5 and 6. Repeat this pro
-
cedure
until the proper stall pressure is obtained.
7. Now
check to
see at what pressure the sprayer starts
to run again after it stalls. Plug in the sprayer, turn it
on, close the needle valve, and set the pressure at
maximum.
Allow the sprayer to run until it stalls.
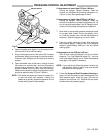
8. Open the needle valve very slowly while observing
the pressure gauge. Check to see if the pressure
drops to approximately 2350 psi (164 bar) before
starting
again.
If the pressure is not
2350 psi (164 bar):
Shut off and unplug the sprayer, but do not relieve
pressure. Turn the differential wheel (D) just one
notch
and repeat Steps 5 and 6. Check the pressure
drop
again, and repeat if necessary
.
NOTE: If you adjust the differential wheel, recheck the
stall
pressure (steps 5 and 6) to be sure the stall
pressure
has not changed.
9. Follow the
Pressure Relief Procedure W
arning
on
page
14. Flush the water out with mineral spirits.
Re
-
lieve pressure again. Install the plug (135) and the
pressure control cover (41). Remove the test hose,
needle
valve and pressure gauge.