


13
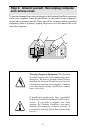
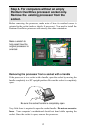
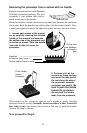
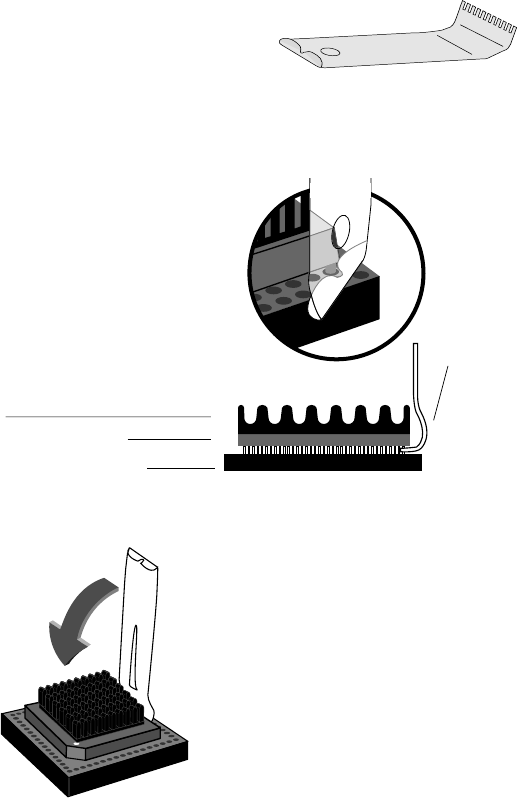
Removing the processor from a socket with no handle
Place the notch at a corner of the processor and insert between the processor
and socket. Rock the handle from side to side to lift the corner slightly. Once
a small gap appears between the chip and socket, move to the next corner.
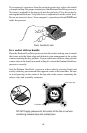
Push inward on the processor removal tool’s handle to gently ease the
processor from its socket. Gradually loosen one side at a time. Loosen all
four sides evenly and remove the processor. Be sure to push the handle
towards the chip as shown.
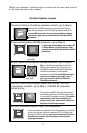
2. Continue until all the
corners are loose and you
can insert the rake part of
the tool along the side of
the processor, between
processor and socket.
Be
sure to push the handle
toward the processor.
Do not push the handle
away from the processor.
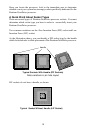
1. Loosen each corner of the proces-
sor by carefully inserting the notched
handle of the removal tool between
the bottom side of the processor and
its socket as shown. Rock the handle
from side to side to loosen the
processor.
Fit the rake
tines between
processor
pins
Heatsink
Processor (gray layer )
Socket (white, black or blue)
Push handle
toward
processor
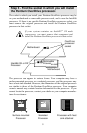
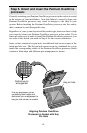
Now proceed to Step 5.
Find the chip removal tool in the Pentium
OverDrive processor package. The tool
resembles a tiny garden rake with a
notch in the end of the handle.
Removal tool