


19
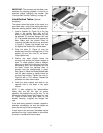
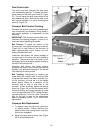
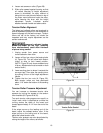
4. Loosen set screws on collar (Figure 28).
5. Slide collar upward against housing so that
all vertical free-play of height adjustment
screw is eliminated. An easy method of
doing this is to use a block of wood on top of
the motor mount slide and under the collar,
while lowering the drum with the height
adjustment handle. Lubricate around
washers beneath handle and above collar.
Tension Roller Alignment
The infeed and outfeed rollers are tensioned to
provide downward pressure on the workpiece to
prevent slippage on the feed conveyor. Tension
rollers are set at the factory, but should be
inspected and may require adjustment as the
sander receives use.
Improperly adjusted tension
rollers (i.e. those set too high, rendering
them non-functional) could allow kick-back
of pieces being sanded.
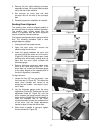
1. Unplug sander from power source and
remove abrasive from drum.
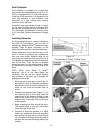
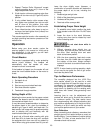
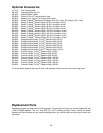
2. Loosen all four hex nuts on the bearing bolts
(A, Figure 29). This will allow both tension
rollers to drop to their lowest position.
(NOTE: Figure 29 only shows outboard end
of drum. Adjustments must be made on both
ends of drum.)
3. Lower sanding drum to where it contacts the
conveyor bed. Then raise the sanding drum
by making 3/4 turn of the height adjustment
handle.
4. Tighten the four hex nuts (A, Figure 29).
Both tension rollers are now positioned
about 1/16” below the bottom of the sanding
drum.
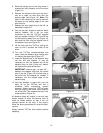
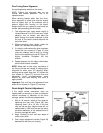
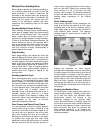
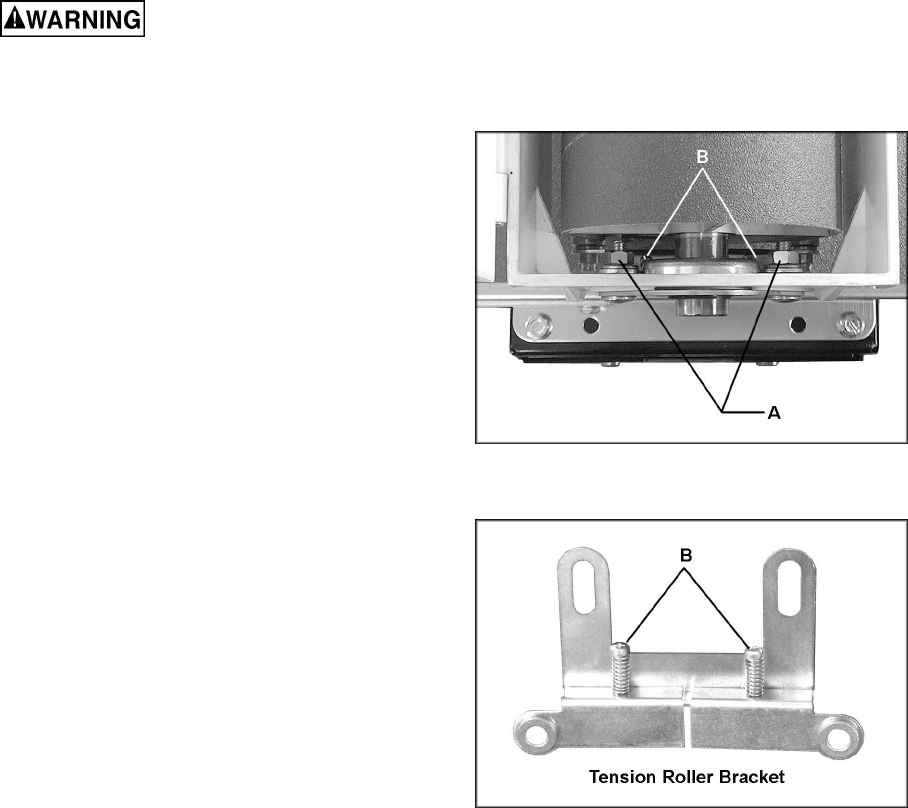
Tension Roller Pressure Adjustment
You can increase or decrease tension roller
pressure by turning the screws on the tension
roller brackets (B, Figures 29 & 30).
Too much tension roller pressure can result in a
“snipe” mark, which is identified as a visible line
running across the width of the board and
located approximately 2-1/4” from the end of the
board.
If the snipe occurs on the leading end of the
board, adjust the outfeed tension roller. If the
snipe occurs on the trailing end of the board,
adjust the infeed tension roller.
Tension roller pressure can also be adjusted by
raising the height of the rollers, as follows:
Figure 29
Figure 30