


11
built up material in the upper part of the bracket
casting.
2. Take the two keys off of the idler pin bracket,
wipe off, and re-grease.
3. Reverse the above steps to make the machine
ready for reinstallation of the belt according to the
Belt replacement instructions.
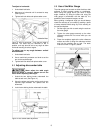
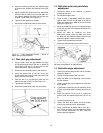
7.3 Installing abrasive discs
1. Disconnect power to the machine to prevent
accidental start-ups.
2. Peel off the old abrasive disc.
3. Clean the drive disc surface using naptha or a
similar nonflammable solvent that will dry film-
free.
4. Pull the protective backing half off the new
abrasive disc.
5. Position the new disc carefully so it is centered
accurately on the drive disc. (See Figure 8.)
6. When accurately centered, remove the rest of the
protective backing and press the abrasive disc
firmly against the drive disc so complete
adhesive contact is made.
7. Reconnect the power to the machine.
Figure 8: Installing new abrasive disc
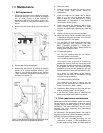
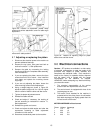
7.4 Replacing the v-belt
1. Disconnect power to the machine to prevent
accidental start-ups.
2. Remove the belt guard (Figure 9) and disc table.
3. Remove the table tilt lock knob (Figure 10).
4. Loosen the four motor bolts so the motor can
slide on its plate.
Figure 9: Removing belt guard
Figure 10: Disc table lock knob
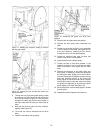
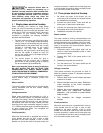
5. Remove the belt from the motor pulley.
6. Remove three of the base mounting bolts, then
loosen the fourth bolt slightly. This allows you to
rotate the machine on the machine base (See
Figure 11).
7. Remove the two bolts, underneath the machine
casting, that secure the disc guard to the casting
(See Figure 11).