


16
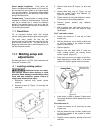
12.3 Making & installing a bedboard
You must use a board over the
planer/molder table when molding. This
prevents the knives from hitting the table and
allows the knives to cut into the guide boards
to clean up the sides of the molding.
1. Disconnect machine from power source
(unplug).
2. Cut a piece of 3/4” particle board 12-7/8” wide
and 31-1/4” long. Note: Board is 12” longer
than the table to allow overhang (6” front and
rear). This increases the work surfaces for
longer pieces of wood stock.
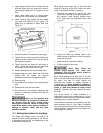
3. Mark and drill four 1/4” holes on the bedboard
that match the pre-drilled holes in the
planer/molder table.
4. Countersink the four drilled holes on the top
side to allow installation of countersunk
screws.
5. Secure the bedboard to the table with four
3/16” x 1-1/2” flat head machine screws, four
3/16” x 3/4” washers and four 3/16” hex nuts.
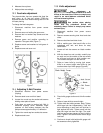
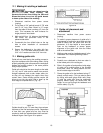
12.4 Making guide rails
Guide rails are used during the molding process to
align the workpiece with the molding cutters. Using
properly adjusted guide rails assures the workpiece
passes the molding cutters in the same position
using multiple passes.
Guide rails should be the same length as the table
(31-1/4”) and 2” wide and be made from smooth,
straight hardwood, such as oak, maple, alder, etc.
so they will not damage the cutters when they
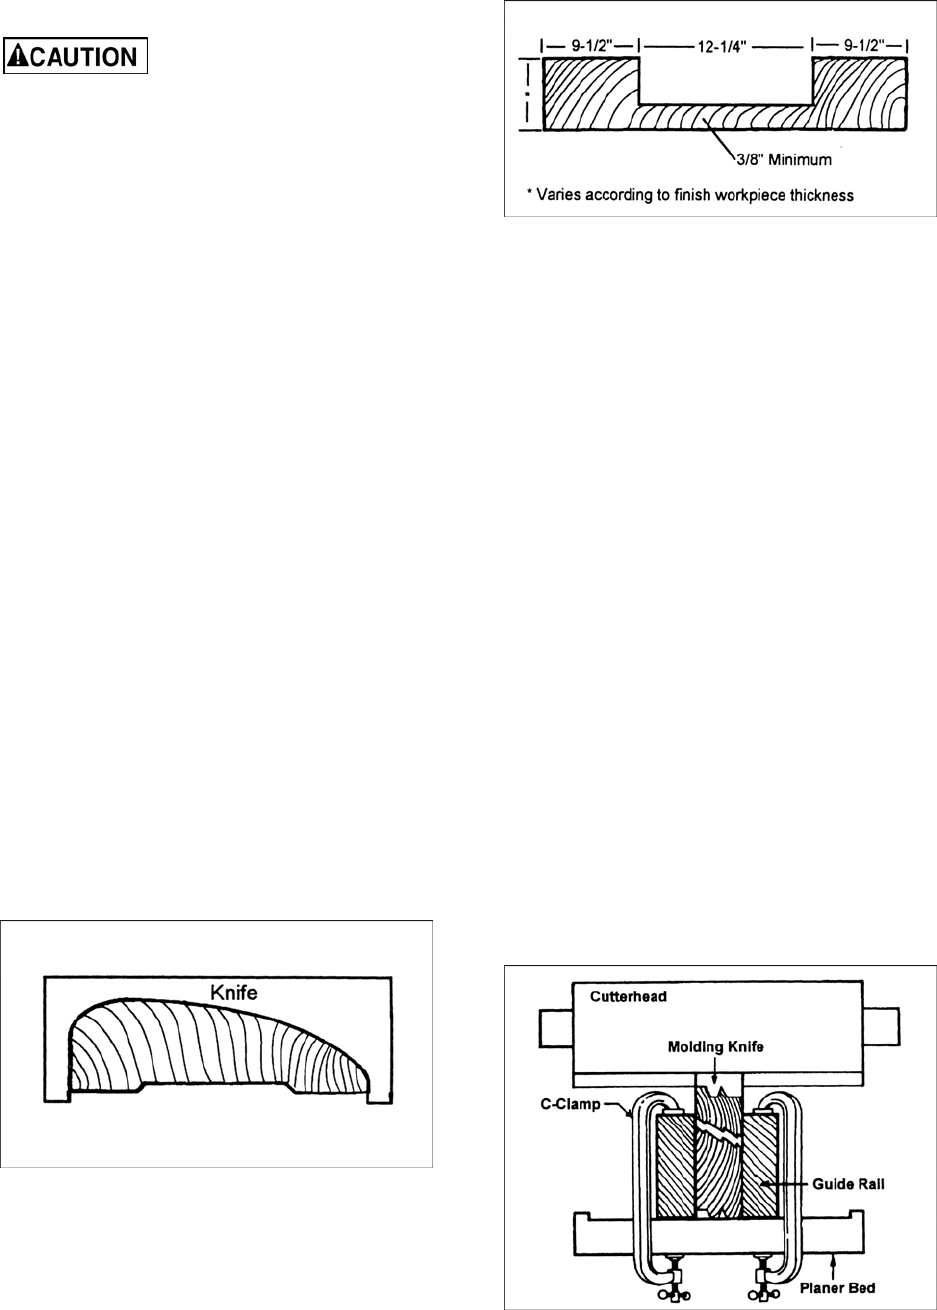
contact them. Some molding profiles require the
knives to cut into the guide rails to clean up the
outer edge to complete the cut. (Fig. 18)
Figure 18
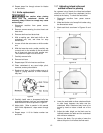
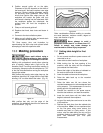
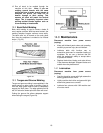
Guides should be cut 1/4” lower than the maximum
thickness of the final workpiece profile. Regardless
of how thick your guide rails are, they must be
notched to clear the infeed/outfeed rollers and anti-
kickback fingers. See Figure 19 for pattern.
Figure 19
12.5 Guide rail placement and
attachment
1. Disconnect machine from power source
(unplug).
2. To assist in proper placement of guide rails, it
is suggested to remove the dust hood and dust
chute to clearly see the cutter knife and rail
placement. It is also helpful to draw parallel
lines on the bedboard to assure proper
alignment of the guide rails from the infeed
side to the outfeed side.
3. Molding cutter must be installed properly in the
cutterhead. See “Installing Molding Cutters”.
4. Lower table.
5. Carefully turn cutterhead so that one cutter is
at the lowest point of the cutting arc.
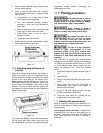
6. Slide in first guide rail and position inside edge
of guide rail to outside edge of the finished
work piece. Note: On many patterns this will
be the outside edge of the knife.
7. Clamp the guide rail to the bedboard using “C”
clamps on both ends. (This can also be done
by nailing with small gauge finish nails. Keep
in mind the guide rails must be positioned
properly before nailing. Be careful with nail
length; do not nail through the bedboard and
into the table). (Fig. 20)
Figure 20