


11
Belt Tracking Adjustment
1. Connect the machine to the power source.
One time quickly turn the machine “ON” and
“OFF”. This will allow you to view the belts
tendency to run down the middle, to the
right, or to the left. The belt should run
centered on the sanding drums. Do not let
the belt run off the drum to the right, or left.
The belt will tear when it contacts parts of
the machine.
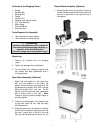
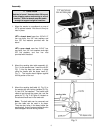
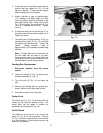
2. Disconnect the machine from the power
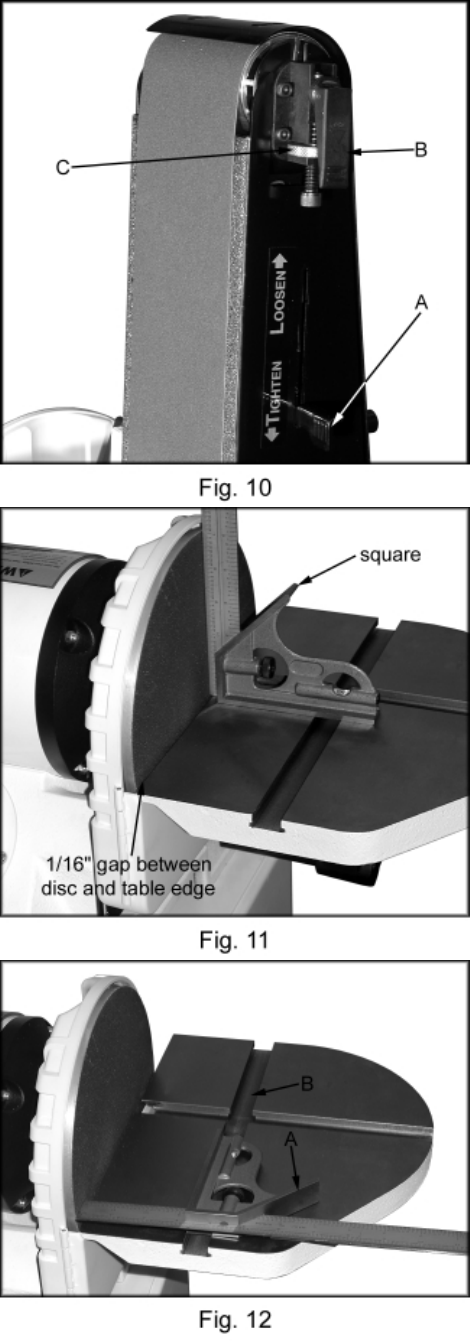
source. Move the tension handle (A, Fig. 10)
to the “Loosen” position. Center the belt
again and move the handle to the “Tighten”
position.
3. Release the tracking lock (B, Fig. 10) by
pulling up on the handle. If the beIt has a
tendency to track left of center, turn the
adjusting knob (C, Fig. 10) counterclockwise
until the belt tracks in the center.
4. If the belt has a tendency to track right of
center, turn the adjusting knob clockwise
until the belt tracks in the center.
5. Secure the tracking lock by pushing the
lever down. Note: when tightening the
tracking lock the belt may tend to move to
the left.
6. Fine tune tracking by turning the adjusting
knob (C, Fig. 10).
Note: To prevent the sanding belt from
stretching and to prolong belt life, remove the
belt tension from the sander if not using for a
long period of time.
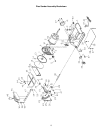
Disc Table Adjustment
1. Disconnect machine from the power
source.
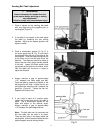
2. Place a square on the table next to the
sanding disc (Figure 11). Loosen locking
handle and move the table to 90°. Tighten
locking handles.
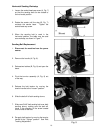
3. Place a combination square (A, Fig. 12) in
the miter gauge slot (B, Fig. 12) and check
the distance from the slot to the edge of the
sanding disc. Slide the square along the
slot to the other end of the disc and check
the distance. The distances should be
equal to ensure that the miter gauge travels
parallel to the disc.