


8
Assembly
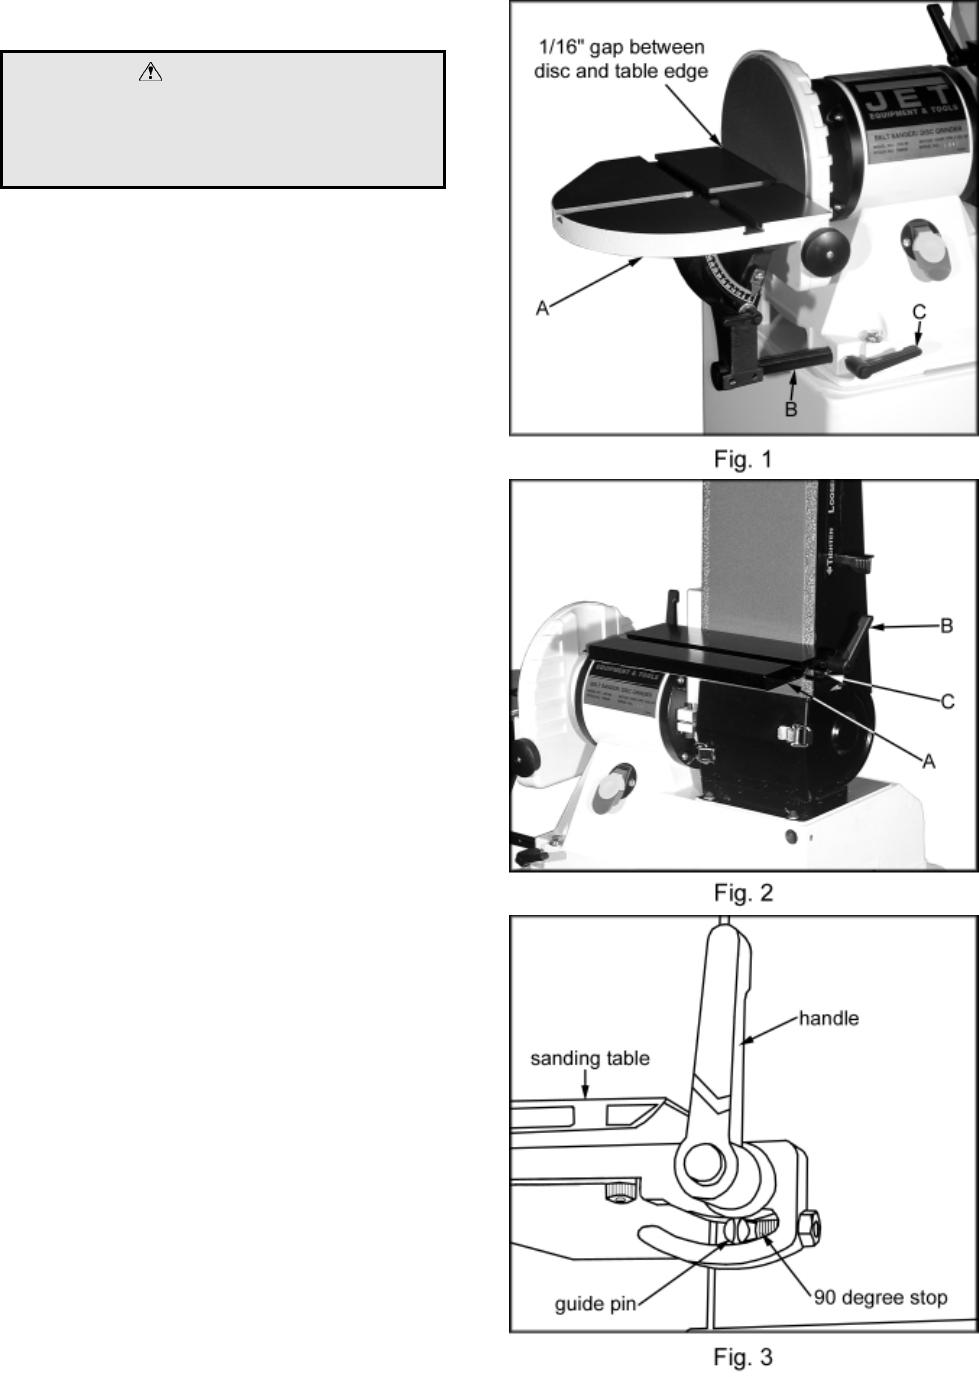
CAUTION
Machine is heavy! Use care when lifting out
of the shipping carton and moving to a final
location. Stand or bench must be stable
enough to support weight of machine.
1. Move the sander to a workbench or one of
JET’s optional stands. Bolt the unit firmly to
holdinplace.
JET’s closed stand uses four 3/8”x2-1/2”
hex cap bolts, four 3/8” lock washers and
four 3/8” flat washers provided with the
stand.
JET’s open stand uses four 3/8”x3” hex
cap bolts, four 3/8” lock washers and eight
3/8” flat washers, and four hex nuts
provided with the stand.
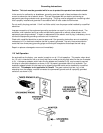
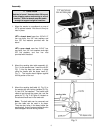
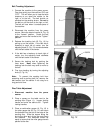
2. Mount the sanding disc table assembly (A,
Fig. 1) to the sander base. Insert the rod (B,
Fig. 1) into the base and secure in place
using the handle with the brass insert (C,
Fig. 1). The handle should tighten against
the flat portion of the rod.
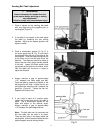
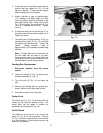
3. Mount the sanding belt table (A, Fig. 2) to
the sander with two locking handles (B, Fig.
2), two 5/16” flat washers. The handle stud
needs to go through the upper slot, and the
guide pin (C, Fig. 2 & Figure 3) located on
the sander should rest in the lower slot.
Note: The belt table can be removed and
the disc table can be used in its place.
There are two holes in the base, below the
sanding belt, that will accommodate the disc
table’s support rod and locking handle.