


17 18
STORE OUT OF REACH OF CHILDREN. Equipment should be in a high location
or locked up to keep out of reach of children. It is not a toy.
DO NOT TAMPER WITH THE LASER OUTPUT. Changing the performance of the
laser to increase its output is prohibited. Any claim for damages or injuries
resulting from not following these instructions will be refused.
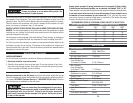
OPERATION ACCESSIBLE FIELDS:
Wavelength 636-660nm
Laser Power for Classification <1mW CW
NEVER OPERATE LASER IF THE UNIT IS DEFECTIVE OR THE COVER OR SEAL
IS DAMAGED.
DO NOT SERVICE LASER. The laser unit must be returned to the factory for any
service or repair. Service or repair must be handled by authorized factory
trained technicians.
Do not open the laser unit except to change batteries.
REMOVE BATTERIES IF THE LEVEL IS TO BE STORED FOR ANY LENGTH OF
TIME. Batteries may leak and damage the laser if it is stored idle for more than
3 months.
Be careful with this tool. Striking or jarring it, especially on the laser housing,
can affect its accuracy.
Other than batteries, there are no user-serviceable parts in the laser device.
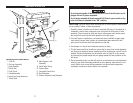
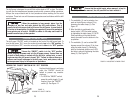
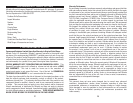
OPERATING THE LASER
Do not stare directly into the Laser beam, aperture or
into a reflection from a mirror-like surface.
The laser runs on two AAA batteries which are located beneath the “ON/OFF” switch.
When the laser light begins to dim, change both batteries. NEVER mix old batteries
with new.
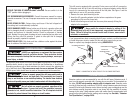
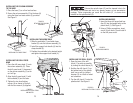
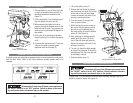
TO CHANGE LASER BATTERIES:
1. Turn off the laser.
2. Press the tab (1) located below the laser
switch (2) and lift up the laser switch
cover.
3. Insert two “AAA” batteries in the laser
battery compartment (3).
4. Close the laser switch cover.
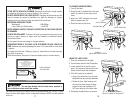
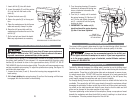
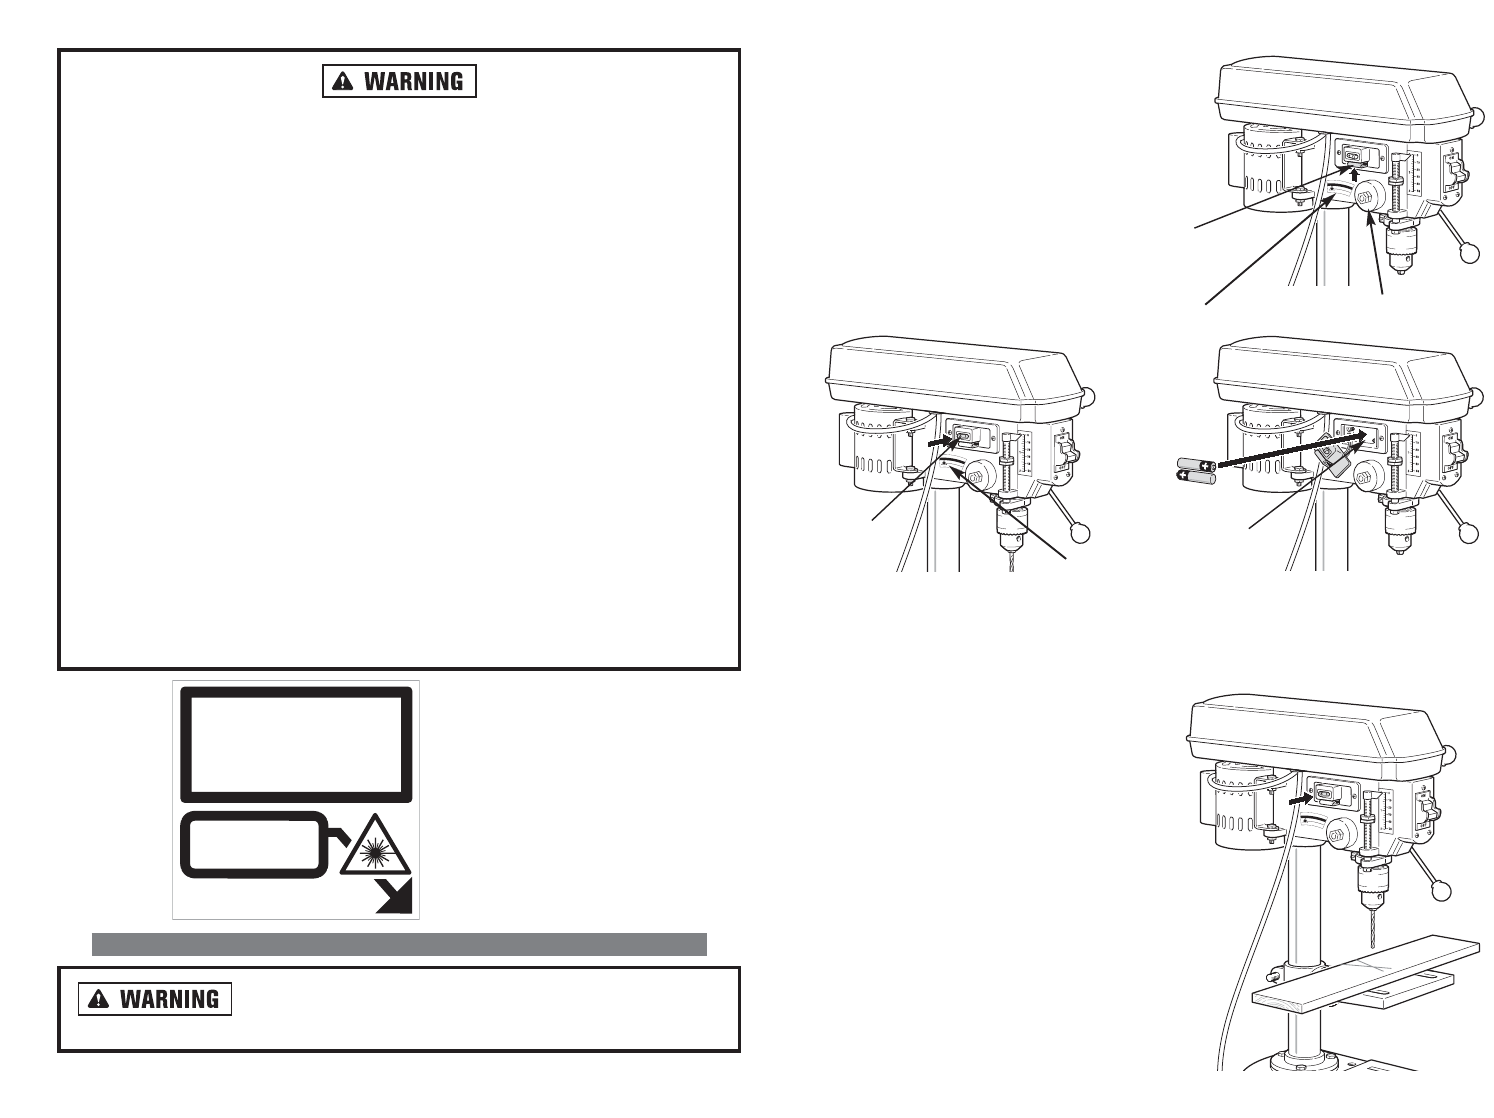
USING THE LASER LIGHT:
1. Place the workpiece on the table.
2. Turn the laser switch to the ON position.
3. Lower the drill bit to meet the work-
piece. The two laser lines should cross
where the drill meets the workpiece.
4. If the drill needs to be adjusted:
• Using a 3mm hex key, turn the laser
adjustment set keys counter-clockwise.
• Rotate the laser light housing until
the two laser lines intersect where
the drill meets the workpiece. DO
NOT stare directly at the laser lines.
5. Re-tighten the adjustment set screws.
A
V
O
I
D
E
X
P
O
S
U
R
E
L
A
S
E
R
R
A
D
I
A
T
I
O
N
C
A
U
T
I
O
N
A
V
O
I
D
E
X
P
O
S
U
R
E
L
A
S
E
R
R
A
D
I
A
T
I
O
N
C
A
U
T
I
O
N
1
(ON/OFF SWITCH)
(LASER APERTURES)
3
2
FIGURE 9.
INSTALLING LASER BATTERIES
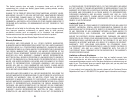
CAUTION LABEL
CAUTION LABEL
LA
SER LIGHT
DO NO
T VIEW D
IRECTL
Y WITH OPTICAL
INSTR
UME
NTS (MA
G
NIFIERS
)
CLASS 2M
LASER PR
ODUC
T
635-66
0nm, <1mW
CW
CLASSIFIEDS
PER
IEC 60825-1, Ed.
1
.2, 2001-08
AV
O
ID
EX
P
O
S
U
R
E -
LAS
ER
LIGH
T IS
E
MITTE
D
FR
O
M TH
IS APE
R
TU
R
E
.
”
LASER RADIATION
CAUTION LABEL
A
V
O
I
D
E
X
P
O
S
U
R
E
L
A
S
E
R
R
A
D
I
A
T
I
O
N
C
A
U
T
I
O
N
FIGURE 10. USING THE LASER LIGHT