


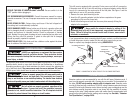


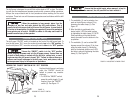
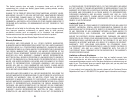
Ensure that the switch toggle, when removed, is kept in
a secure place. Once removed, the drill press will not start without it.
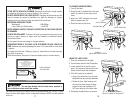
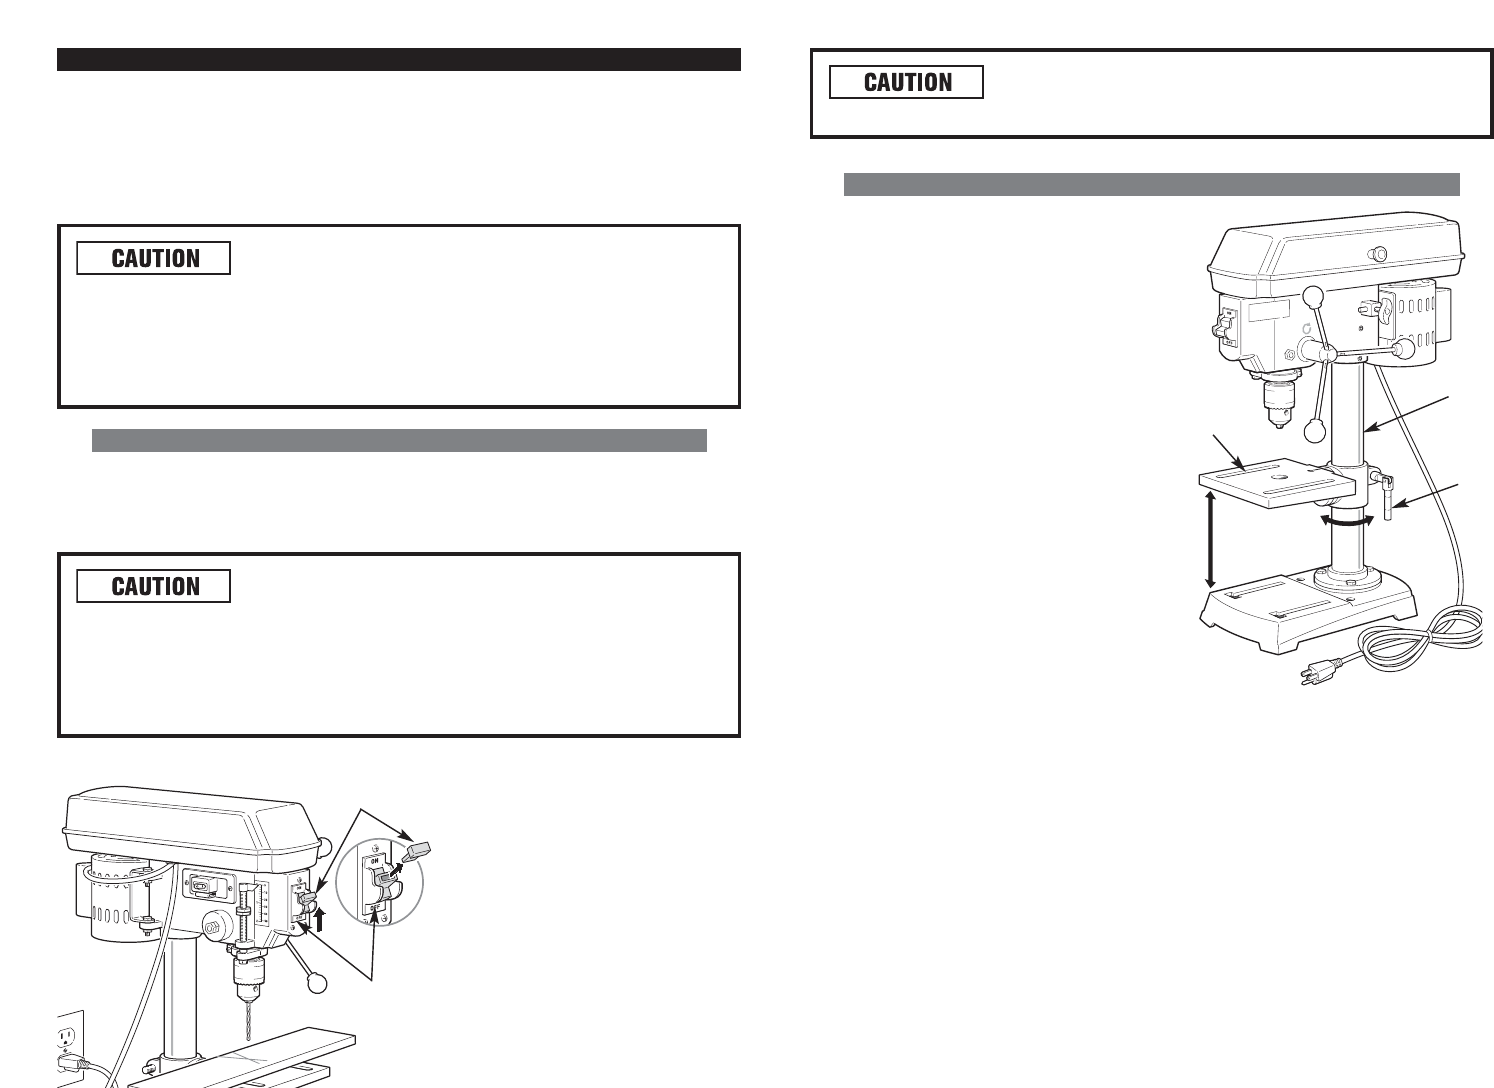
ADJUSTING THE WORK TABLE
1. The worktable (1) can be raised or low-
ered on the drill press column (2) by
loosening the table clamp (3). See
Figure 12.
2. After the table is positioned at the
desire height, LOCK the table in place
by tightening the table clamp (3). NOTE:
Final positioning of the table should
always be made from the bottom to the
up position.
3. The worktable (1) can be rotated 360
degrees around the column (2) by loos-
ening the table clamp (3). Rotate the
table to the desired position and LOCK
the table in place by tightening the table
clamp (3). See Figure 12.
2019
OPERATING THE DRILL PRESS
The drill press is designed to use drill bits with a shank of 1/2" or less. The follow-
ing will give the inexperienced operator practice with common drilling operations.
Always use scrap material and do test procedures before working on the actual
workpiece. These test runs will decrease as experience and confidence with the drill
press increase.
When the workpiece is long enough, place it on the
worktable so that one end rests against the drill press column. This is
usually the left side as you look to the rear of the drill press. In case the drill
bit seizes in the workpiece, the drill press support will prevent the workpiece
from spinning out of control. FAILURE to adhere to this step could result in
possible severe injury to the operator.
OPERATING THE ON/OFF SWITCH
The drill press “ON/OFF” switch is located on the front of the drill press head. To
turn the drill press “ON,” move the rocker-style switch up to the “ON” position. To
turn the drill press “OFF,” move the rocker-style switch down to the “OFF” position.
Ensure the “ON/OFF” switch is in the “OFF” position
before plugging the power cord into the AC power source. Ensure there are
no tools or work pieces in contact with the drill bits, cutting tools, or sand-
ing drum when the drill press is turned “ON.” Failure to observe these pro-
cedures could result in damage to the drill press, tools, work pieces, and/or
serious personal injury to the operator or bystanders.
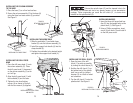
LOCKING THE “ON/OFF” SWITCH IN THE “OFF” POSITION
1
FIGURE 11.
LOCKING THE “ON/OFF” SWITCH
1
2
3
FIGURE 12. ADJUSTING THE WORK TABLE
2
Anytime the drill press is not being
used, the “ON/OFF” should be
locked to prevent any unautho-
rized use.
1. To LOCK the “ON/OFF” switch,
grasp the switch toggle (1) and
remove it from the “ON/OFF”
switch (2). See Figure 11.