


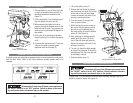
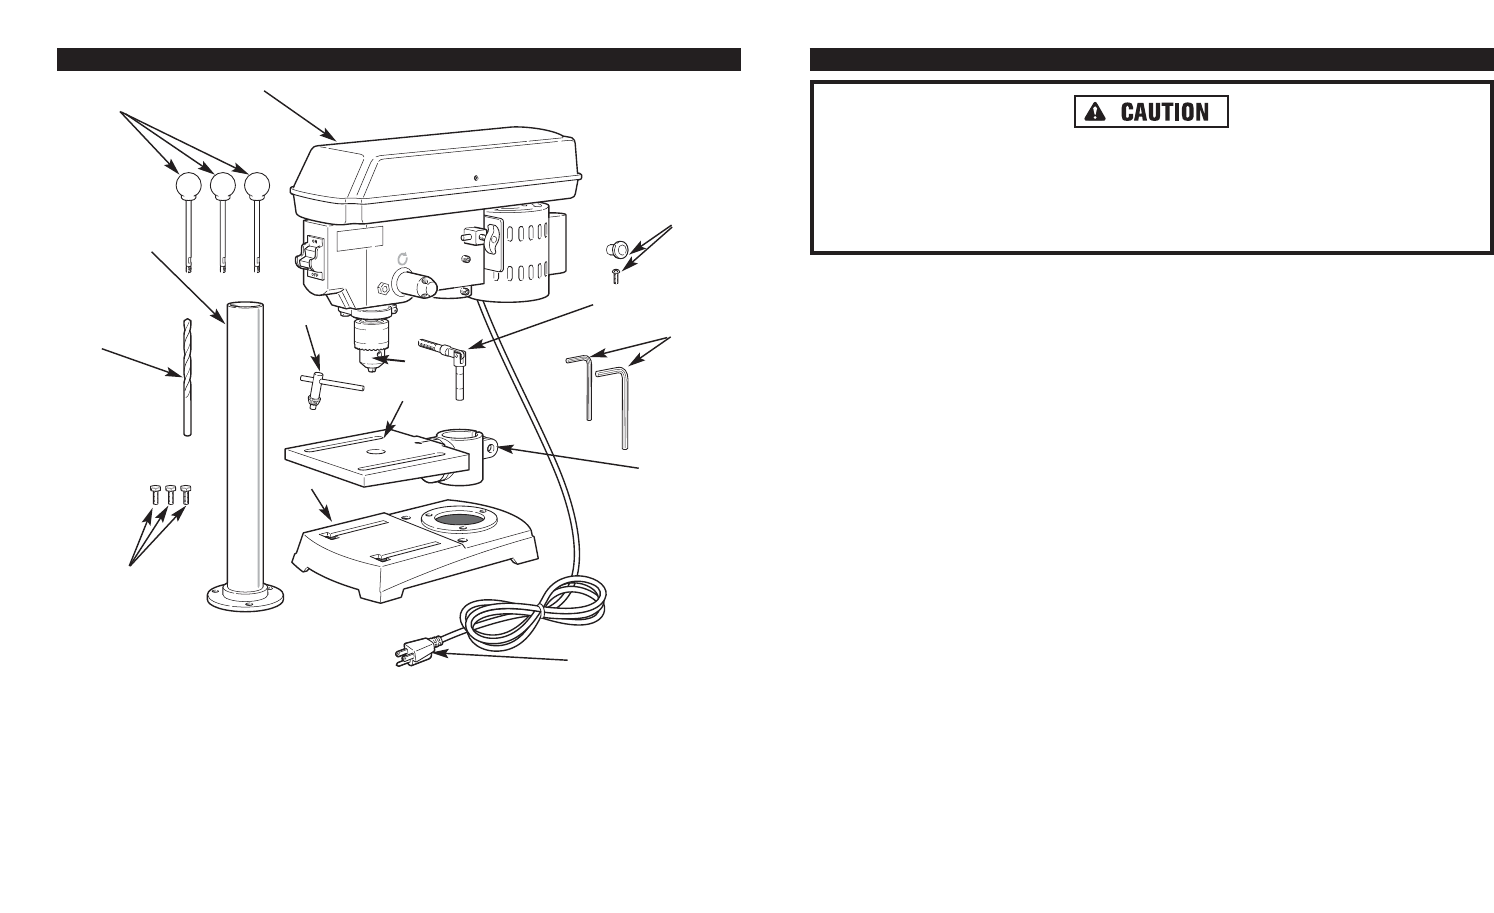
FUNCTIONAL DESCRIPTION
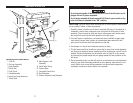
CONTROLS AND COMPONENTS:
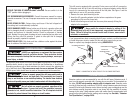
1. Drill Bit
2. Column Assembly
3. Feed Handles
4. Chuck Key
5. Drill Chuck
5. Head Assembly
6. Knob (and mtg Hardware)
7. Work Table
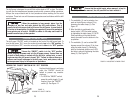
ASSEMBLY
Do not begin assembly of Bench-mounted Drill Press if the AC power cord is
plugged into an AC power receptacle.
Do not begin assembly of Bench-mounted Drill Press if power switch on the
front of the base is switched to the “ON” position.
INSPECTION: Carefully inspect each individual part of the drill press to ensure there
are no cracked, broken, or bent components.
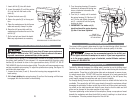
1. Carefully choose a location for the bench-mounted drill press. If mounted on a
workbench, ensure there is adequate room all around the drill press for safe
operation. The area must be level and clear of other power tools and/or power
tool cords that could interfere with operation of the drill press.
2. If the drill press is installed on a universal tool stand (available at larger hard-
ware stores), ensure there is plenty of unobstructed space around the drill
press as not to interfere with safe operation on the tool.
3. Use clamps or a vise to hold workpiece securely in place.
4. The drill press should be installed in a place that is away from outside elements
and close to an approved power receptacle so that an extension cord will not be
needed. Should an extension cord be needed, refer to Page 25 in this manual
for choosing the proper length and wire gauge needed for safe operation of the
drill press.
5. Do not assemble and/or use the drill press in an area that may be contaminated
with oily rags. Keep flammable materials such as gasoline, paint thinner or sol-
vents. Sparks from normal drilling operations can ignite these compounds
resulting in moderate to severe burns to the operator.
1211
8. Table Support Lock
Assembly
9. Work Table Clamp
10. Column Base
11. Grounded Power Cord
12. Hex Wrenches
13. Column Assembly mtg Hardware
3
5
2
1
4
10
7
13
6
8
9
5
11
12