


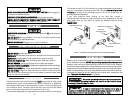

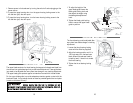
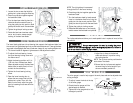

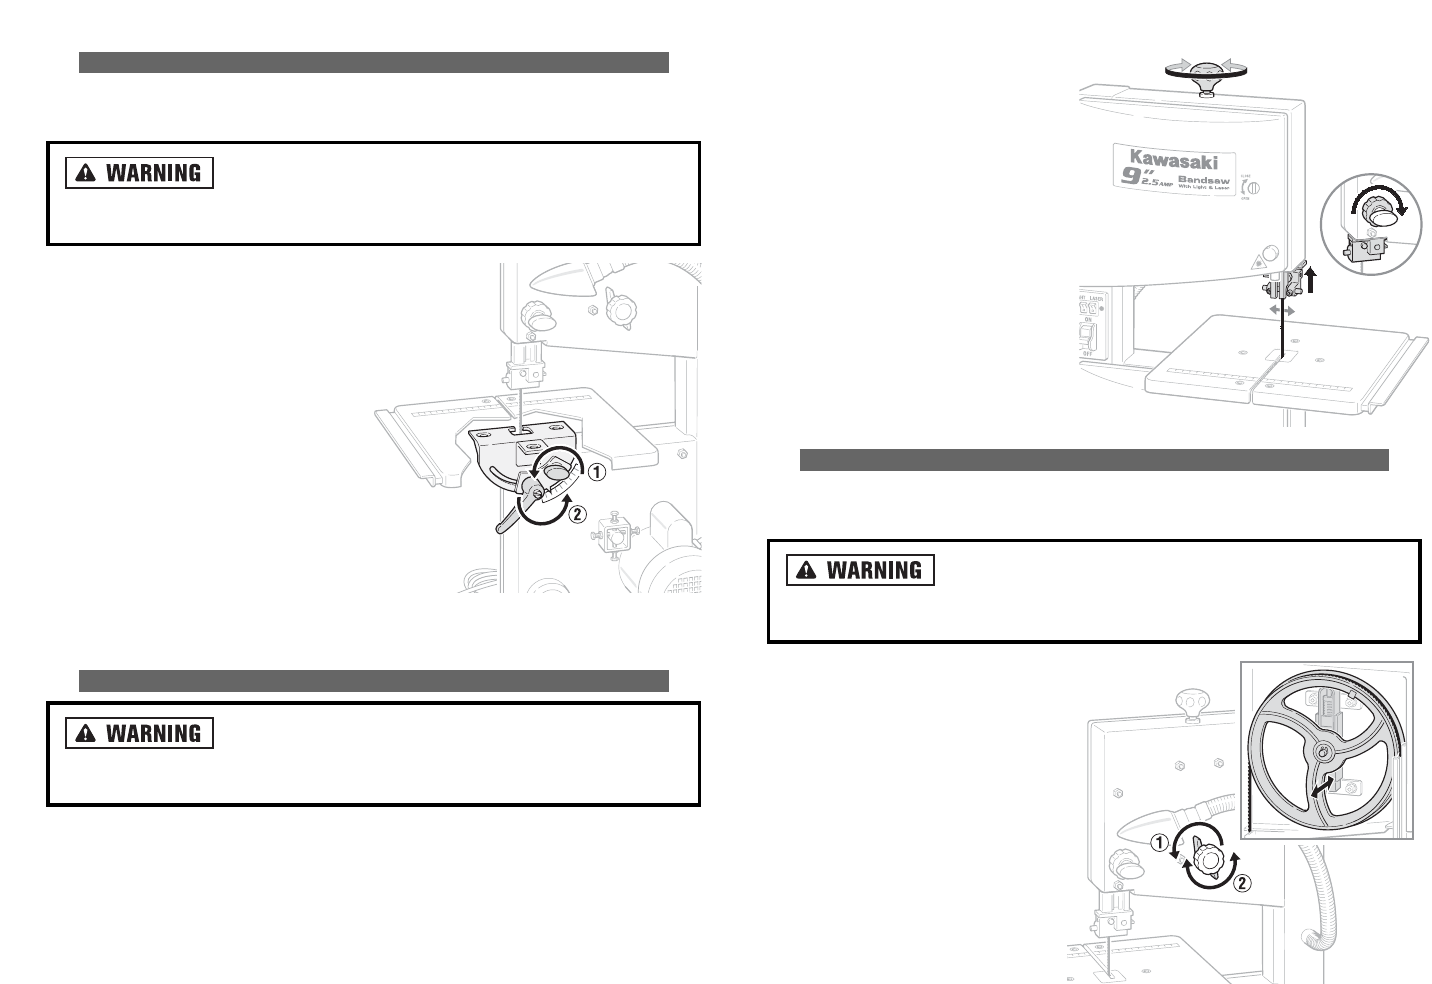
1. To increase blade tension, turn the
blade tension knob clockwise.
2. To reduce blade tension, turn the
blade tension knob counterclock-
wise.
3. Fully raise the upper blade guide.
4. Check the tension by pushing the
side of the blade, halfway between
the table and upper blade guide,
with your finger. The blade should
bend no more than 5/64 to 1/8 inch.
5. Correct the tension as needed by
turning the blade tension knob and
then measuring bending again.
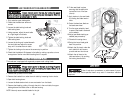
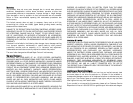
AADDJJUUSSTTIINNGG BBLLAADDEE TTRRAACCKKIINNGG
This procedure is followed to ensure that the blade is centered on the band saw
wheels.
AAllwwaayyss rreemmoovvee ppoowweerr ttoo tthhee ssaaww,, bbyy ttuurrnniinngg tthhee ppoowweerr
sswwiittcchh ooffff aanndd tthheenn
uunnpplluuggggiinngg iitt,, bbeeffoorree mmaakkiinngg aannyy aaddjjuussttmmeennttss.. FFaaiilluurree ttoo
ddoo ssoo ccaann rreessuulltt iinn sseevveerree iinnjjuurryy oorr ddeeaatthh.
.
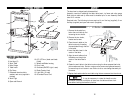
1. Unlock and open the housing
doors.
2. Loosen the blade tracking locking
nut.
3. While rotating the band saw wheel
by hand, turn the blade tracking
adjustment knob: clockwise if the
blade runs toward the front of the
saw or counterclockwise if the
blade runs toward the back.
4. When tracking properly, tighten the
blade tracking nut.
20
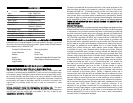
AADDJJUUSSTTIINNGG TTHHEE BBEEVVEELL AANNGGLLEE
The bevel adjustment allows material to be cut at any angle between 0 and 45
degrees.
AAllwwaayyss rreemmoovvee ppoowweerr ttoo tthhee ssaaww bbyy ttuurrnniinngg tthhee ppoowweerr
sswwiittcchh ooffff aanndd tthheenn
uunnpplluuggggiinngg iitt,, bbeeffoorree mmaakkiinngg aannyy aaddjjuussttmmeennttss.. FFaaiilluurree ttoo
ddoo ssoo ccaann rreessuulltt iinn sseevveerree iinnjjuurryy oorr ddeeaatthh.
.
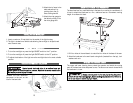
1. Loosen the table locking knob.
NOTE: the table setting lever works on a
cam allowing you to pull it toward you
and back if you run out of room.
2. Loosen the table setting lever.
3. Adjust the bevel adjustment scale
located under the table to help set the
table to the desired angle between 0
and 45 degrees.
4. Tighten the table setting lever and the
table locking knob to secure the table
in position.
5. Make a practice cut on a scrap piece of
similar wood and adjust the table as needed for precision.
AADDJJUUSSTTIINNGG SSAAWW BBLLAADDEE TTEENNSSIIOONN
AAllwwaayyss rreemmoovvee ppoowweerr ttoo tthhee ssaaww bbyy ttuurrnniinngg tthhee ppoowweerr
sswwiittcchh ooffff aanndd tthheenn
uunnpplluuggggiinngg iitt,, bbeeffoorree mmaakkiinngg aannyy aaddjjuussttmmeennttss.. FFaaiilluurree ttoo
ddoo ssoo ccaann rreessuulltt iinn sseevveerree iinnjjuurryy oorr ddeeaatthh.
.
19
INCREASE
DECREASE
5/64" TO 1/8"