


DC-400
E-5
TROUBLESHOOTING
E-5
If for any reason you do not understand the test procedures or are unable to perform the tests/repairs safely, contact your
Local Authorized Field Service Facility for technical troubleshooting assistance before you proceed.
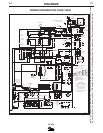
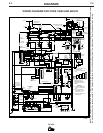
PROCEDURE FOR REPLACING PC BOARDS
When a PC Board is suspected to be defective, the
following procedure must be followed:
1. Visually inspect the PC Board. If the board has
fuses, check to see if any are blown. Are any of
the components damaged? Is a conductor on the
back side of the board damaged? If electrical
damage is visible on the PC Board, inspect the
machine wiring for grounds or shorts to avoid dam-
aging a new PC Board, Install a new PC Board
only after a visual inspection of the PC Board and
machine wiring is satisfactory.
2. If the problem is remedied by a new PC Board,
install the old PC Board and see if the problem still
exists. If the problem does not return with the old
board:
a) Check the PC Board harness plug and PC
Board plug for contamination, corrosion or over-
size.
b) Check leads in the harness for loose connec-
tions.
CONNECTING THE REMOTE CONTROL TO THE
MACHINE
Extreme caution must be observed when installing or
extending the wiring of a remote control. Improper
connection of this unit can lead to failure of the output
control rheostat or the control circuit. Only the green
lead can and should be grounded to the machine
case. When extending the standard remote control,
make sure the leads are the same and the splice is
waterproof. Be very careful not to ground the cable
when in use and don’t let the lugs touch against the
case.
OUTPUT VOLTAGE
The output circuit voltage of the machine should be
adjustable from 10 to 46 volts in CV. In the CC mode,
the open circuit voltage should be approximately 57
volts (54 volts on 50/60 Hz) except at near minimum
settings of the output control where it may be lower. If
any other condition exists, refer to the
Troubleshooting Guide.
FAULT PROTECTION OPERATION
The overload protection circuit, in the Control PC
Board will limit the welding current (heat) to 550 amps
if a short or overload is applied to the machine. (Refer
to the Machine and Circuit Protection section).
CHECKING SNUBBER CIRCUIT
In case of an SCR malfunction or failure the snubber
assembly should be checked. Turn the machine off
and remove the sides of the machine. (See the
instruction manual parts list for the exact location.)
1. Visually inspect the snubber assembly for over-
heated components or damaged components.
CHECKING OUTPUT CONTROL RHEOSTAT ON
MACHINE
Turn machine off (“0” position).
Remove the control panel screws and open the con-
trol panel (see the section on Terminal Strip
Connections for screw locations).
Turn the OUTPUT CONTROL switch to “REMOTE”.
Disconnect the harness plug from the Control PC
Board.
With an ohmmeter on X1K, connect it to lead 210 and
75 on R4.
Exercise caution to avoid damaging POT taps.
POWER “I/0” SWITCH CHECK
1. Turn off the machine power input (“0” position). S1
has 115V across it when the input power is con-
nected.
2. Isolate the switch to be tested by removing all con-
necting leads.
3. Check to make sure the switch is making connec-
tions with an ohmmeter. The meter should read
zero resistance.
4. Put the ohmmeter on X1K scale and measure the
resistance between the terminal and the case of
the machine (touch a self-tapping screw). Reading
should be infinite.
5. If either step (3) or step (4) fails, replace the
switch.
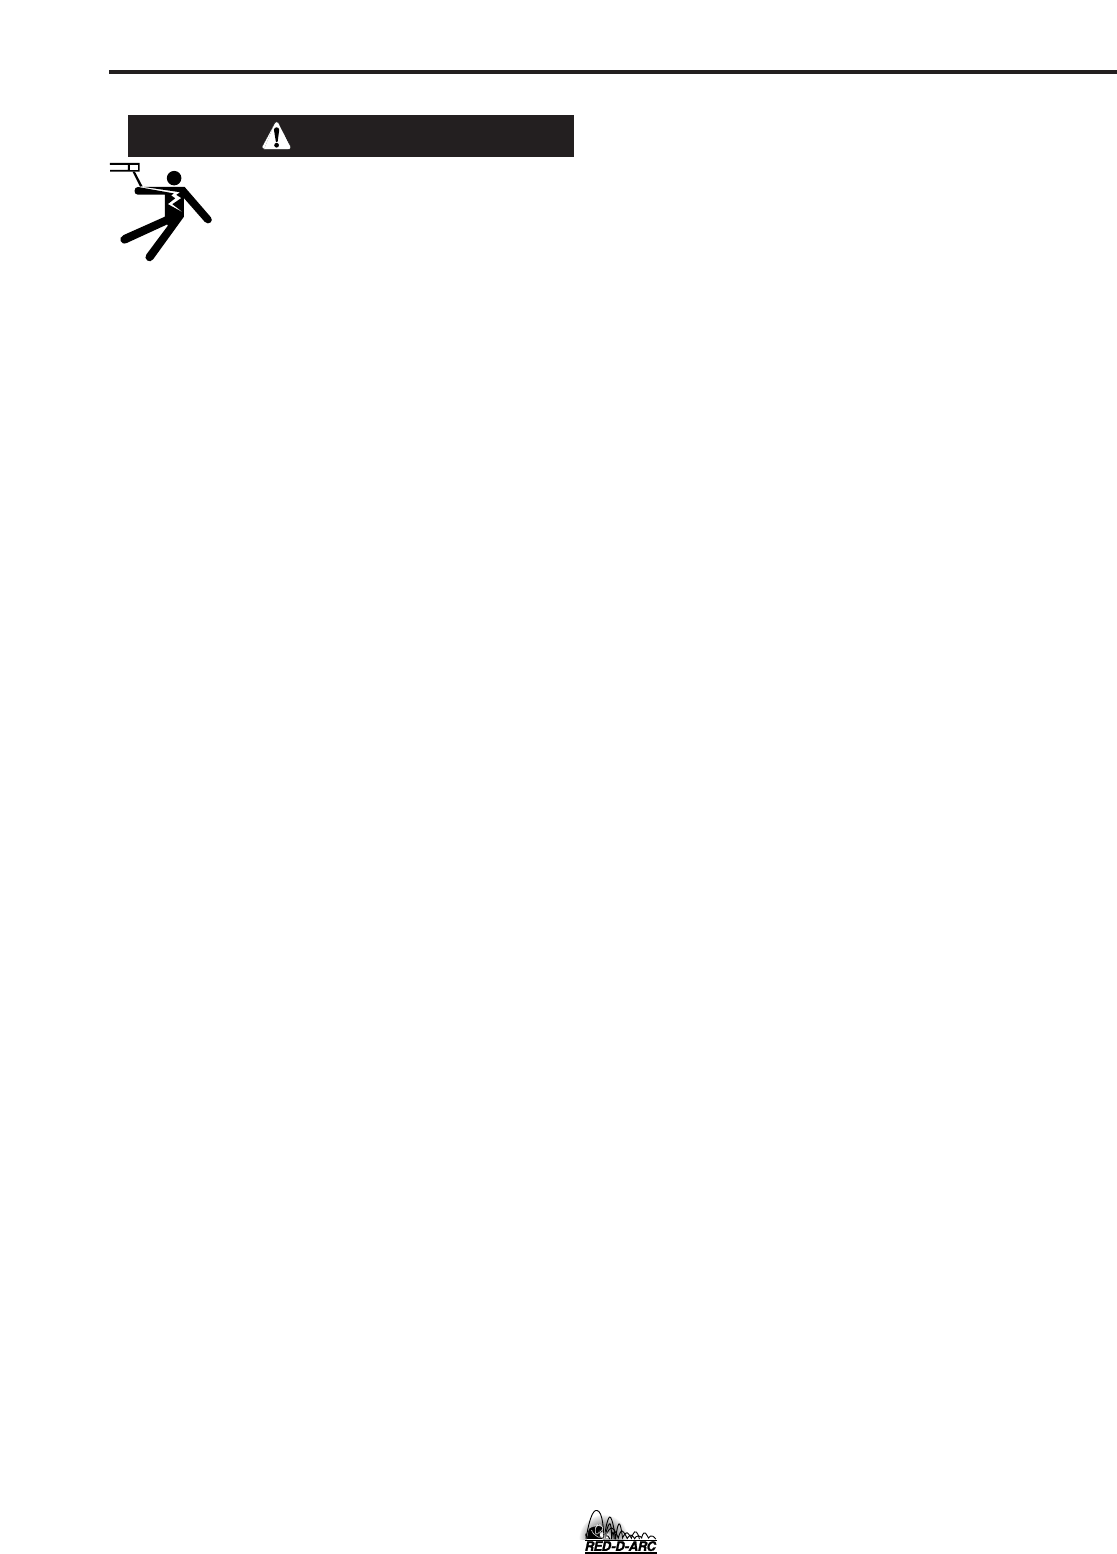
ELECTRIC SHOCK can kill.
• Have an electrician install and service
this equipment.
• Turn the input power off at the fuse
box before working on equipment.
• Do not touch electrically hot parts.
---------------------------------------------------------------------
WARNING