


P 5/ 13
Repair
[3] DISASSEMBLY/ASSEMBLY
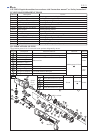
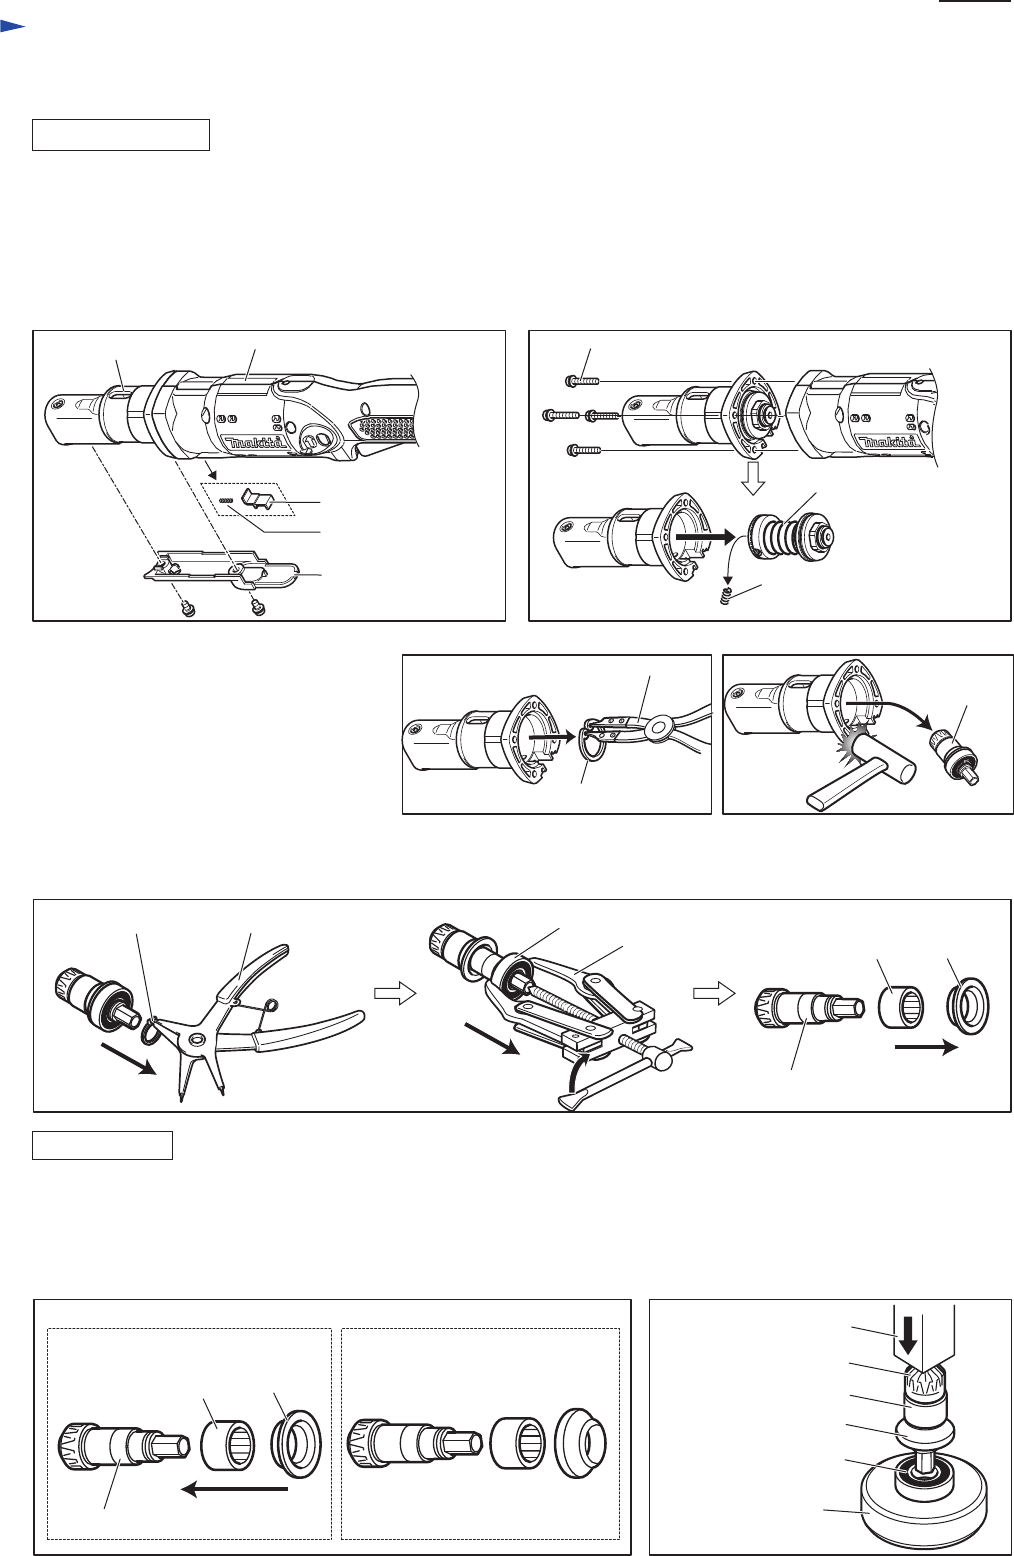
[3] -3. Spiral bevel gear 9 section
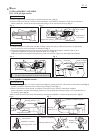
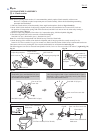
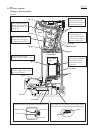
1) Remove Light cover by unscrewing two M4x8 Pan head screws, then remove Switch lever and Compression spring 2.
(Fig. 12)
2) Remove Angle head complete from Housing by unscrewing four M4x22 (+) Pan head screws, then remove Clutch
section (= Clutch assembly) from Angle head complete. (Fig. 13)
Note: Be careful not to lose Compression spring 5, which may pop out from Clutch section when Clutch section is
removed from Angle head complete. (Fig. 13)
DISASSEMBLING
ASSEMBLING
Fig. 13Fig. 12
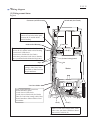
Fig. 15Fig. 14
Fig. 16
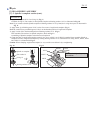
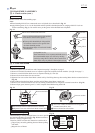
3) Using 1R173, remove Retaining ring R-22
that retains Spiral bevel gear 9 section in
Angle head complete. (Fig. 14)
Spiral bevel gear 9 section can now be
removed by tapping the end surface of
Angle head complete with plastic
hammer. (Fig. 15)
Compression spring 5
Retaining ring R-22
Spiral bevel
gear 9 section
Angle head complete
M4x22 (+) Pan head screws (4pcs.)
Housing
Clutch section
(= Clutch assembly)
Switch lever
Compression spring 2
Light cover
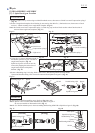
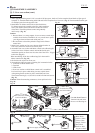
4) Remove Retaining ring S-10 using 1R291, then remove Ball bearing 6900LLB using 1R269.
Spacer and Needle bearing 1210 can now be removed from Spiral bevel gear 9. (Fig. 16)
1R291Retaining ring S-10
Ball bearing 6900LLB
1R269
Spacer
Needle baring 1210
Spiral bevel gear 9
1R173
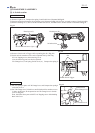
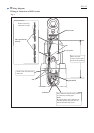
Do the reverse of the disassembling steps. (Refer to Figs. 16 to 12.)
Note 1: Spacer is not reversible when assembled to Spiral bevel gear 9.
Be sure to assemble as illustrated to left in Fig. 17.
Note 2: Use 1R034 and arbor press when assembling Ball bearing 6900LLB to Spiral bevel gear 9. (Fig. 18)
Fig. 18Fig. 17
Spacer
Needle baring 1210
Ball bearing 6900 LLB
1R034
Arbor press
Spiral bevel gear 9
Spacer
Needle baring 1210
Spiral bevel gear 9
[Correct] [Wrong]