


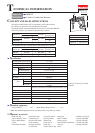
Repair
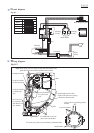
P 7 / 13
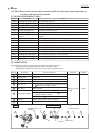
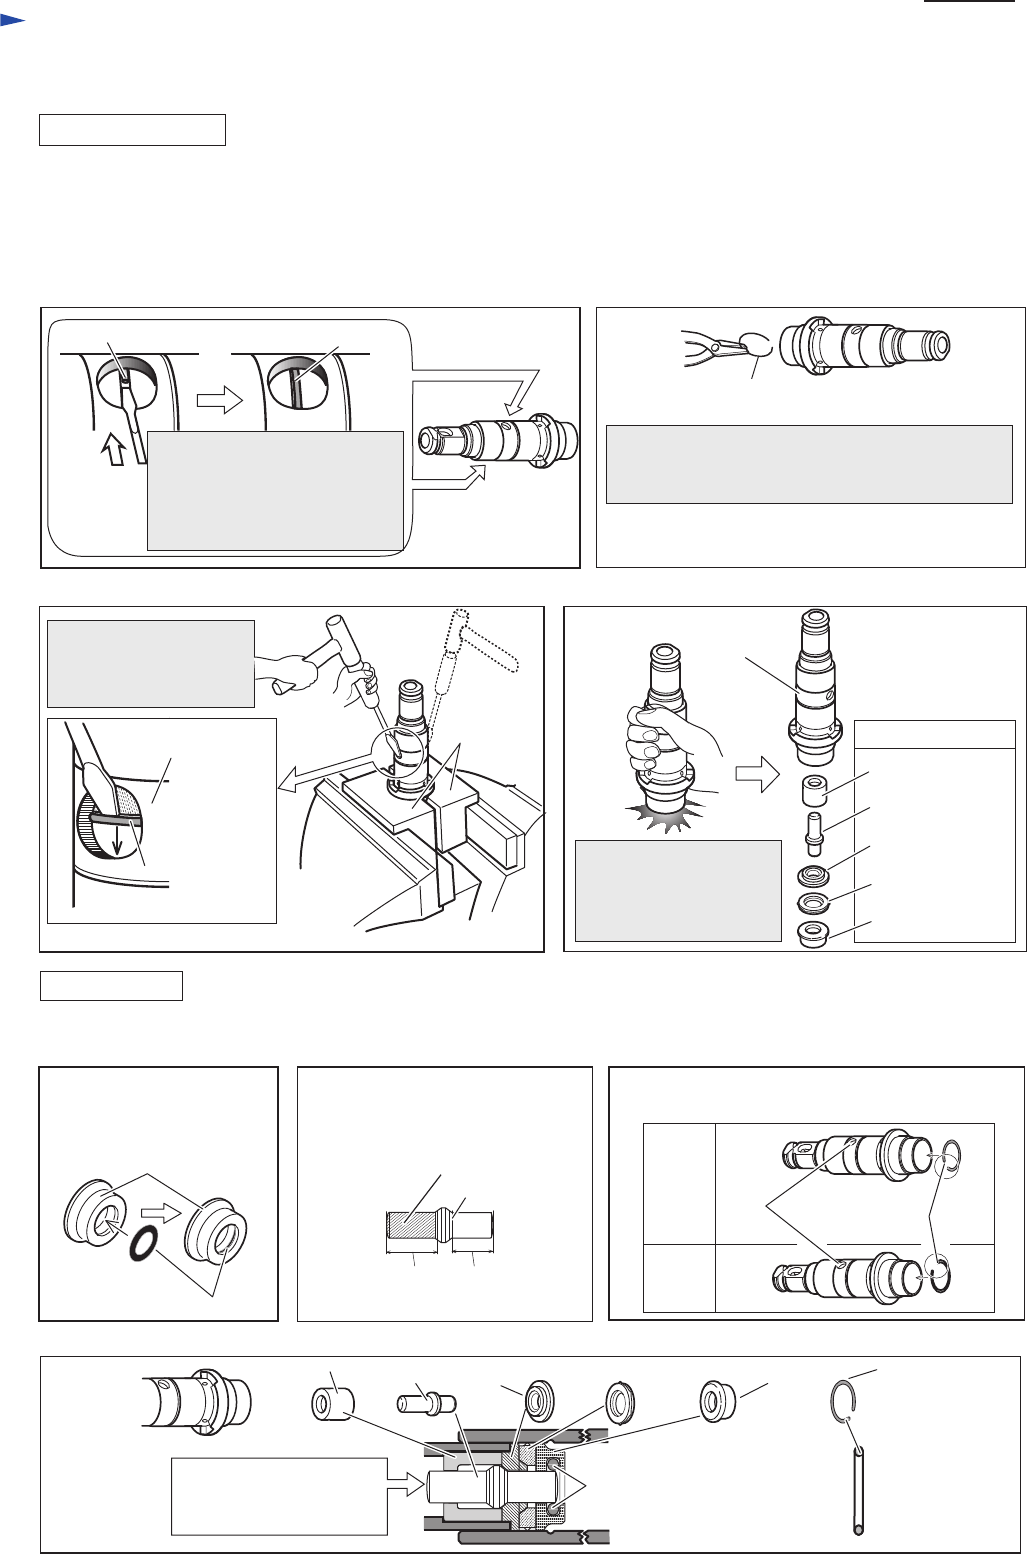
DISASSEMBLI NG
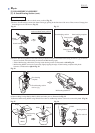
1) Referring to "[3] -5. Torque Limiter Section", disassemble Ring spring 29, Washer 31, Compression spring 32
and Spur gear 51 from Tool holder complete. Refer to Figs. 11 to 14.
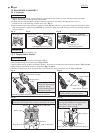
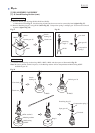
2) Holding Gear housing complete in vise and 1R038, Tap Ring spring 28 in Tool holder complete as illustrated in Figs. 21
and 22.
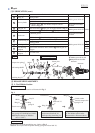
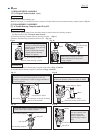
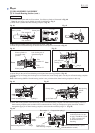
3) Remove Ring spring 28 from Tool holder complete and disassemble Impact bolt section. (Figs. 23 to 24)
Ring spring 28
Ring spring 28 can be pulled off from Tool holder
complete when completely removed from the
groove.
Disassemble Impact bolt
section by striking Tool
holder complete against
workbench.
Note: Be sure to replace Ring spring 28
when assembling Tool holder section.
Fig. 23
Fig. 24
Tool holder
complete
Sleeve 9
Impact bolt
Ring 10
Cushion ring 13
O ring case
Impact bolt section
[3] DISASSEMBLY/ASSEMBLY
[3] -7. Impact Bolt Section
Fig. 22
Fig. 21
end of Ring spring 28 Ring spring 28
When the end of Ring spring
28 is in the hole of Tool holder
complete, slide the end to the
blind side using a slotted
screwdriver.
Ring spring 28
1R038
Vise
Tap Ring spring 28 from
the two holes alternately
to push downward.
Tool holder
complete
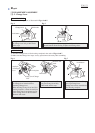
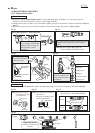
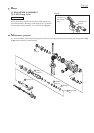
ASSEMBLING
Fig. 25 Fig. 26 Fig. 27
Fig. 28
Tool holder
complete
1) Referring to Figs. 25, 26 and 27 assemble the Impact bolt section to Tool holder complete as illustrated in Fig. 28.
O Ring 9
O ring 9
O ring case
Note: Make sure O ring 9
is mounted to O ring
case in advance.
Note: Do not put the end of the ring spring 28 into
the two holes on Tool holder complete.
end of
Ring spring 28
hole
Correct
Wrong
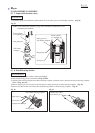
Ring 10
Sleeve 9 Impact bolt
O ring case Ring spring 28
Cushion ring 13
15.5mm20mm
Note: This end has to be inserted
into Sleeve 9.
Incorrect assembling causes
trouble in hammering.
Impact bolt
Impact Bolt Section
assembled in Tool holder
complete