


17
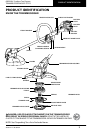
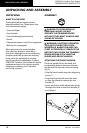
UNPACKING AND ASSEMBLY
OREGON® Cordless Tool System
TRIMMER/EDGER MODEL ST275
AB 0214 - F/N 564571
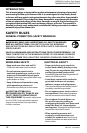
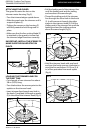
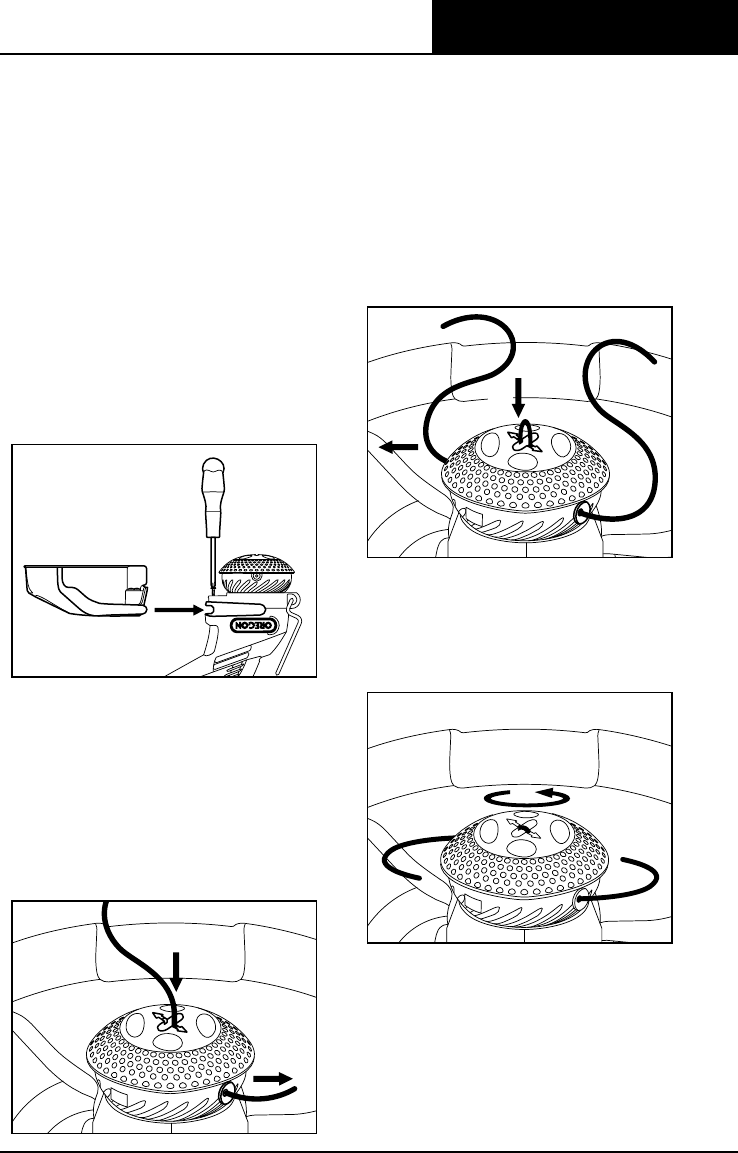
ATTACHING THE GUARD
The guard fits onto the slot on the
trimmer motor housing (Fig. ).
• Turn the trimmer/edger upside down.
• Slide the guard onto the trimmer until it
snaps into place ().
• Tighten the screws on the housing ()
until fully seated to hold the guard in
place.
• Make sure that the line cutting blade ()
is attached to the guard to insure that
the trimmer/edger functions correctly.
IMPORTANT: INSTALL THE SCREWS TO
MAKE SURE THE GUARD STAYS IN
PLACE.
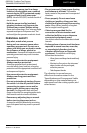
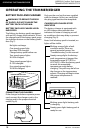
LOADING THE TRIMMER LINE FOR
THE FIRST TIME
• Cut a length of new trimmer line about
. m (. ft) long.
• Turn the knob so the arrows point to the
eyelets on the trimmer head.
• Insert trimmer line through one hole in
the knob () and feed it through an eyelet
() in the side of the trimmer head (Fig. ).
• Pull the leading end of the trimmer line
until the leading end and the trailing
end are about the same length.
• Thread the trailing end of the trimmer
line through the other hole in the knob
(). It will come out through the other
eyelet in the trimmer head (). Pull the
trailing end of the trimmer line until the
leading end and the trailing end are
about the same length (Fig. ).
• Hold the trimmer head with one hand
and turn the knob counter-clockwise to
wind the line until about – cm (–
in) of line protrudes from each eyelet
(Fig. ).
FIG. 3
1
2
3
FIG. 4
1
2
FIG. 5
1
2
FIG. 6