


26
MAINTENANCE AND CLEANING
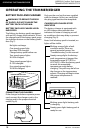
OREGON® Cordless Tool System
TRIMMER/EDGER MODEL ST275
AB 0214 - F/N 564571
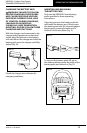
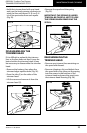
• Line up the tabs on the cover () with the
slots in the trimmer head (), and press
the cover onto the trimmer head until
both tabs click into place. (Fig. ).
IMPORTANT: MAKE SURE BOTH TABS
ARE IN POSITION AND THAT THE
COVER IS LEVEL AND WELLSEATED.
IT MAY BE NECESSARY TO SQUEEZE
THE SIDES OF THE TRIMMER HEAD IN
ORDER FOR THE TABS TO CLICK INTO
PLACE FIG. 28.
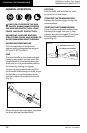
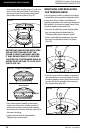
• Turn the trimmer head by hand and
make sure the cover rotates evenly. If
rotates unevenly, remove and replace
the cover so it is level with the rest of the
trimmer housing.
• Load trimmer line as described in
“Replacing trimmer line”.
REMOVING AND REPLACING
THE TRIMMER HEAD
If the trimmer head is cracked or broken,
it should be removed and replaced with
a new one. Also, if there is buildup of
clippings between the trimmer head and
the guard, it is easier to clean them if the
trimmer head is removed first.
• Remove the battery, then disassemble
the trimmer head as described in
“Disassembling the trimmer head”.
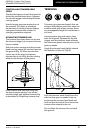
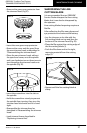
• Insert a standard screwdriver into the
slot on the spindle to hold it in place
(Fig. ).
• Hold the screwdriver steady to prevent
the spindle from turning, then turn the
trimmer head counter-clockwise until it
comes off of the spindle, then remove
the screwdriver (Fig. ).
FIG. 27
1
2
1
2
CORRECT ALIGNMENT
MISALIGNED
FIG. 28
FIG. 29
FIG. 30