


20
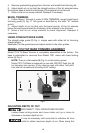
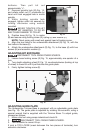
If joint to TOO TIGHT (laminate
will not snap into place), turn
eccentric counterclockwise.
4. Repeat Steps 1 through 3 as
required to achieve a good fit-
up.
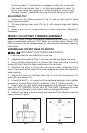
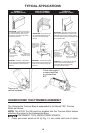
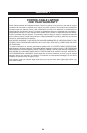
USING THE
UNDERSCRIBE
TRIMMER
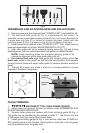
The bottom plate of the
Underscribe Trimmer has a guide lip (see Fig. 17). This guide lip is moved
along an installed piece of laminate as the trimmer bit cuts the mating piece
of laminate.
The “butt” joint is commonly used in the construction of face frames.
Proceed as follows to install a laminate covering on a face frame. Similar
procedures would be required for making any “butt” joint.
ALWAYS WEAR
SAFETY GLASSES WHILE
OPERATING A LAMINATE
TRIMMER.
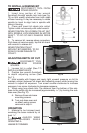
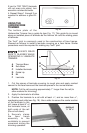
A Trimmer Base
B Sub-Base
C Installed laminate
D Guide Lip
E Bit
F Laminate
1. Cut the pieces of laminate covering to rough size and apply contact
cement to the face frame and the laminate pieces in the normal manner.
NOTE: Cut the rail covering approximately 1" longer than the rail (to
allow material for trimming).
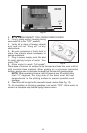
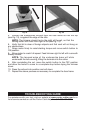
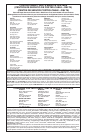
2. Apply the laminate to all stiles.
3. Position the laminate to a rail with at least
1
/4", and no more than
3
/4",
overlapping each stile (see Fig. 18). Use a roller to secure the center section
of the laminate to the
rail. Leave at least 4" of
the laminate loose, at
both ends of the rail
(Do not roll down).
4. Securely clamp
the face frame
assembly to the
worktable to prevent
movement during the
trimming operation.
Fig. 17
A
B
C F
E
D
Fig. 18
OVERLAP
1
/4" TO
3
/4"
Fig. 16