


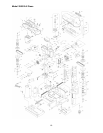
11
Improper connection of the equipment-
grounding conductor can result in a risk of
electric shock. The conductor with insulation
having an outer surface that is green with or
without yellow stripes is the equipment-
grounding connector.
If repair or replacement of the electric cord or
plug is necessary, do not connect the
equipment-grounding conductor to a live
terminal.
Check with a qualified electrician or service
personnel if the grounding instructions are not
completely understood, or if in doubt as to
whether the tool is properly grounded.
Use only 3-wire extension cords that have 3-
prong grounding plugs and 3-pole receptacles
that accept the machine’s plug.
Repair or replace damaged or worn cord
immediately.
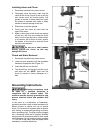
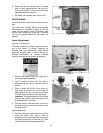
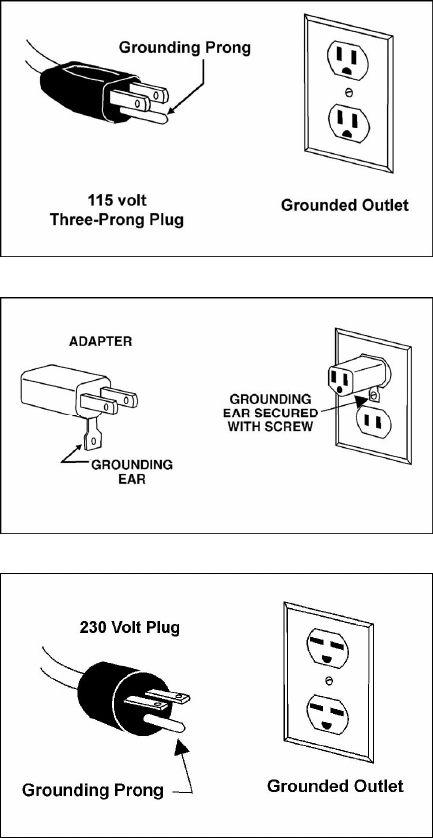
115 Volt Operation
As received from the factory, your drill press is
ready to operate at 115-volt operation. This drill
press, when wired for 115 volt, is intended for
use on a circuit that has an outlet that looks like
the one illustrated in Figure 11. The tool has a
grounding plug that looks like the plug illustrated
in Figure 11.
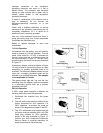
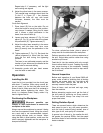
A temporary adapter, similar to the one in Figure
12, may be used to connect this plug to a 2-pole
receptacle if a properly grounded outlet is not
available. The temporary adapter should only be
used until a properly grounded outlet can be
installed by a qualified electrician. This adapter
is not applicable in Canada.
The green-colored rigid ear, lug, and the like,
extending from the adapter must be connected
to a permanent ground such as a properly
grounded outlet box.
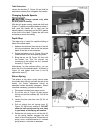
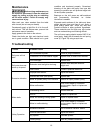
230 Volt Operation
If 230V, single phase operation is desired, the
following instructions must be performed:
1. Disconnect the machine from the power
source.
2. The drill press motor has four leads that are
factory connected for 115V operation. For
230V operation, re-connect the leads as
shown in the diagrams on pages 22 and 23.
3. The 115V attachment plug supplied with the
drill press must be replaced with a UL/CSA
listed plug suitable for 230V operation,
similar to the plug illustrated in Figure 13.
Contact your local Authorized Powermatic
Service Center or qualified electrician for
proper procedures to install the plug.
Figure 11
Figure 12
Figure 13