


10
3. Tighten the four socket head cap screws.
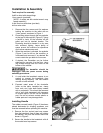
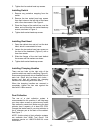
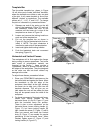
Installing Switch
1. Remove any protective wrapping from the
switch.
2. Remove the two socket head cap screws
from their holes on the left side of the frame
with a 5mm hex wrench. See Figure 4.
3. Place the flange of the switch box over the
holes, and re-insert the two socket head cap
screws, as shown in Figure 4.
4. Tighten both socket head cap screws.
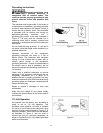
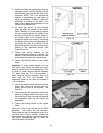
Installing Dust Hood
1. Open the cabinet door and pull out the dust
hood, which is connected to a hose.
2. Loosen the two socket head cap screws on
the front of the headstock (Figure 5) with a
4mm hex wrench.
3. Slide the flanges of the dust hood behind
the screws and flat washers as shown.
4. Tighten both socket head cap screws.
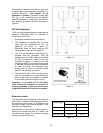
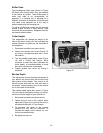
Installing Clamping Handles
There are two hubs at the right side of the
machine which are used for clamping (Figure 6).
Screw one clamp handle into a threaded hole on
each hub. (Each hub has three such holes –
choose one that will prevent the clamping
handles from conflicting with each other.)
When the clamping handles are screwed in
completely, tighten the hex nuts against the
hubs with a 19mm wrench.
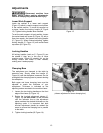
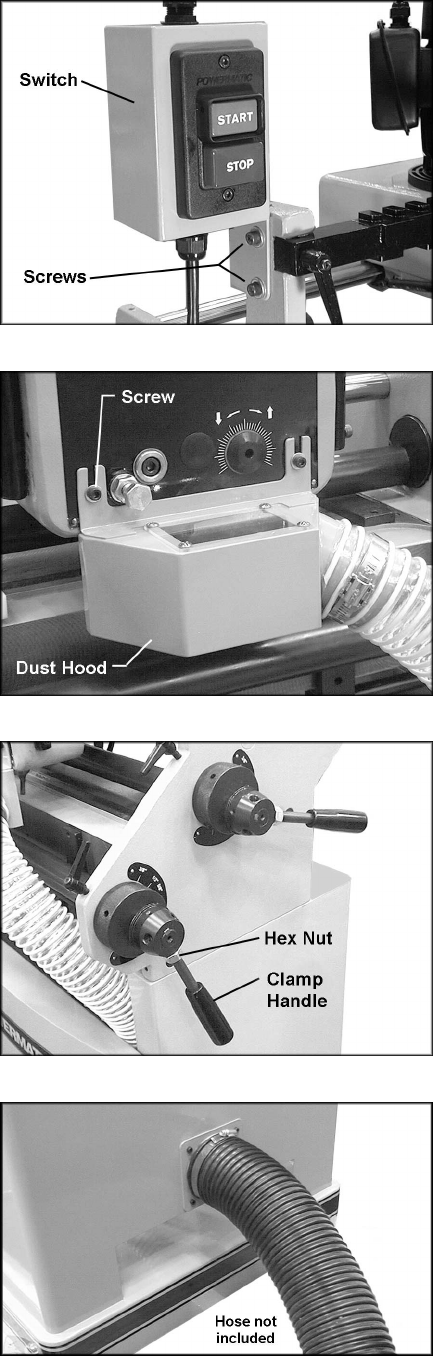
Dust Collection
The use of a dust collection system is
recommended for this machine. It will help keep
your shop clean as well as minimize any health
risks caused by wood dust. Make sure your dust
collector has a capacity of at least 500 CFM.
Connect the intake hose of your dust collector to
the 4” diameter port at the back of the cabinet.
See Figure 7.
NOTE: A wide variety of dust collection systems
are available from WMH Tool Group. Call
customer service at 1-800-274-6848 for more
information.
Figure 4
Figure 5
Figure 6
Figure 7