


20
10. Insert the LEFT SIDE piece and clamp it in
vertical position on the lower work support
and against the fence. (NOTE: The bottom
grooves on both pieces will be face up, but
will now be opposite the fences.) Again,
make sure the edges are flush with the
LEFT SIDE overlapping the edge of the
BACK.
11. Continue the dovetailing procedure with the
FRONT piece, making cuts “C” and “D”
(Figure 25) until all four joints of the drawer
have been cut.
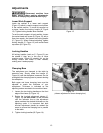
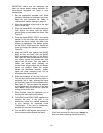
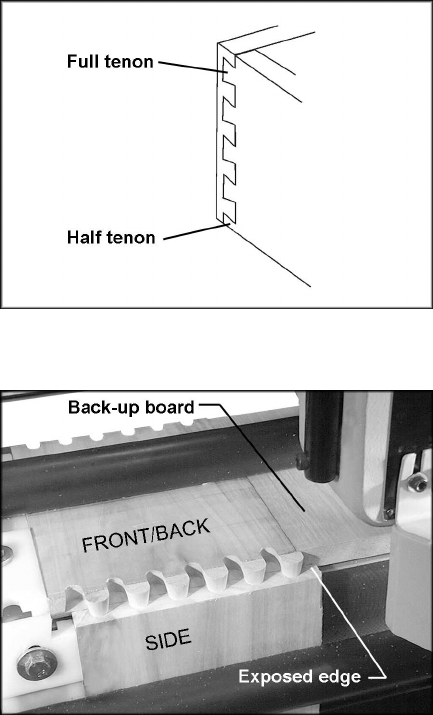
TIP: When using drawer side widths that are not
“whole inch” sizes, you may wish to gauge off
the top of the drawer rather than the bottom
when placing workpieces in the machine. Doing
this will improve the look of the drawer by
providing a full tenon near the top of the drawer
and the half-tenon will end up at the bottom. See
Figure 28.
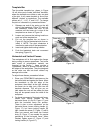
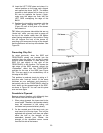
Preventing Chip Out
As noted previously, when the SIDE and
FRONT/BACK pieces are inserted into the
machine, they are offset a bit so they’ll match
correctly when assembled. In other words, the
SIDE will rest slightly to the right of the
FRONT/BACK in the machine. This leaves the
right edge of the SIDE exposed without the
“chipbreaker” effect that the FRONT/BACK
provides for the rest of the SIDE (see Figure
29). This may result in an unsatisfactory cut at
the edge of the SIDE.
This problem is resolved simply by taking a 2-
inch-plus wide “back-up” board, of the same
thickness as your workpiece, and clamping it
horizontally next to the FRONT/BACK piece so
that it backs up the exposed edge of the SIDE,
as shown in Figure 29. You can use this piece
over and over again.
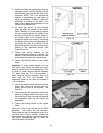
Dovetails in Plywood
Because plywood handles a bit differently than
solid stock, here are some tips to follow:
1. When using plywood, the layers tend to be
more fragile. Therefore, the operator should
keep the movement of the cutting unit
consistent and proceed relatively slowly.
2. On the rounded arcs of the tenon cuts, you
may lose a bit of the top layer. This is to be
expected with plywood, and does not affect
either the look or the strength of the
assembled dovetail joint. Rather, the
strength of the dovetailed corner comes
from the flat side of the tenons.
Figure 28
Figure 29