


20
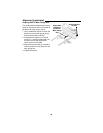
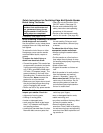
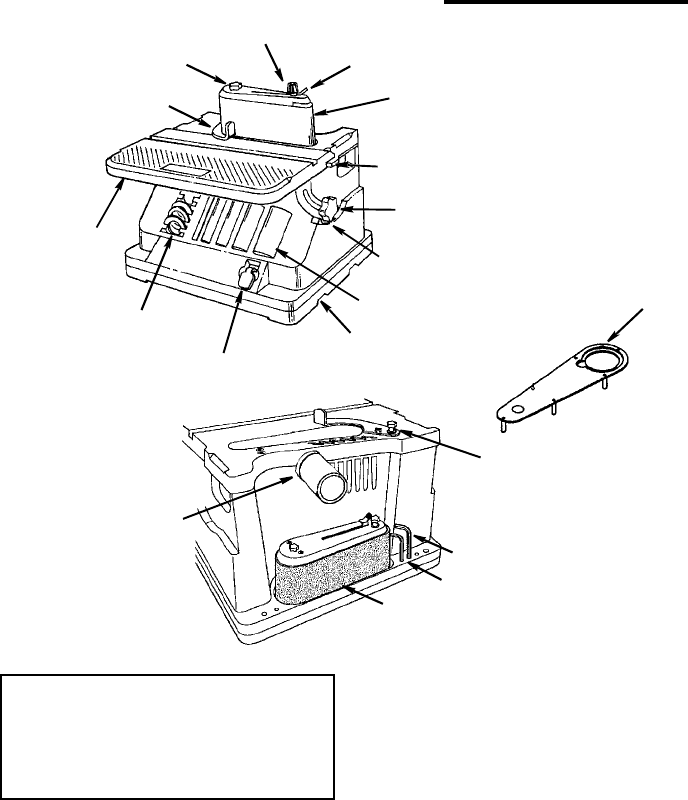
Getting to Know Your Spindle Sander
WARNING: To reduce the risk of
injury from accidental start, turn
switch “OFF” and remove plug
from power source outlet before
making any adjustments.
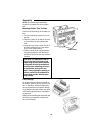
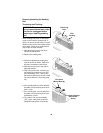
1.Sanding Belt. Removes material from
wood. Oscillates (3/4") up and down to
sand faster and prevents burning of
the workpiece.
2.Belt Tension Lever. Slide lever left to
release the sanding belt tension; slide
right to apply belt tension.
3. Tracking Knob. Turning knob coun-
terclockwise causes sanding belt to
move towards the table; turning knob
clockwise causes sanding belt to
move away from the table.
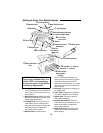
4.Spindle Knob. Loosen knob to
remove sanding belt assembly (or
sanding drum) and change to spindle
sanding (or belt sanding). NOTE:
Knob has left hand threads. Turn knob
clockwise to loosen and counterclock-
wise to tighten.
5. Backstop. Supports the workpiece on
the sanding belt.
6. Front Table. Supports the workpiece.
Can also be tilted for bevel sanding.
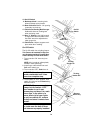
7. Spacer Ring. Fits around drum to
help support workpiece.
8. Sanding Sleeve/Drum. Removes
material from wood. Oscillates up and
down to sand faster and prevents
burning the workpiece.
9. Table Lock Knob. Loosening knob
allows the front table to be tilted for
bevel sanding.
1 Sanding Belt
2 Belt Tension Lever
4 Spindle Knob
6 Front Table
11 Backstop Knob
5 Backstop
3 Tracking Knob
8 Sanding Drum(s)/
9 Front Table
10 On-Off Switch
Lock Knob
Sleeves(s)
Slots for
“Saw Horse”
Mounting
12 Dust Collection
13 Table Insert/
Port
7 Spacer Rings
14 3/32 Hex “L” Wrench
Detent
Sanding Belt
Storage
15 Table Insert
5/32 Hex “L” Wrench
Table Adjustment Screws
(Left and Right Side)