


25
MAINTENANCE
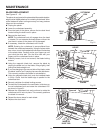
BLADE REPLACEMENT
See Figures 21 - 23.
The planer is equipped with replaceable/disposable double-
edged cutter blades attached to a rotating cutterhead. Worn
cutter blades will affect cutting accuracy and may produce
ridges on the workpiece.
Unplug the planer.
Lower the cutterhead assembly.
From the back of the planer, remove the two dust hood
knobs holding the dust hood in place.
Remove the dust hood.
NOTE: The cutterhead lock will engage when the head
is rotated. Do not operate thickness planer without the
dust hood in place or the planer will be damaged.
If necessary, rotate the cutterhead until it locks.
NOTE: Rotating the cutterhead is accomplished from
beneath the cutterhead assembly. Using the planer table
as a mirror, touch the threaded spindle where it attaches
to the planer table. Carefully move your fingers up until
you touch the drive belt. Turn the drive belt with your
fingers until the cutterhead locks in place.
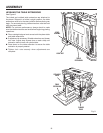
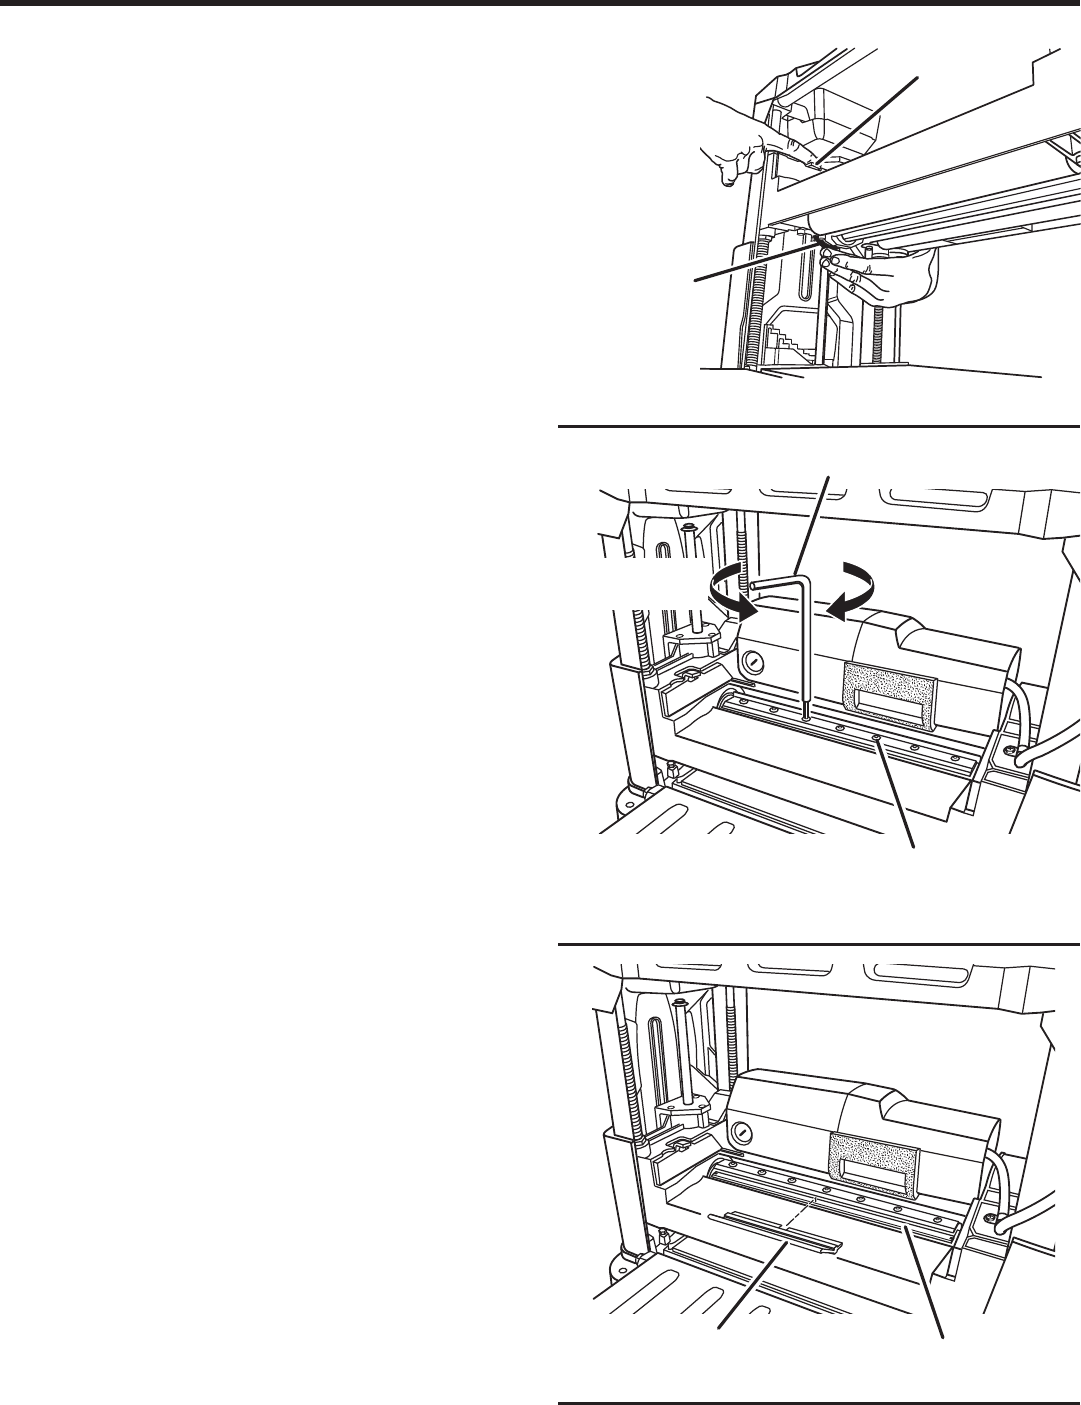
Carefully loosen, but do not remove, the blade locking
screws.
Using the magnetic blade tool, remove the blade by
placing the blade tool on the blade, lifting slightly, then
pulling the blade straight out.
If you are changing to the second side of the blade, rotate
the blade “end for end” keeping the same flat side down.
This correctly positions the blade for reinstallation.
Using the magnetic blade tool, push the installed blade
in firmly. Check that the blade edge is parallel to the
cutterhead slot.
Securely retighten the blade locking screws.
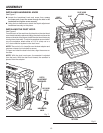
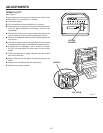
To rotate the cutterhead to the next blade, hold down on
the red cutterhead lock and rotate the cutterhead 120°
as shown in figure 21.
Release the cutterhead lock and continue to rotate the
cutterhead until it locks in place. This correctly positions
the blade for removal.
Repeat the above steps for each blade.
Replace the dust hood.
Fig. 23
driVe
Belt
BlAde
mAGnetiC
BlAde tool
CutterheAd
loCk
to
looSen
to
tiGhten
hex key
BlAde loCkinG
SCrewS
Fig. 21
Fig. 22