


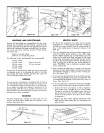
STANDARD SAW OPERATIONS
PRELIMINARY CROSS-CUT AT THE
0 ° POSITION
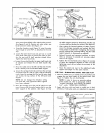
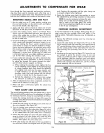
1. Loosen the carriage lock knob (4, figure 23) and move
the carriage to position the saw just forward of the rip
fence (See figure 22.)
2. Lower the radial arm until the saw blade just clears the
table top.
3. Tighten the carriage lock knob (4, figure 23.)
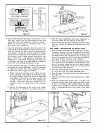
CAUTION: Before making the cut, make sure
the arm latch handle (8, figure 23) is fully en-
gaged in the detent notch.
4. Plug in the power cord (if not already connected).
5. Insert the safety lock key (figure 24) and pull the switch
lever out to "ON" position.
6. Lower the radial arm, by rotating the elevation crank,
until the saw blade cuts into the table top surface to a
depth of approximately 1/32-inch.
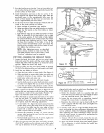
7. Complete the blade clearance groove in the table and
rip fence as follows:
a. Grasp the handle (14, figure 23) with the left hand
and loosen the carriage lock knob (4, figure 23) with
the right hand.
b. Slowly pull the carriage with the right hand out to
the extreme end of its travel.
c. Push the carriage slowly rearward to the extreme
end of the travel. This stroke will cut through the
rip fence.
d. Push the switch to "'OFF" position.
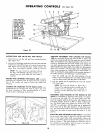
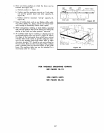
CROSS-CUTTING
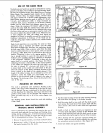
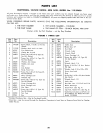
Cross-cuttingis the sawing of wood across the grain. Boards
are sawed with the grain running the length of the board. If
a straight cross-cut is desired, the board is placed on the
saw table against the fence so that the grain is parallel
to the fence. (See figure 30.)
CAUTION: Make sure the guard chute is in the
maximum raised position before turning on
the motor.
NOTE: When cross-cutting normal pieces of
lumber, the long end of the board should be
placed to the left of the saw blade, as the
board is normally held by the left hand during
the sawing operation.
1. The radial arm' must be positioned at 0 ° as indicated
by the radial arm position indicator. The arm latch handle
must be indexed and arm lock handle tightened. (Refer
to paragraph entitled "Angular Movement and Locking
of the Radial Arm".)
2. The yoke must be indexed at the 0 ° position, making
the saw blade perpendicular to the rip fence, and the
yoke clamp arm placed in locked position.
3. The motor must be positioned at 0°, as indicated by
the bevel scale, and locked.
4. Turn the elevation crank to lower the saw until the blade
teeth are approximately 1/32 prbelow the table surface
and ride in the saw slot made when performing the
"PRELIMINARY CROSS-CUT AT THE 0 ° POSITION".
5. Push the saw carriage to the rear of the radial arm so
the blade is behind the rip fence.
6. Adjust the anti-kickback pawl assembly so it clears the
board to be cut.
7. Turn the switch key "ON'" and pull out the switch lever
to start the saw motor.
I /
I /
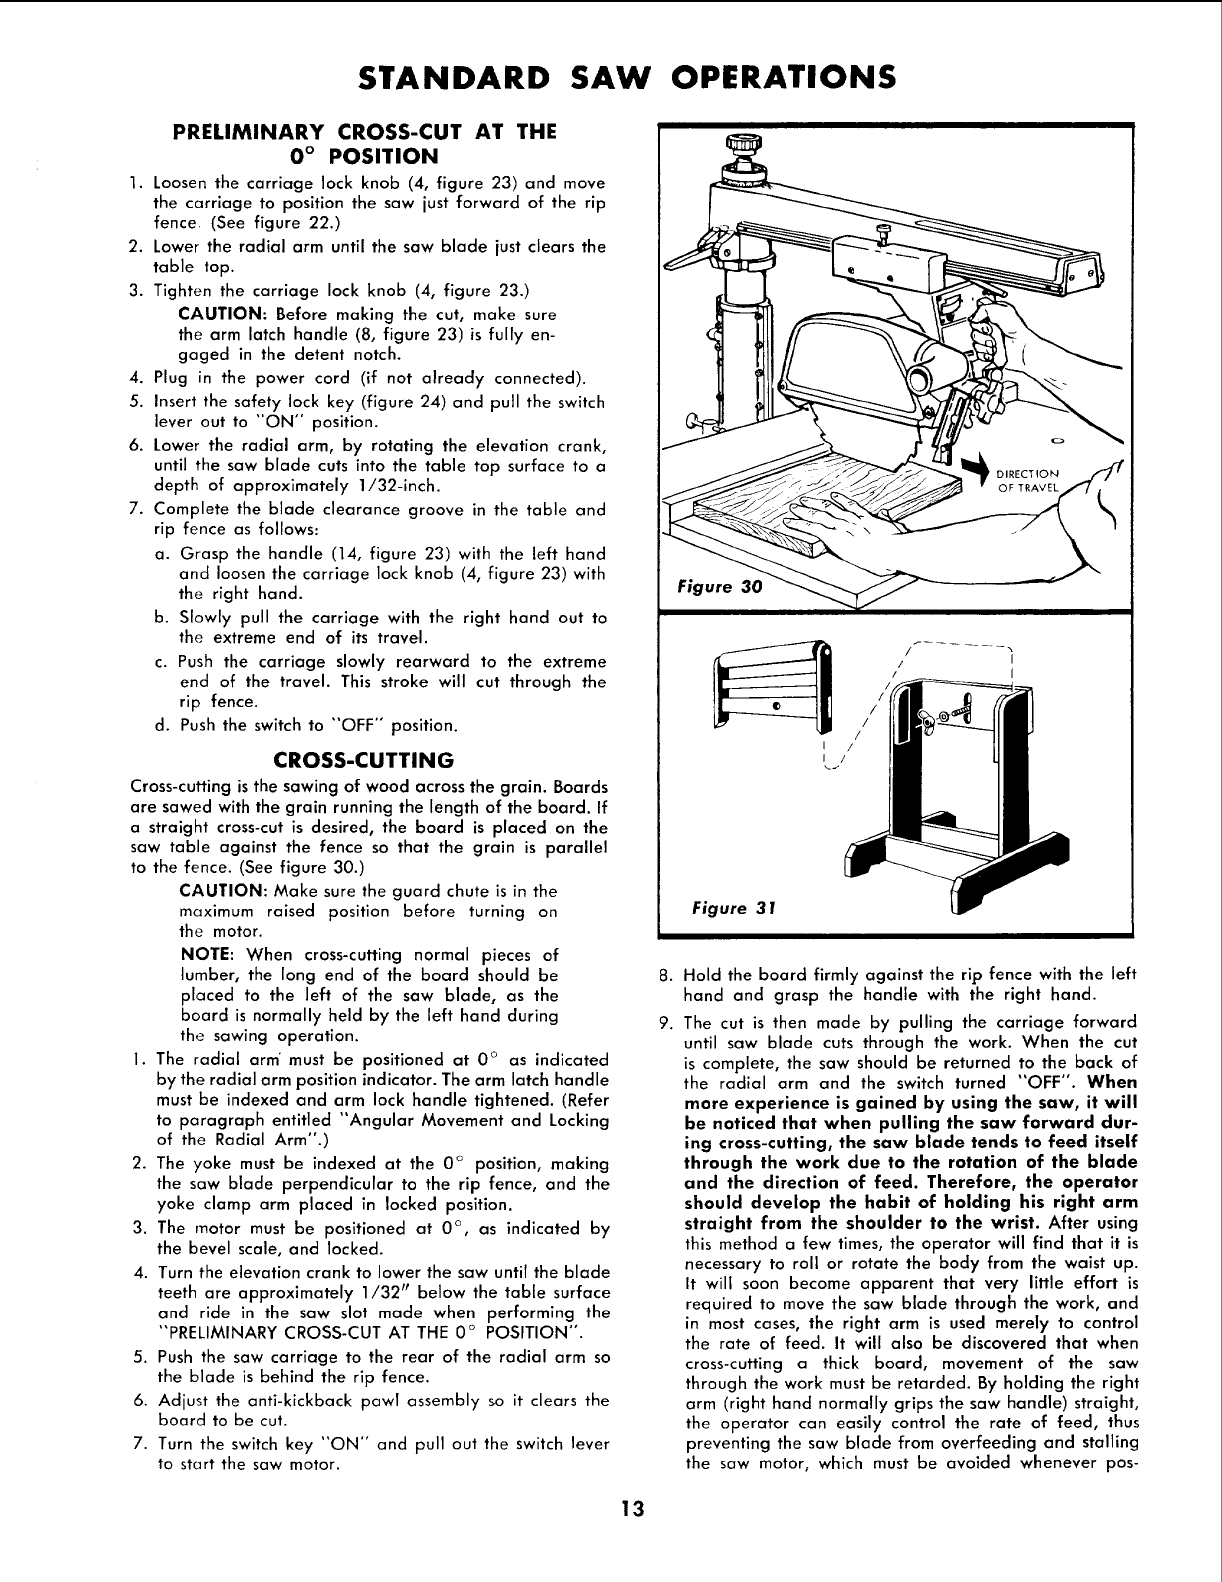
Figure 31
8.
9.
Hold the board firmly against the rip fence with the left
hand and grasp the handle with the right hand.
The cut is then made by pulling the carriage forward
until saw blade cuts through the work. When the cut
is complete, the saw should be returned to the back of
the radial arm and the switch turned "OFF". When
more experience is gained by using the saw, it will
be noticed that when pulling the saw forward dur-
ing cross-cutting, the saw blade tends to feed itself
through the work due to the rotation of the blade
and the direction of feed. Therefore, the operator
should develop the habit of holding his right arm
straight from the shoulder to the wrist. After using
this method a few times, the operator will find that it is
necessary to roll or rotate the body from the waist up.
It will soon become apparent that very little effort is
required to move the saw blade through the work, and
in most cases, the right arm is used merely to control
the rate of feed. It will also be discovered that when
cross-cutting a thick board, movement of the saw
through the work must be retarded. By holding the right
arm /right hand normally grips the saw handle) straight,
the operator can easily control the rate of feed, thus
preventing the saw blade from overfeeding and stalling
the saw motor, which must be avoided whenever pos-
13