


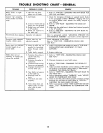

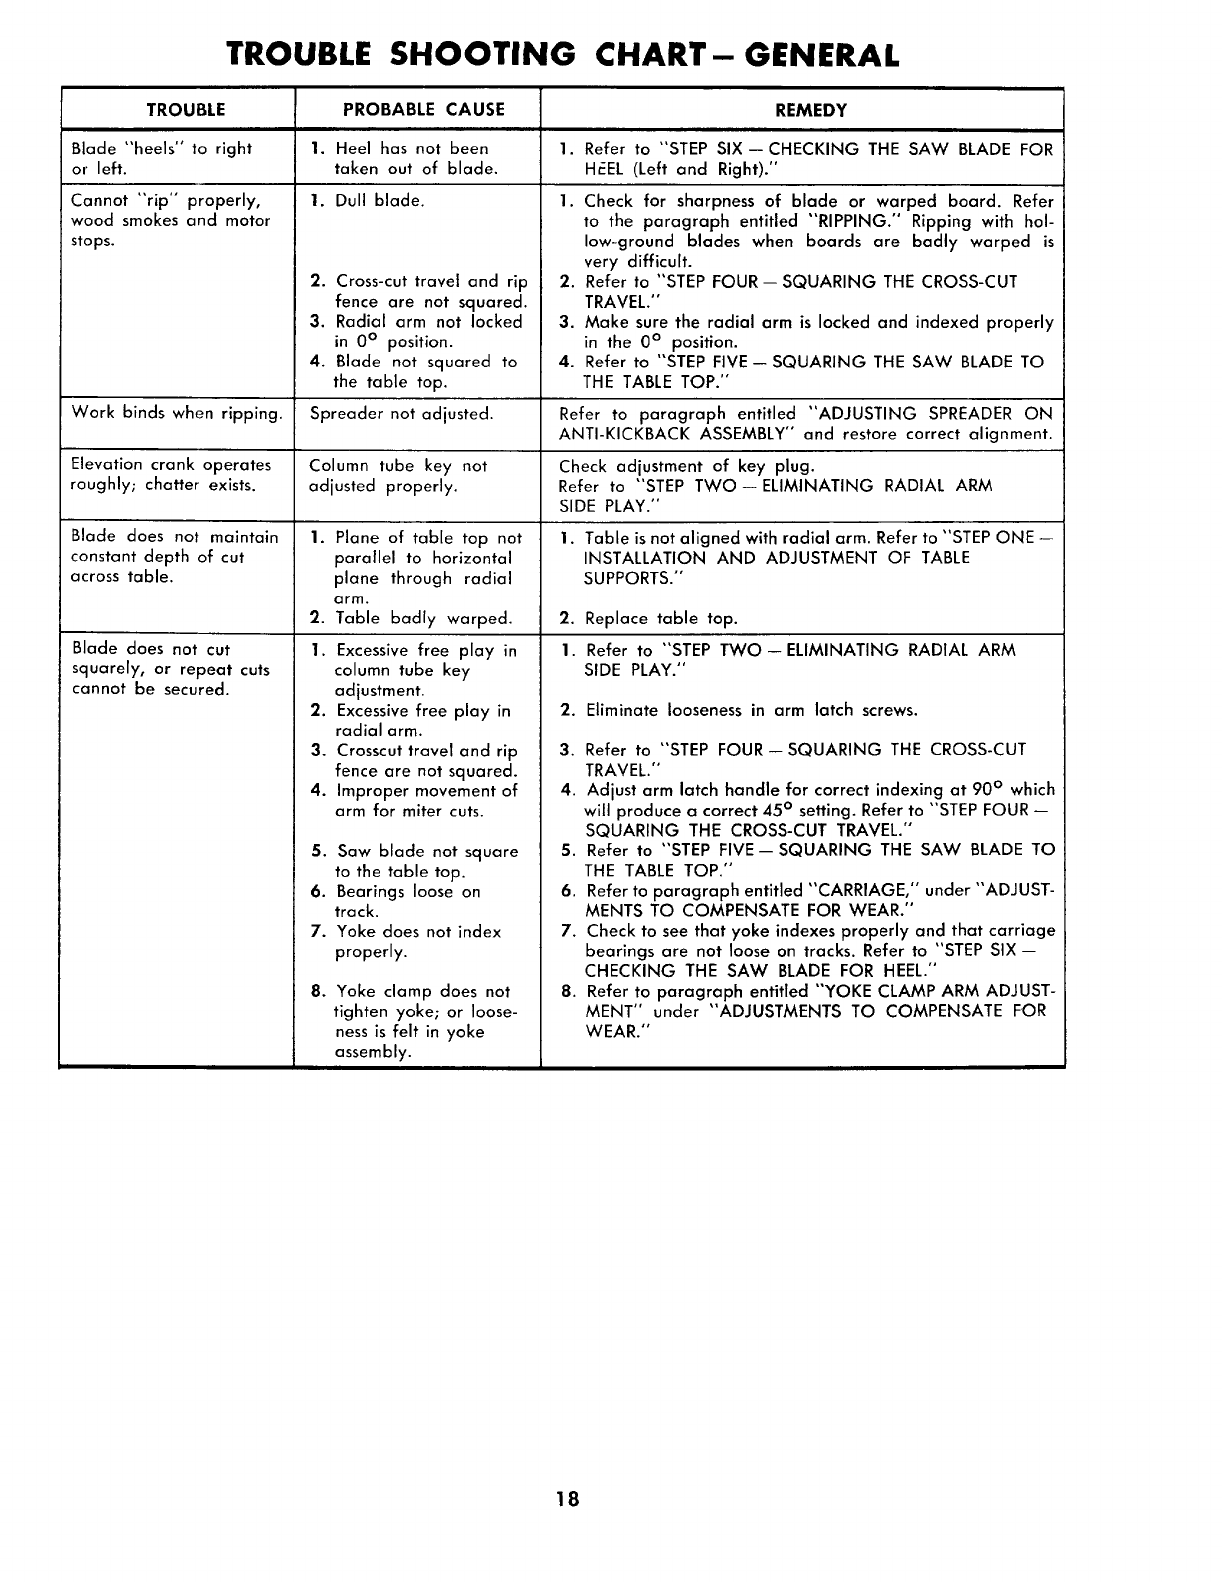
TROUBLE SHOOTING CHART-GENERAL
TROUBLE
Blade "heels" to right
or left.
Cannot "rip" properly,
wood smokes and motor
stops.
Work binds when ripping.
Elevation crank operates
roughly; chatter exists.
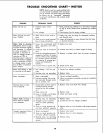
Blade does not maintain
constant depth of cut
across table.
Blade does not cut
squarely, or repeat cuts
cannot be secured.
PROBABLE CAUSE REMEDY
1. Heel has not been 1. Refer to "STEP SIX--CHECKING THE SAW BLADE FOR
taken out of blade. Hr_EL(Left and Right)."
1. Dull blade. 1.
2. Cross-cut travel and rip
fence are not squared.
3. Radial arm not locked
in 0° position.
4. Blade not squared to
the table top.
2.
3.
4.
Check for sharpness of blade or warped board. Refer
to the paragraph entitled "RIPPING." Ripping with hol-
low-ground blades when boards are badly warped is
very difficult.
Refer to "STEP FOUR -- SQUARING THE CROSS-CUT
TRAVEL."
Make sure the radial arm is locked and indexed properly
in the 0° position.
Refer to "STEP FIVE -- SQUARING THE SAW BLADE TO
THE TABLE TOP."
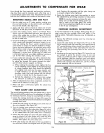
Spreader not adjusted. Refer to paragraph entitled "ADJUSTING SPREADER ON
ANTI-KICKBACK ASSEMBLY" and restore correct alignment.
Column tube key not Check adjustment of key plug.
adjusted properly. Refer to "STEP TWO--ELIMINATING RADIAL ARM
SIDE PLAY."
1.
2.
Plane of table top not
parallel to horizontal
plane through radial
arm.
Table badly warped.
1. Excessive free play in
column tube key
adjustment.
2. Excessive free play in
radial arm.
3. Crosscut travel and rip
fence are not squared.
4. Improper movement of
arm for miter cuts.
5. Saw blade not square
to the table top.
6. Bearings loose on
track.
7. Yoke does not index
properly.
B°
Yoke clamp does not
tighten yoke; or loose-
ness is felt in yoke
assembly.
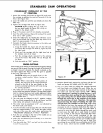
1. Table is not aligned with radial arm. Refer to "STEP ONE --
INSTALLATION AND ADJUSTMENT OF TABLE
SUPPORTS."
2. Replace table top.
1. Refer to "STEP TWO--ELIMINATING RADIAL ARM
SIDE PLAY."
2. Eliminate looseness in arm latch screws.
3. Refer to "STEP FOUR--SQUARING THE CROSS-CUT
TRAVEL."
4. Adjust arm latch handle for correct indexing at 90° which
will produce a correct 45° setting. Refer to "STEP FOUR --
SQUARING THE CROSS-CUT TRAVEL."
5. Refer to "STEP FIVE--SQUARING THE SAW BLADE TO
THE TABLE TOP."
6. Refer to paragraph entitled "CARRIAGE," under "ADJUST-
MENTS TO COMPENSATE FOR WEAR."
7. Check to see that yoke indexes properly and that carriage
bearings are not loose on tracks. Refer to "STEP SIX-
CHECKING THE SAW BLADE FOR HEEL."
8. Refer to paragraph entitled "YOKE CLAMP ARM ADJUST-
MENT" under "ADJUSTMENTS TO COMPENSATE FOR
WEAR."
18