


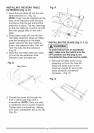
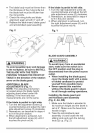

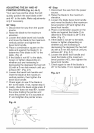
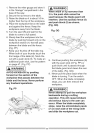


ADJUSTING THE TABLE iNSERT
(Fig. ii)
[,A WARNING]
To avoid serious injury, the table
insert (2) must be level with the
table, if the table insert is not flush
with the table, adjust the two bolts
(1) with a 4 mm he× wrench until it is
parallel with the table.
NOTE: To raise the insert, turn the hex
screws counterclockwise. To lower the
insert, turn the hex screws clockwise.
Do not remove the insert, adjustments
need to be made with the insert in
place to get the proper level.
Fig. II
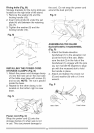
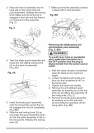
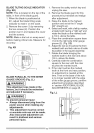
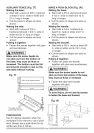
REMOVING THE BLADE (Fig. S, T, U)
I,,A WARNING]
To avoid injury from an accidental
start, make sure the switch is in
the OFF position and the plug is
disconnected from the power source
outlet.
1. Remove the table insert by snapping
out from the hole (8). (Fig. S)
2. Raise the blade to the maximum
height by turning the blade elevation
handwheel clockwise.
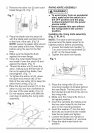
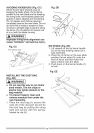
3. Adjust the blade to the 90 ° vertical
position by unlocking the blade
tilting lock knob, push in the blade
elevation wheel and turn the bevel
tilting handwheel counterclockwise,
and then lock into position.
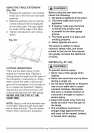
4. Place the box-end wrench (7) on the
arbor nut (2). (Fig. U)
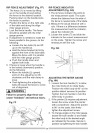
5. Place the open-end wrench (6) on
the flats of the saw arbor to keep the
arbor from turning and loosen the
arbor nut (2). (Fig. U)
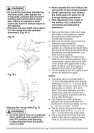
6. Then remove the blade. Clean but
do not remove the inner blade flange
before reassembling the blade.