


-18-
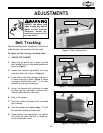
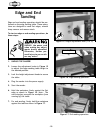
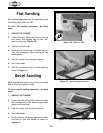
Figure 16. Edge sanding operation.
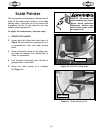
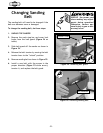
Figure 17. End sanding operation.
1. UNPLUG THE SANDER!
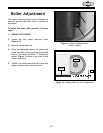
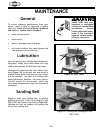
2. Loosen the adjustment knobs in Figure 15
to adjust the edge sanding table height to
the desired position.
3. Lock the height adjustment knobs to secure
the table.
4. Plug the sander into the power supply.
5. Start the sander.
6. Hold the workpiece firmly against the flat
edge as shown in Figure 16. Note— The
work stop bar prevents the workpiece from
running off the table.
7. For end sanding, firmly hold the workpiece
against the table as shown in Figure 17.
Figure 15. Height adjustment knob (1 of 2).
UNPLUG the power cord
when making any adjust-
ments during operation!
Otherwise, serious per-
sonal injury to you or oth-
ers may occur!
Work Stop Bar
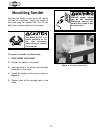
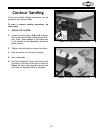
Edge and end sanding operations should be per-
formed on the edge sanding table. These opera-
tions are designed to sand flat edges, smooth
sharp corners and remove stock.
To start an edge or end sanding operations, do
these steps:
Edge and End
Sanding