


Df[\cN(/)+('?pYi`[KXYc\JXn
-45-
FG<I8K@FEJ
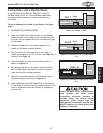
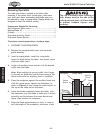
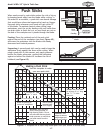
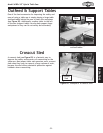
4. Rout a
1
⁄4"–
3
⁄8" wide slot 4"–5" long in the workpiece
and 1"–2" from the short end of the featherboard, as
illustrated in Figure 64.
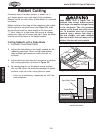
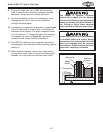
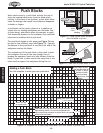
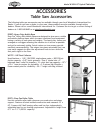
5. Cut a miter bar that will fit in the table miter slot
approximately 5" long (see Figure 65).
Tip: Consider making the miter bar longer for larger
featherboards—approximately half the length of the
total featherboard—to support the force applied to
the featherboard during use.
6. Drill a
1
⁄4" hole in the center of the bar, then
countersink the bottom to fit a
1
⁄4"-20 flat head
screw.
7. Mark a 4" line through the center of the countersunk
hole in the center, then use a jig saw with a narrow
blade to cut it out.
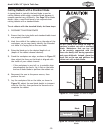
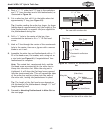
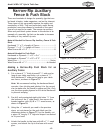
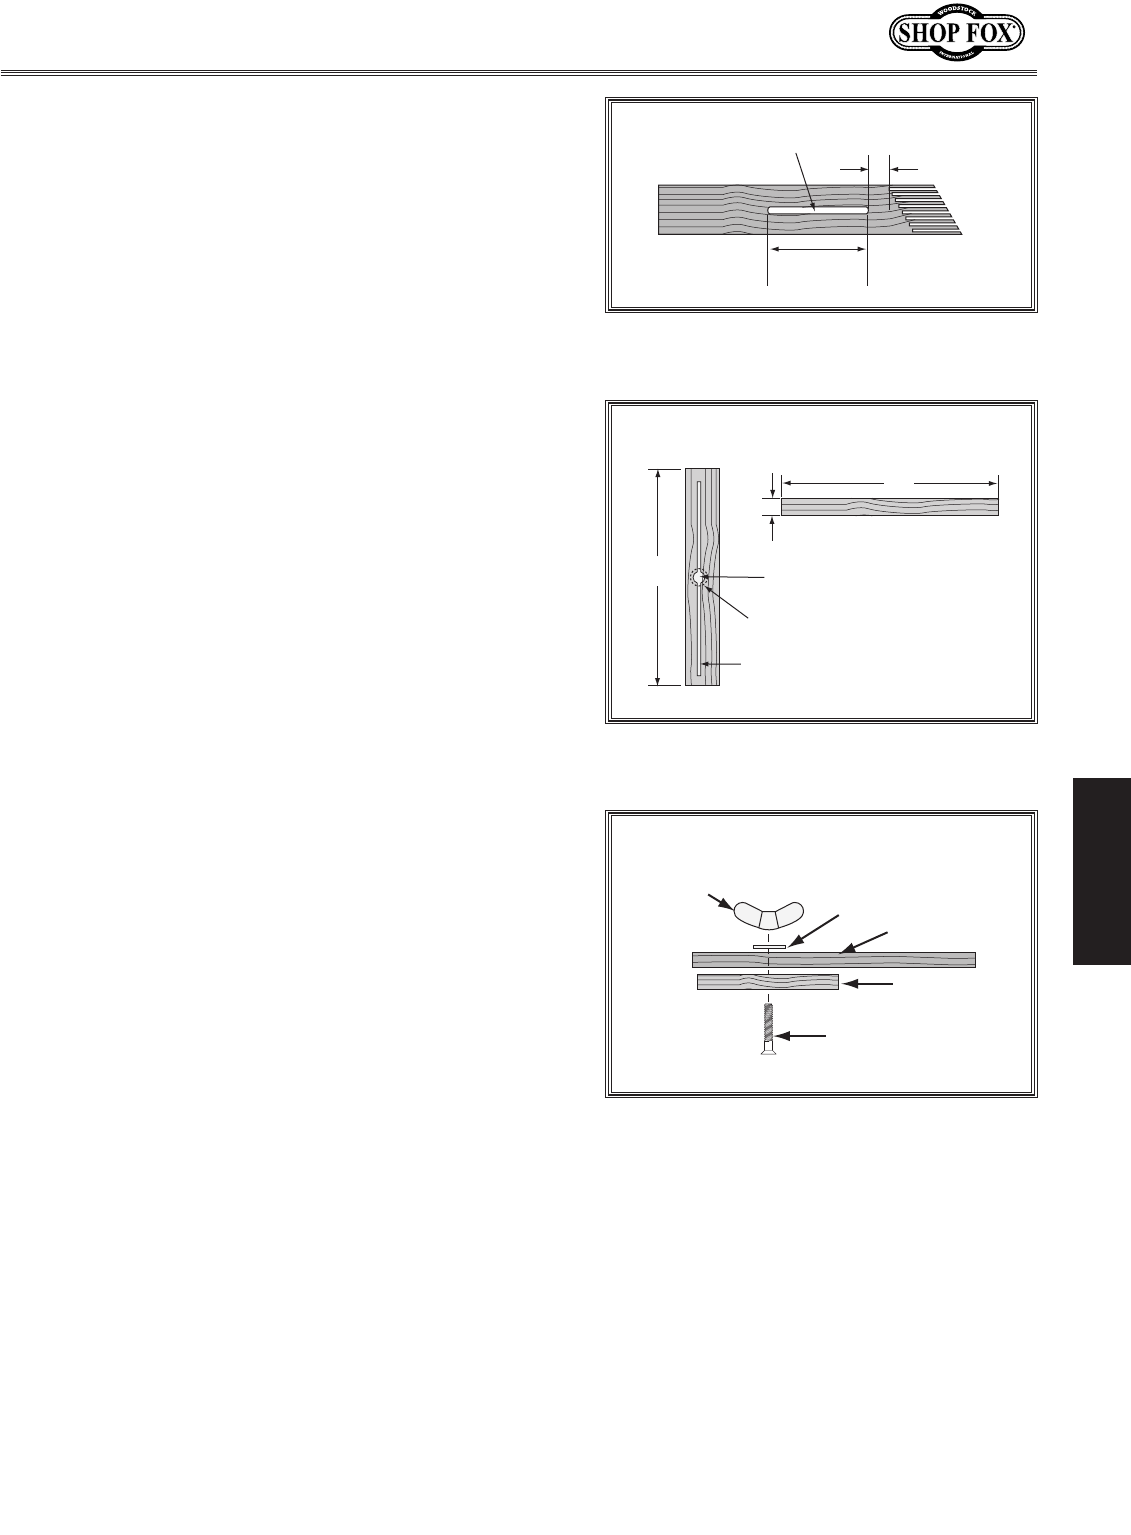
8. Assemble the miter bar and featherboard with a
1
⁄4"-
20 x flat head screw, flat washer, and a wing nut or
a star knob (see Figure 66). Congratulations! Your
featherboard is complete.
Note: The routed slot, countersunk hole, and the
flat head screw are essential for the miter bar to
clamp into the miter slot. When the wing nut is
tightened, it will draw the flat head screw upward
into the countersunk hole. This will spread the sides
of the miter bar and force them into the walls of
the miter slot, locking the featherboard in place.
Tip: The length of the flat head screw depends on
the thickness of the featherboard—though 1
1
⁄2" to 2"
lengths usually work.
9. Proceed to Mounting Featherboard in Miter Slot on
the next page.
1"-2"
4"-5"
1
/
4
"-
3
/
8
" Slot
Figure 64. Slot cut into the featherboard
for use with a miter slot.
5"
5"
4" Slot
(Top View)
(Side View)
3
/
8
"
Countersink on Bottom
1
/
4
" Hole
Figure 65. Patterns for featherboard miter
bar.
(Side View)
Wing Nut
Miter Bar
Featherboard
Flat Head Screw
Flat Washer
Figure 66. Assembly order of featherboard
components for use with a miter slot.