-13-
SB1363-64/SB1367-68Mfg. Since 10/09
OPERATION
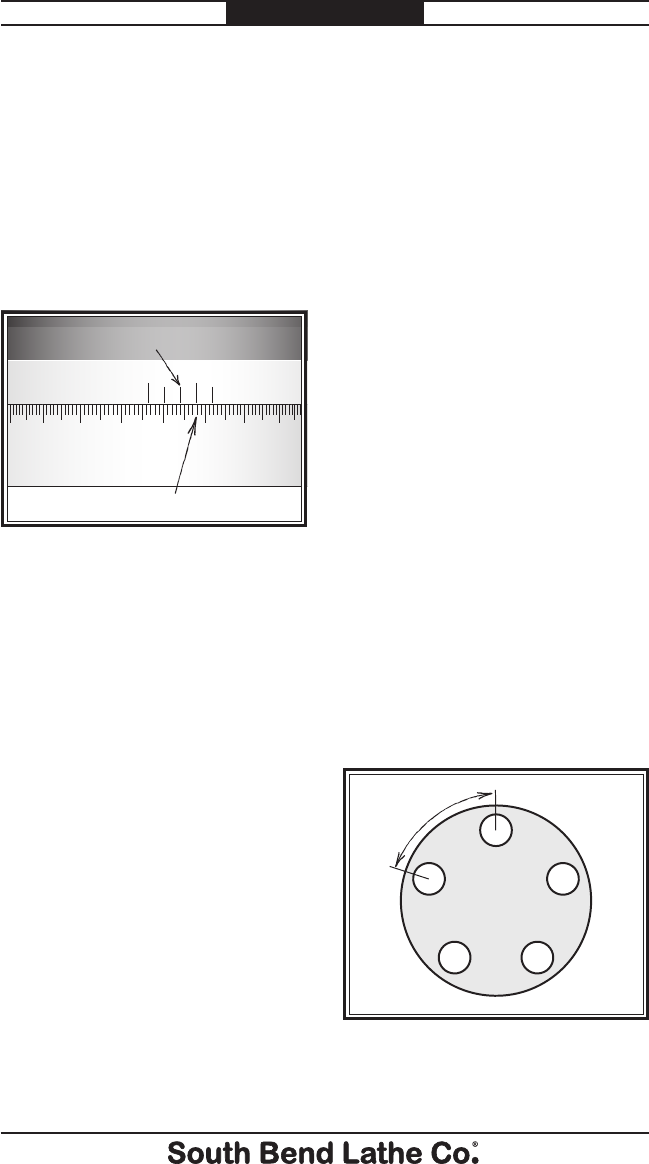
2. Slowly continue to turn the
handwheeluntilthe32'markon
the handwheel scale aligns with
the 0° mark on the vernier scale
(see the illustrated example in
Figure 11).
Note: Figure 11 may not agree
with the layout of the scales on
your model. However, the use of
these scales as instructed here
is the same.
Figure 11. Handwheel and vernier
scales aligned so that the table is at
16° 32' 20".
0
60
40
30
20
10
0
50
10
20
30
40
5
0
1
32 Arc Minutes
20 Arc Seconds
Vernier Scale
Handwheel Scale
3. Identify the mark on the vernier
scale that is two marks (20") to
the left of the vernier scale 0°
mark.
Important: When the handwheel
is turned clockwise, the marks
to the left of the vernier scale
0° mark are used, and when
the handwheel is turned
counterclockwise, the marks on
the right are used.
4. Identify the mark on the
handwheel scale that is
immediately to the left of the
vernier scale 20" mark, then
slowly rotate the handwheel
clockwise until the this mark
and the vernier scale 20" mark
are aligned. The table is now set
at16°32'20".
Operational Examples
Use your rotary table and mill to
follow along with the operational
examples below to better
understand how to use the rotary
table.
Note: For both examples, the
following statements are assumed to
be true:
• Therotarytableisproperly
secured to the mill in the
horizontal position.
• Therotarytableisproperly
centered with the mill spindle
centerline.
• Theworkpieceiscenteredand
properly clamped on the rotary
table, and elevated for proper
machining clearances.
• The0°marksofthehandwheel
and vernier scales are aligned.
Five Evenly Space Holes
In this example, you will make
five holes spaced 72° apart in a
circular workpiece, as illustrated in
Figure 12.
Figure 12. Five hole layout spaced 72°
apart.
72º


