


-52-
For Machines Mfg. Since 3/11
Turn-Nado
®
EVS Lathes
OPERATION
Tools Needed Qty
Tool Post T-Wrench ...............................................1
Steel Shims ............................................ As Needed
Cutting Tool ...........................................................1
Fine Ruler ..............................................................1
Tailstock Center ....................................................1
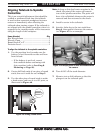
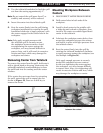
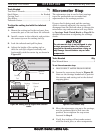
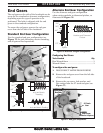
To align the cutting tool with the tailstock
center:
1. Mount the cutting tool in the tool post, then
secure the post so the tool faces the tailstock.
2. Install a center in the tailstock, and position
the center tip near the cutting tool tip.
3. Lock the tailstock and quill in place.
4. Adjust the height of the cutting tool so
that the tool tip is aligned vertically and
horizontally with the center tip, as shown in
Figure 62.
Cutting
Tool
Tailstock
Center
(Top View)
Cutting
Tool
Tailstock
Center
(Side View)
Figure 62. Cutting tool tip aligned with tailstock
center.
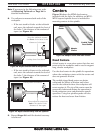
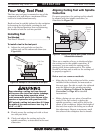
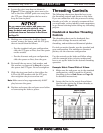
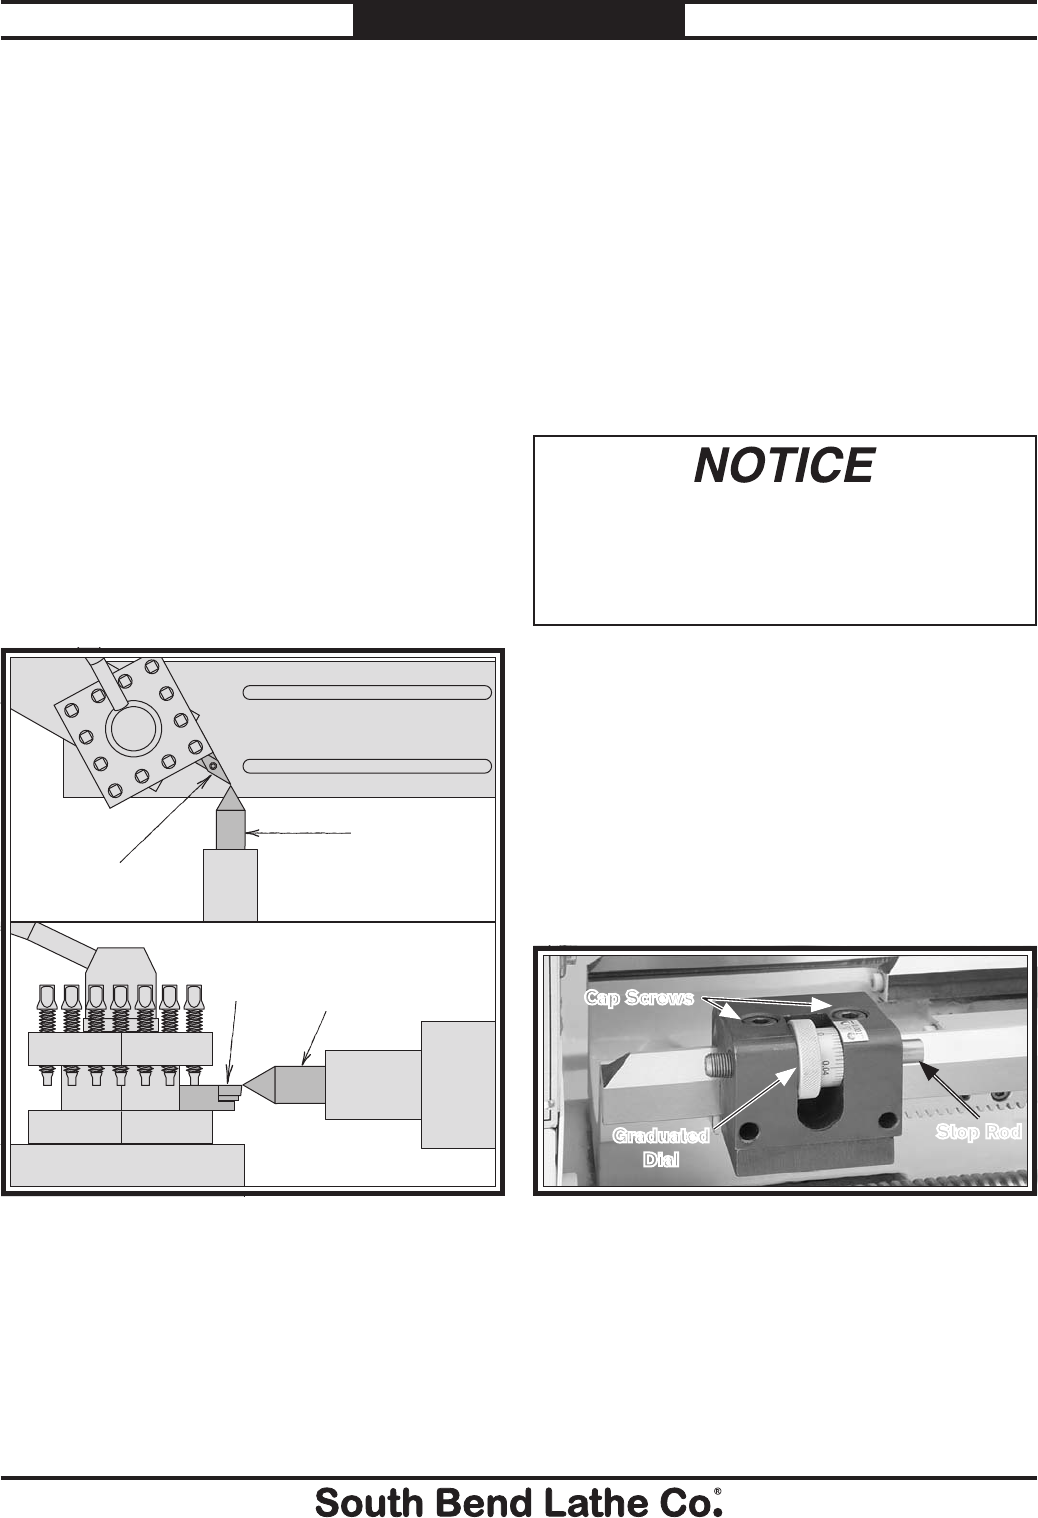
Micrometer Stop
3. Move the micrometer stop up to the carriage,
use the graduated dial to fine tune the
position, then retighten the cap screws
loosened in Step 2.
4. Verify that tooling will not make contact
with the chuck, jaws, or other components.
The micrometer stop is used to limit carriage
travel for production runs or make final
adjustments to the carriage position.
If power feed is being used and the carriage
clutch is correctly adjusted, the carriage will
disengage from the feed rod when it contacts the
micrometer stop and movement will stop. Refer
to Carriage Feed Clutch Knob on Page 56 for
detailed instructions on adjusting the carriage
clutch.
The micrometer stop is not designed to stop
carriage movement when the leadscrew is
engaged for threading operations—doing so
may damage the micrometer stop or lathe
components.
Tools Needed Qty
Hex Wrench 8mm .................................................1
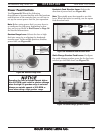
To set the micrometer stop:
1. DISCONNECT LATHE FROM POWER!
2. Loosen the cap screws shown in Figure 63,
then use the carriage handwheel to position
the carriage and cutting tool at the desired
stopping point.
Figure 63. Micrometer stop.
Cap Screws
Stop Rod
Graduated
Dial