


For Machines Mfg. Since 3/11 Turn-Nado
®
EVS Lathes
-83-
SERVICE
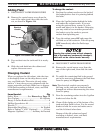
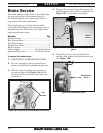
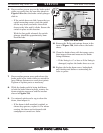
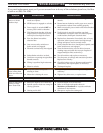
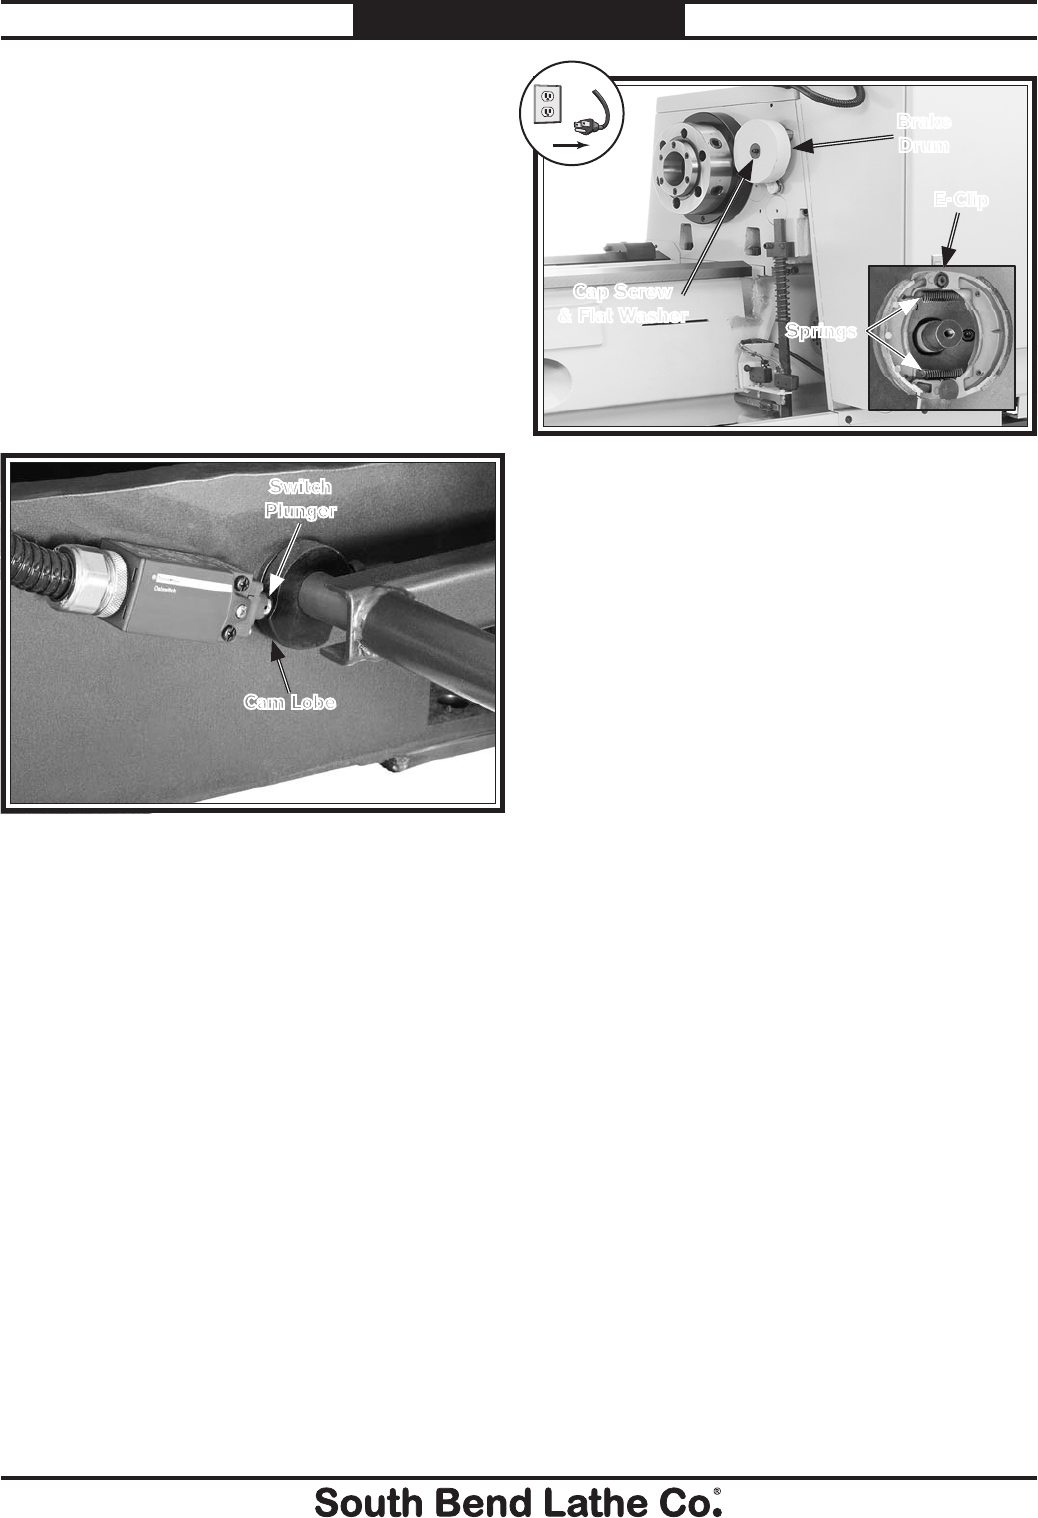
6. Have another person step on the brake pedal
while you verify that the cam lobe shown in
Figure 129 makes the brake switch plunger
click in.
— If the switch does not click, loosen the two
switch mounting screws, push the pedal
all the way down, and move the switch
closer to the lobe until it clicks. Secure the
switch in place at this location.
With the foot pedal released, the switch
plunger should be approximately 3mm
from the lobe.
Figure 129. Brake switch.
Cam Lobe
Switch
Plunger
7. Have another person press and release the
brake pedal a few times while you watch for
loose linkage fasteners or worn pivot points.
Tighten or replace parts as necessary.
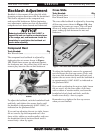
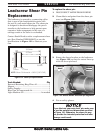
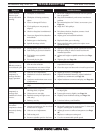
8. While the brake pedal is being held down
to lock the brake drum in place, remove the
drum retaining cap screw and flat washer
shown in Figure 130.
9. Use mineral spirits and a rag to clean the
drum, then inspect it.
— If the drum is bell-mouthed, cracked, or
shows deep grooves, replace it. For minor
scoring, the drum can be dressed with
sandpaper or turned on a lathe.
Figure 130. Brake drum.
Brake
Drum
Cap Screw
& Flat Washer
E-Clip
Springs
10. Remove the E-clip and springs shown in the
inset of Figure 130, then remove the brake
shoes.
11. Clean the brake shoes with hot soapy water,
then inspect them and measure the brake
lining thickness.
— If the lining is
3
⁄16" or less or if the lining is
damaged, replace the brake shoes as a set.
12. Replace the brake drum cover, backsplash,
and chuck guard before re-connecting the
lathe to power.
!