


DS06 User Manual ◄ 13
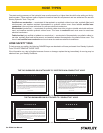
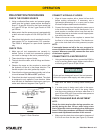
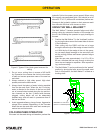
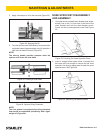
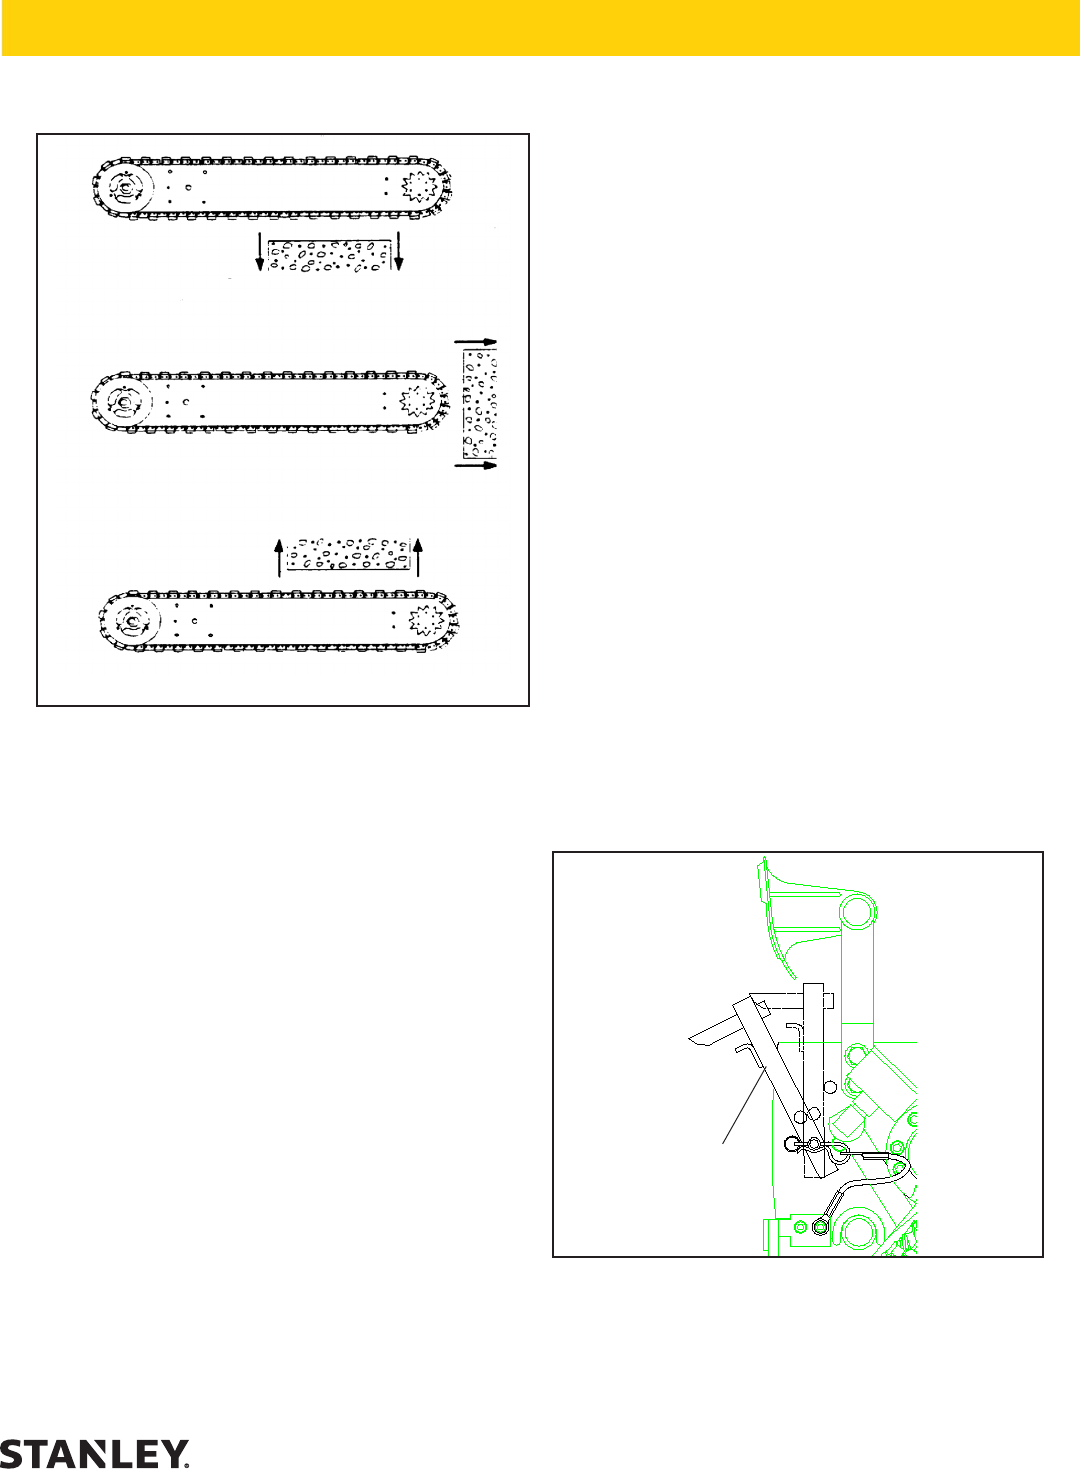
DOWN CUT
PLUNGE CUT
UP CUT
Figure 6. Types of Cuts (chain guard removed for
clarity)
1. Do not use a cutting force in excess of 45 lbs/20
kg. Excessive force causes the chain to slow down
or stall and causes premature wear of the saw bar
and chain.
2. Always maintain a high chain speed. High chain
speeds produce the best results.
3. Always check that plenty of water is being expelled
from the bar and chain. When the tool is running,
water is directed to the interior of the bar and then
out of several holes located along the top and bot-
tom channels on the bar. If these holes become
plugged, cutting debris will not be adequately
washed away and will result in premature wear of
the bar and chain.
4. Avoid aggressive/heavy plunge forces. Aggressive
plunge force creates fragmenting of the concrete
when the saw bar and chain exits and causes pre-
mature bar and chain wear.
COLD WEATHER OPERATION
If the saw is to be used during cold weather, preheat the
hydraulic uid at low power source speed. When using
the normally recommended uids, uid should be at or
above 50 °F/10 °C (400 ssu/82 centistokes) before use.
Damage to the hydraulic system or chain saw can result
from use with uid that is too viscous or thick.
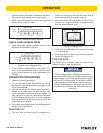
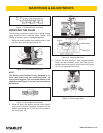
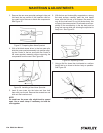
USING THE WALL WALKER™
The Wall Walker™ lessens operator fatigue and effort
during cutting by automatic insertion of the wedge into
the cut, thus allowing the operator to apply leverage to
the saw.
1. Position the Wall Walker™ in the "autofeed" position
by pinning the lever arm at the lowest hole as shown
in the illustration.
Start cutting with the DS06 until the cut is large
enough to allow the tip of the wedge to insert into the
cut. With the tip of the wedge in the cut, the opera-
tor can easily apply leverage to the saw which will
aid the cutting process and lessen operator fatigue
and effort.
After the saw cuts approximately 1 to 2.5 in./25 to
65 mm, withdraw the saw only enough to allow the
lever arm and wedge to reposition. After reposition-
ing, continue cutting.
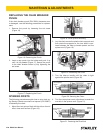
2. The Wall Walker™ can be positioned to the “parked”
position by pinning the lever arm at the upper most
hole. In this position, the Wall Walker™ is used as a
bucking cleat.
Wall Walker™ Lever Arm
(Shown in “autofeed position)
Figure 7. Wall Walker™
OPERATION