14 ► DS06 User Manual
GENERAL MAINTENANCE TIPS
Several simple maintenance tasks which, if performed,
can keep a chain saw operating at a high level of ef-
ciency. Routine maintenance also keeps replacement
costs down on the parts of the chain saw, which occa-
sionally wear out.
If any chain saw disassembly is required, refer to the
Service Manual.
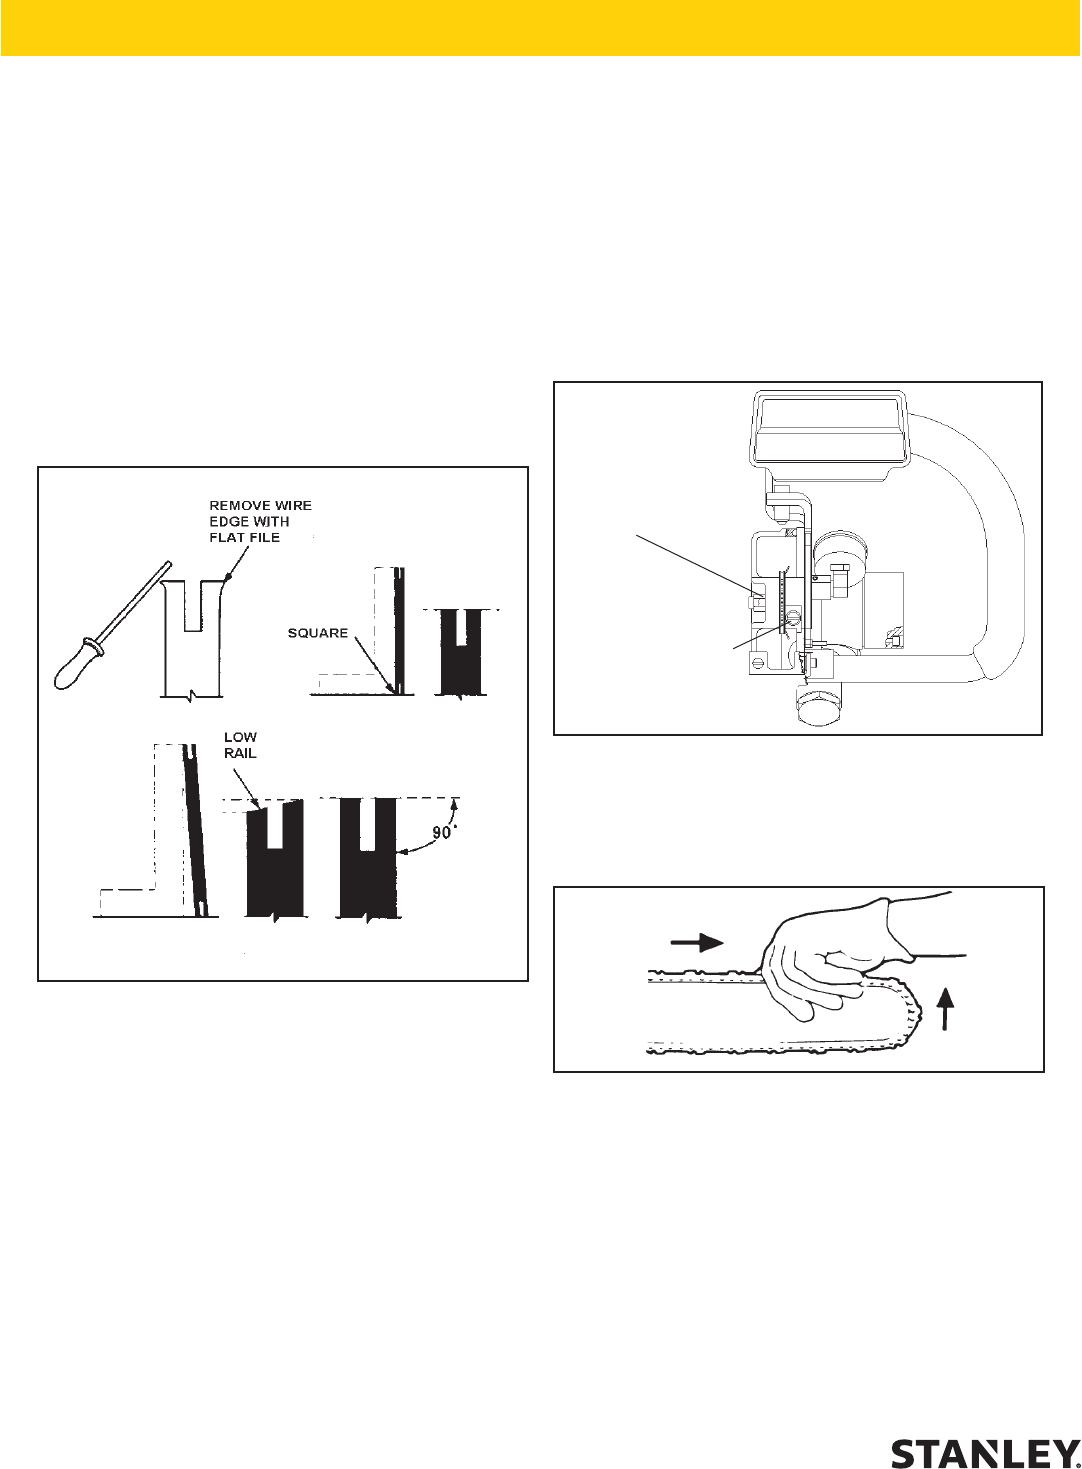
SAW BAR RAIL
A quick check can be made to determine if saw bar rail
or chain segment wear exists. Figure 8 shows a worn
saw bar rail.
Figure 8. Rail Wear
If the saw bar rails are worn, use a at le and dress
each one until it is at and square with the side of the
saw bar (Figure 8).
Also make sure the saw bar is perfectly straight. If bows
or bends are present in the saw bar, it must be replaced
before dressing any rail.
ROTATING THE SAW BAR
Maximum saw bar life can be achieved by occasionally
turning the bar over so the top and bottom bar surfaces
wear evenly. Refer to the saw bar disassembly proce-
dures in the Service Manual for further details.
CHAIN TENSION ADJUSTMENT
Correct chain tension is very important throughout the
life of the chain. Check the chain tension often during
use (when the chain saw is stopped and the saw bar and
chain have cooled off). The chain should move easily
around the saw bar when pulled by hand. To adjust the
chain tension:
1. Turn off the water and power supplies.
2. Loosen the two saw bar attachment nuts (Figure 9).
Bar Attachment
Nuts (2)
Bar Adjusting Screw
Figure 9. Attachment Screw Locations
3. Using the saw bar adjustment screw (Item 68, Parts
Illustration), tighten the chain until you are still able
to rotate it one full revolution by hand (Figure 10).
Figure 10. Pulling the Chain
4. Pull the chain around the saw bar to make sure it
properly ts the sprocket and saw bar. The chain
should be easily pulled.
5. Fully tighten the two saw bar attachment nuts
(Figure 9).
NOTE:
Adjust the chain tension each time the drive link
tang hangs fully exposed from the groove at the bot-
tom of the saw bar (Figure 11).
MAINTENAN & ADJUSTMENTS


