


8
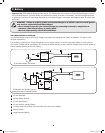
3. Battery
3.2 Monthly Maintenance
• Check the electrolyte level of each Wet-Cell battery cell monthly after the batteries have been charged. The level should be
about one-half inch above the top of the plates, but not completely full. Note: This check is not necessary for maintenance-
free batteries.
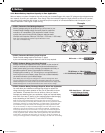
• Check the battery connections for tightness and corrosion. If any corrosion is noted, disconnect the cables and clean them
with a mild solution of baking soda and water. DO NOT ALLOW THE SOLUTION TO ENTER THE BATTERY. When nished, rinse
the top of the battery with clean water.
• To reduce corrosion on the battery terminals, coat them with a thin layer of petroleum jelly or anti-corrosion grease. Do not
apply any material between the terminal and the cable lugs; the connection should be metal to metal. Apply the protective
material after the bolts have been tightened.
3.3 Battery Installation
Caution! Batteries can produce extremely high currents. Review both the important safety
instructions at the beginning of this manual and the battery supplier’s precautions before installing
the inverter and batteries.
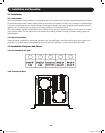
3.3.1 Battery Location
Batteries should be installed in an accessible location with good access to the battery caps and terminals. At least two feet of
overhead clearance is recommended. Batteries must be located as close as possible to the inverter. Do not install the inverter
in the same compartment with non-sealed batteries (sealed batteries are acceptable). The gasses produced by non-sealed
batteries during charging are highly corrosive and will shorten the life of the inverter.
3.3.2 Battery Enclosure
Batteries should be installed in a locked enclosure or room. The enclosure should be well ventilated to prevent accumulation
of hydrogen gasses that are released during the battery charging process. The enclosure should be made of acid-resistant
material or coated with an acid-resistant nish to prevent corrosion from spilled electrolyte and released fumes. If the batteries
are located outdoors, the enclosure should be rainproof and have mesh screens to prevent insects and rodents from entering.
Before installing the batteries in the enclosure, cover the bottom with a layer of baking soda to neutralize any acid spills.
3.4 Battery Connection
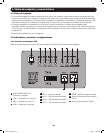
3.4.1 Connect your Inverter/Charger to your batteries using the following procedures:
• Connect DC Wiring: Though your Inverter/Charger is a high-efciency converter of electricity, its rated output capacity is
limited by the length and gauge of the cabling running from the battery to the unit. Use the shortest length and largest
diameter cabling to provide maximum performance (see table below). Shorter and heavier-gauge cabling reduces DC
voltage drop and permits maximum transfer of current. Your Inverter/Charger is capable of delivering peak wattage at up
to 200% of its rated continuous wattage output for brief periods of time. Heavier-gauge cabling should be used when
continuously operating heavy-draw equipment under these conditions. Tighten your Inverter/Charger and battery terminals
to approximately 3.5 Newton-meters of torque to establish an efcient connection and to prevent excessive heating at the
connection. Insufcient tightening of the terminals could void your warranty.
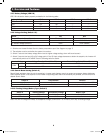
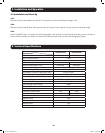
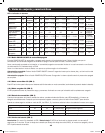
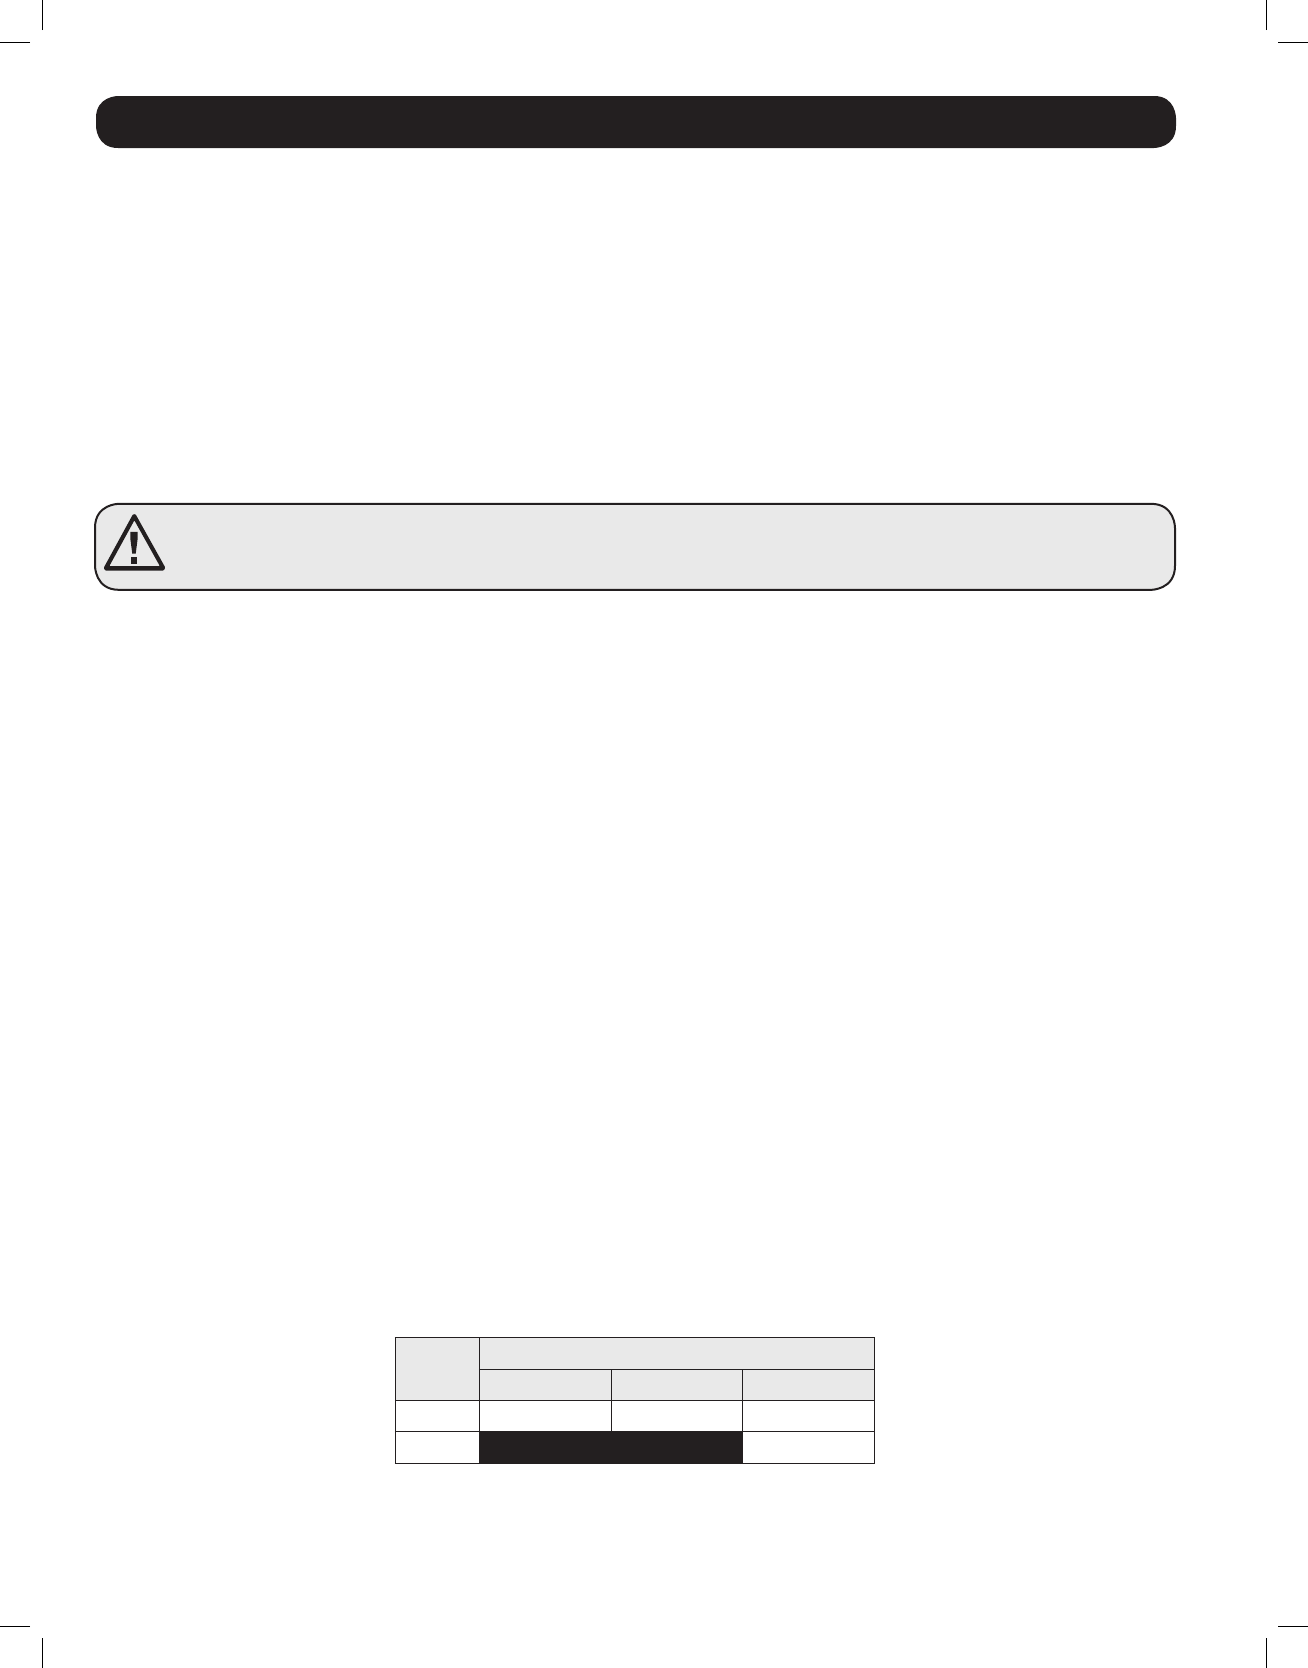
Maximum Recommended DC Cable Length
Maximum Distance From Battery to
Inverter/Charger
Output
Wire Gauge (AWG)
2 0 00 (2/0)
1000W 20 ft 31 ft 39 ft
2000W
Do not use Do not use
20 ft
201110117 93-3054.indb 8 11/9/2011 10:57:56 AM