


Installing Truecharge+
2–8
Installing Truecharge+
Installation
steps
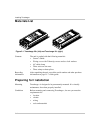
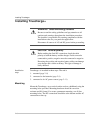
Truecharge+ is installed in three steps. The unit is
1. mounted (page 2–8)
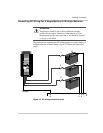
2. connected to the batteries (page 2–9)
3. connected to its AC power source (page 2–11)
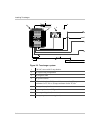
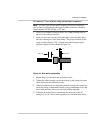
Mounting
Mount the Truecharge+ on a vertical surface such as a bulkhead, using the
mounting holes provided. Mounting hardware should be corrosion
resistant and #8 (4 mm). For secure, permanent mounting, use all four
mounting holes. The DC connections should be at the bottom and the AC
connections at the top.
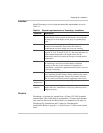
WARNING Shock and Energy Hazards
Be sure to read the safety guidelines and pay attention to all
cautions and warnings throughout the installation procedure.
The installer is responsible for ensuring compliance with the
installation codes for your particular application.
Disconnect all sources of AC and DC power before proceeding.
CAUTION Reverse polarity
Before making the final DC connection, check the cable
polarity at both the battery and the charger. Positive must be
connected to positive; negative must be connected to negative.
Reversing the positive and negative battery cables can damage
your charger and void the warranty. This type of damage is
easily detected.