4.
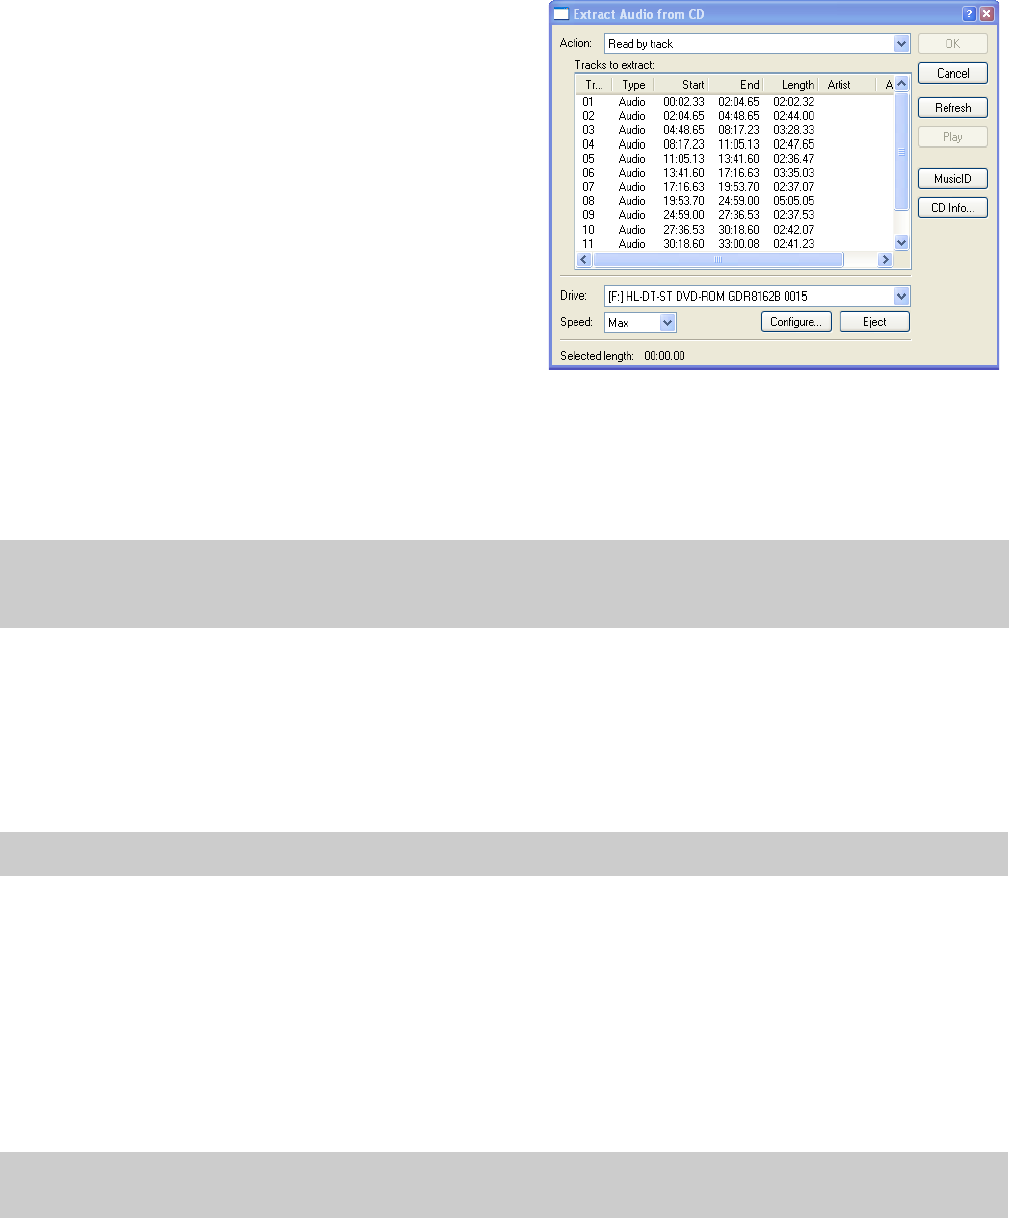
From the Action drop-down list, choose how you want to extract
audio:
• Choose Read by track and select each track you want to
extract. Each track is extracted to a new track in your project.
• Choose Read entire disc to extract the current CD to a single
file.
• Choose Read by range and enter a starting time and ending
time (or a starting time and length). The time range is
extracted to a new track in your project.
Click Play to preview your selection. In order to preview, your CD
drive’s audio output must be connected to your sound card, or
you can connect headphones to the front of the CD drive.
5.
Click the MusicID button if you want to obtain CD information
using Gracenote MusicID.
If CD information is not available, you can click the CD Info button
to display a dialog box where you can edit the CD information and
submit it for inclusion in the Gracenote Media Database. For more
information, see Obtaining or editing CD information using Gracenote on page 33.
6.
From the Speed drop-down list, choose the speed at which you want to extract audio.
7.
Click OK. The Save As dialog appears.
8.
Enter a file name and choose a location for the new file(s).
Tip:
Extracted tracks can be automatically named for you. From the Options menu, choose Preferences, and on the General tab, select
the Autoname extracted CD tracks check box. For more information, see From the Options menu, choose Preferences to display the
Preferences dialog. on page 253.
9.
Click Save to start extracting audio.
CD data extraction begins and a progress meter is displayed. If the file is longer than 30 seconds, the Beatmapper™ Wizard appears.
10.
Use the Beatmapper Wizard or choose to open the file as a one-shot. The extracted file is added to a track. For more information, see
Using the Beatmapper on page 113.
You can also double-click a CDA file in the Explorer window (or drag it to the track view) to extract a CD track without opening the
Extract Audio from CD dialog.
Note:
When adding media from multiple CDs, you may need to press F5 to refresh the Explorer window to view the new CD’s contents.
Obtaining or editing CD information using Gracenote
If ACID can access information about a track or CD (either from the file or CD itself, or from a local cache), it automatically reads and
displays this information when you insert a CD or browse your computer. However, if this information is not available, the software can
retrieve information over the Internet from Gracenote MusicID.
Once ACID obtains information from Gracenote MusicID, it is saved to a local cache so the information displays more quickly the next
time the tracks are displayed.
If the software cannot connect to the Gracenote Media Database and the appropriate CD information is not available on your computer,
the tracks are simply listed numerically. In this case, you can edit CD information and submit it to the Gracenote Media Database.
Note:
Using Gracenote MusicID requires an active Internet connection. For more information on using Gracenote MusicID, refer to
www.gracenote.com/.
GETTING STARTED | 33


