


1-12
Cisco 8500 Series Wireless Controller Installation Guide
Chapter 1 Cisco 8500 Series Wireless Controller Installation Guide
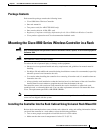
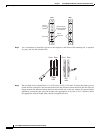
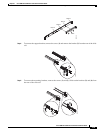
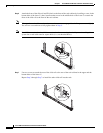
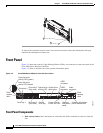
Mounting the Cisco 8500 Series Wireless Controller in a Rack
• Do not block any air vents; usually 15 cm (6 in.) of space provides proper airflow.
• Do not leave open spaces above or below an installed controller in your rack cabinet. To help prevent
damage to controller components, always install a blank filler panel to cover the open space and to
help ensure proper air circulation.
• Install the controller only in a rack cabinet with perforated doors.
• Plan the device installation starting from the bottom of the rack cabinet.
• Install the heaviest device in the bottom of the rack cabinet.
• Do not extend more than one device out of the rack cabinet at the same time.
• Remove the rack doors and side panels to provide easier access during installation.
• Connect the controller to a properly grounded outlet.
• Do not overload the power outlet when you install multiple devices in the rack cabinet.
• Install the controller in a rack that meets the following requirement:
–
Minimum depth of 70 mm (2.76 in.) between the front mounting flange and inside of the front
door.
Caution Use safe practices when lifting.
Caution Do not place any object on top of rack-mounted devices.
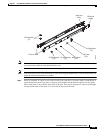
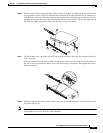
The following illustration shows the items that you need to install the controller in the rack cabinet. If
any items are missing or damaged, contact your place of purchase.
Note Some items come with the controller, not in the rack installation kit.