


1-17
Cisco 8500 Series Wireless Controller Installation Guide
Chapter 1 Cisco 8500 Series Wireless Controller Installation Guide
Mounting the Cisco 8500 Series Wireless Controller in a Rack
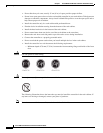
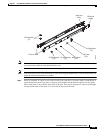
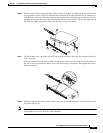
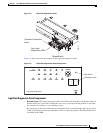
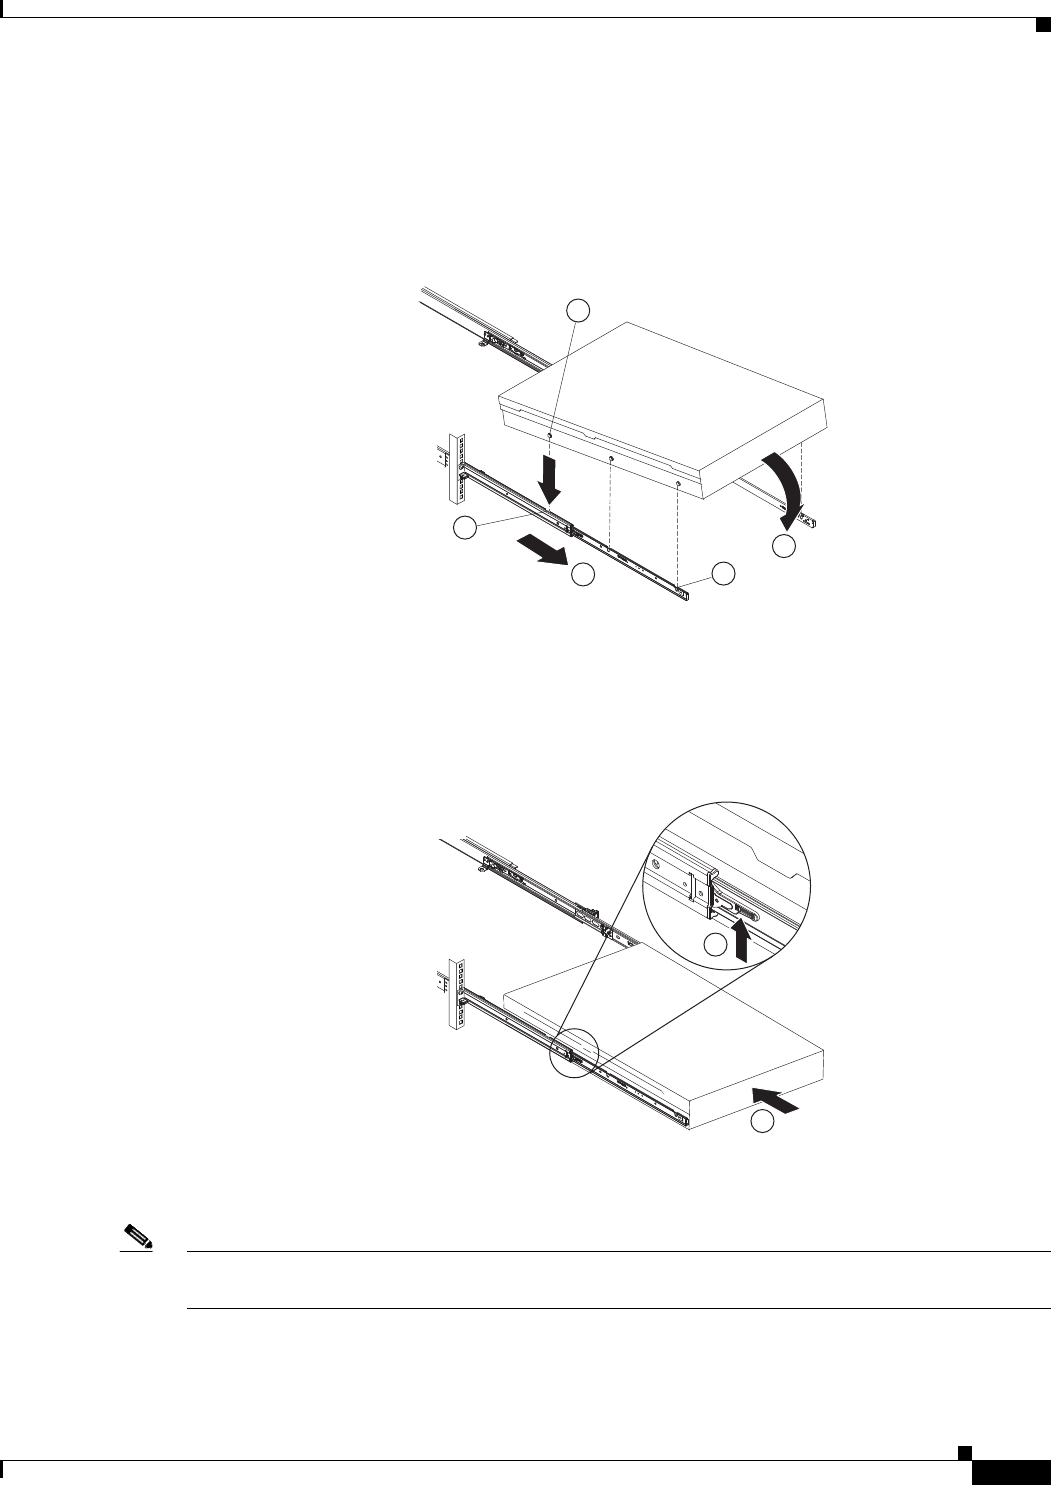
Step 8 Pull the slide rails forward (1) until they click, two times, into place. Carefully lift the controller and tilt
it into position over the slide rails so that the rear nail heads (2) on the controller line up with the rear
slots (3) on the slide rails. Slide the controller down until the rear nail heads slip into the two rear slots,
and then slowly lower the front of the controller (4) until the other nail heads slip into the other slots on
the slide rails. Make sure that the front latch (5) slides over the nail heads.
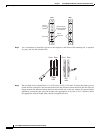
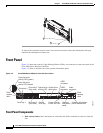
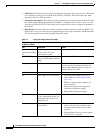
Step 9 Lift the locking levers (1) on the slide rails and push the controller (2) all the way into the rack until it
clicks into place.
Slide the system in and out twice to make sure the system slides correctly. Push the system inwards to
the rack as close as possible but able to access the screws with a screwdriver. Then tighten the screws
with a screwdriver.
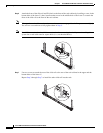
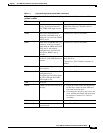
Step 10 Slide the controller into the rack until it snaps into place. To slide the controller out of the rack, press on
the release latches (1).
Note When you move the rack cabinet, or if you install the rack cabinet in a vibration-prone area, insert the
optional M6 screws (2) in the front of the controller.
255162
1
2
3
4
5
255163
1
2