


assembly and alignment EA.SKI.T
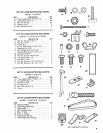
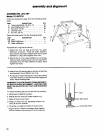
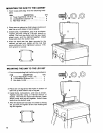
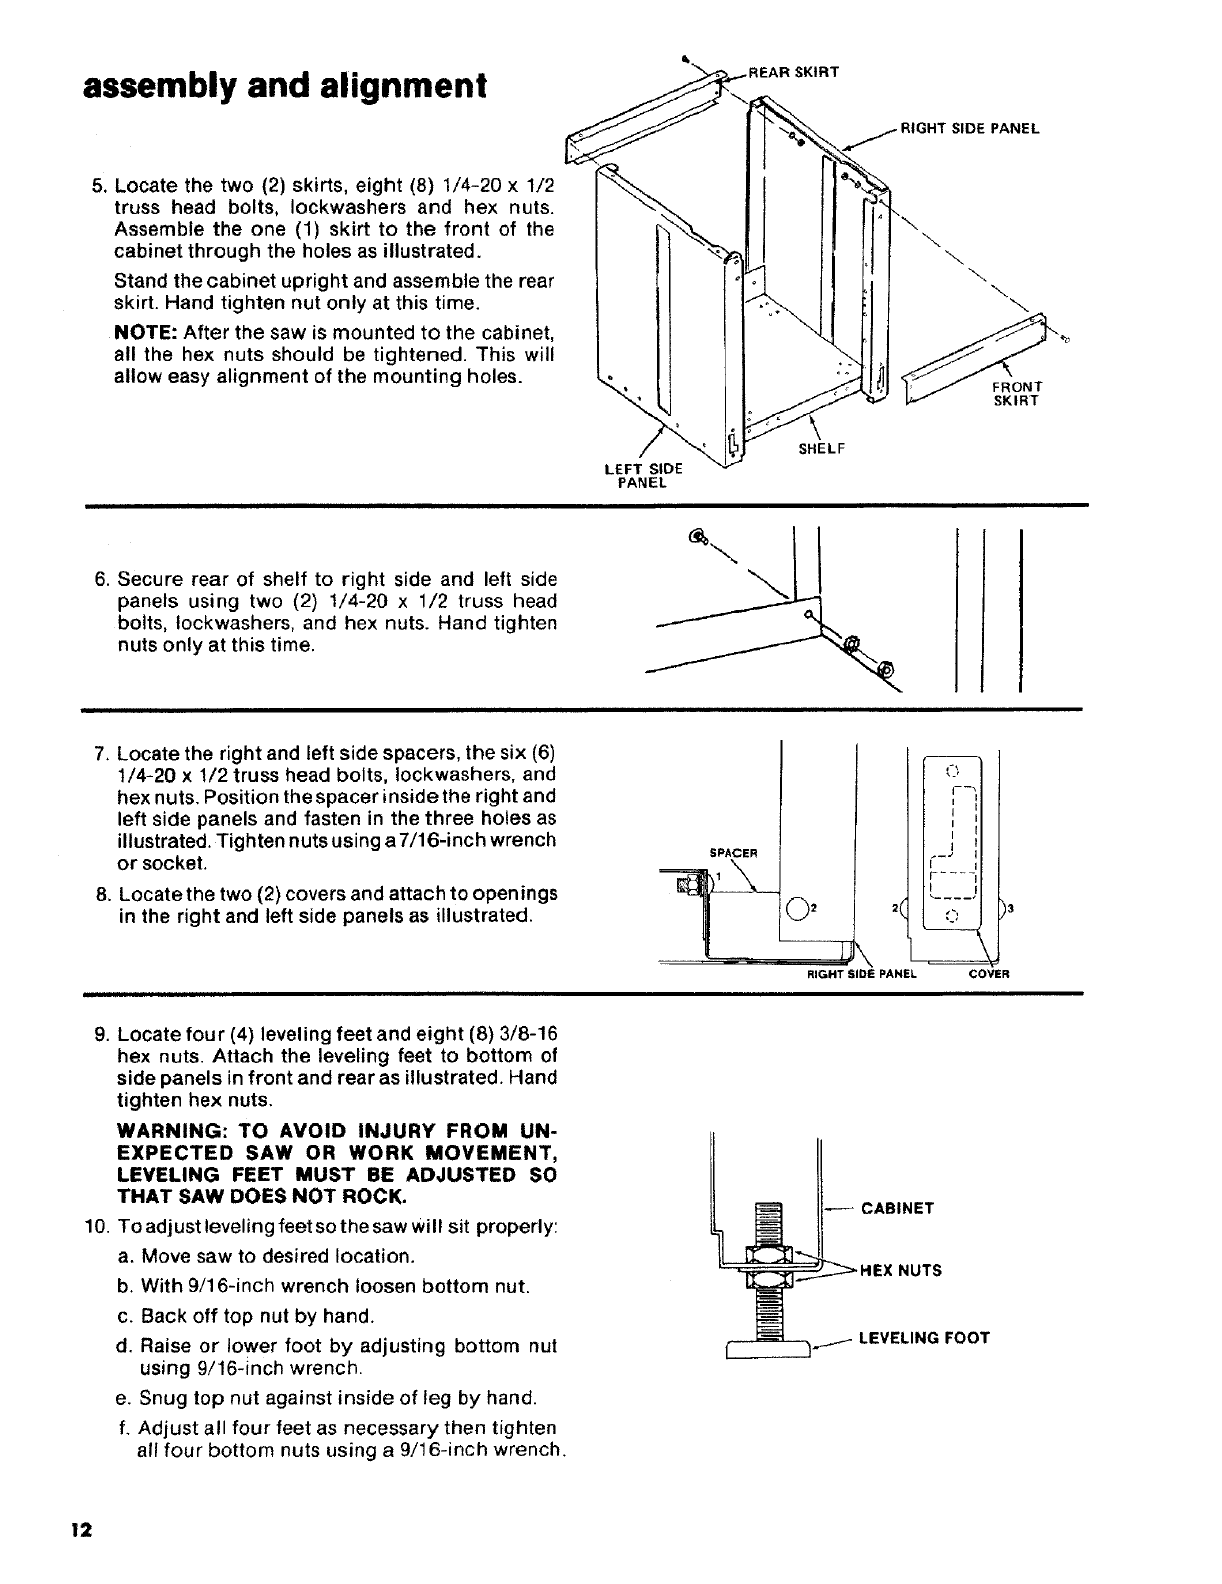
5. Locate the two (2) skirts, eight (8) 1/4-20 x 1/2
truss head bolts, Iockwashers and hex nuts.
Assemble the one (1) skirt to the front of the
cabinet through the holes as illustrated.
Stand the cabinet upright and assemble the rear
skirt. Hand tighten nut only at this time.
NOTE: After the saw is mounted to the cabinet,
all the hex nuts should be tightened. This will
allow easy alignment of the mounting holes.
RIGHT SIDE PANEL
\
\
\
FRONT
SKIRT
LEFT SIDE
PANEL
SHELF
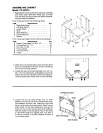
6. Secure rear of shelf to right side and left side
panels using two (2) 1/4-20 x 1/2 truss head
bolts, Iockwashers, and hex nuts. Hand tighten
nuts only at this time.
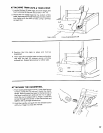
7. Locate the right and left side spacers, the six (6)
1/4-20 x 1/2 truss head bolts, Iockwashers, and
hex nuts. Position the spacer inside the right and
left side panels and fasten in the three holes as
illustrated. Tighten nuts using a 7/16-inch wrench
or socket.
8. Locate the two (2) covers and attach to openings
in the right and left side panels as illustrated.
SPACER
RIGHT SIDE PANEL COVER
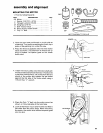
9. Locate four (4) leveling feet and eight (8) 3/8-16
hex nuts. Attach the leveling feet to bottom of
side panels in front and rear as illustrated. Hand
tighten hex nuts.
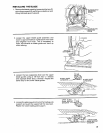
WARNING: TO AVOID INJURY FROM UN-
EXPECTED SAW OR WORK MOVEMENT,
LEVELING FEET MUST BE ADJUSTEO SO
THAT SAW DOES NOT ROCK.
10. To adjust leveling feet so the saw will sit properly:
a. Move saw to desired location.
b. With 9/16-inch wrench loosen bottom nut.
c. Back off top nut by hand.
d. Raise or lower foot by adjusting bottom nut
using 9/16-inch wrench.
e. Snug top nut against inside of leg by hand.
f. Adjust all four feet as necessary then tighten
all four bottom nuts using a 9/16-inch wrench.
12