


18
Fig. 43
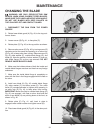
MAINTENANCE
CHANGING THE BLADE
WARNING: USE ONLY CROSS-CUTTING SAW
BLADES. WHEN USING CARBIDE TIPPED BLADES,
MAKE SURE THEY HAVE A NEGATIVE HOOK ANGLE.
DO NOT USE BLADES WITH DEEP GULLETS AS
THEY CAN DEFLECT AND CONTACT GUARD.
1. DISCONNECT THE SAW FROM THE POWER
SOURCE.
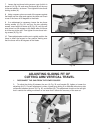
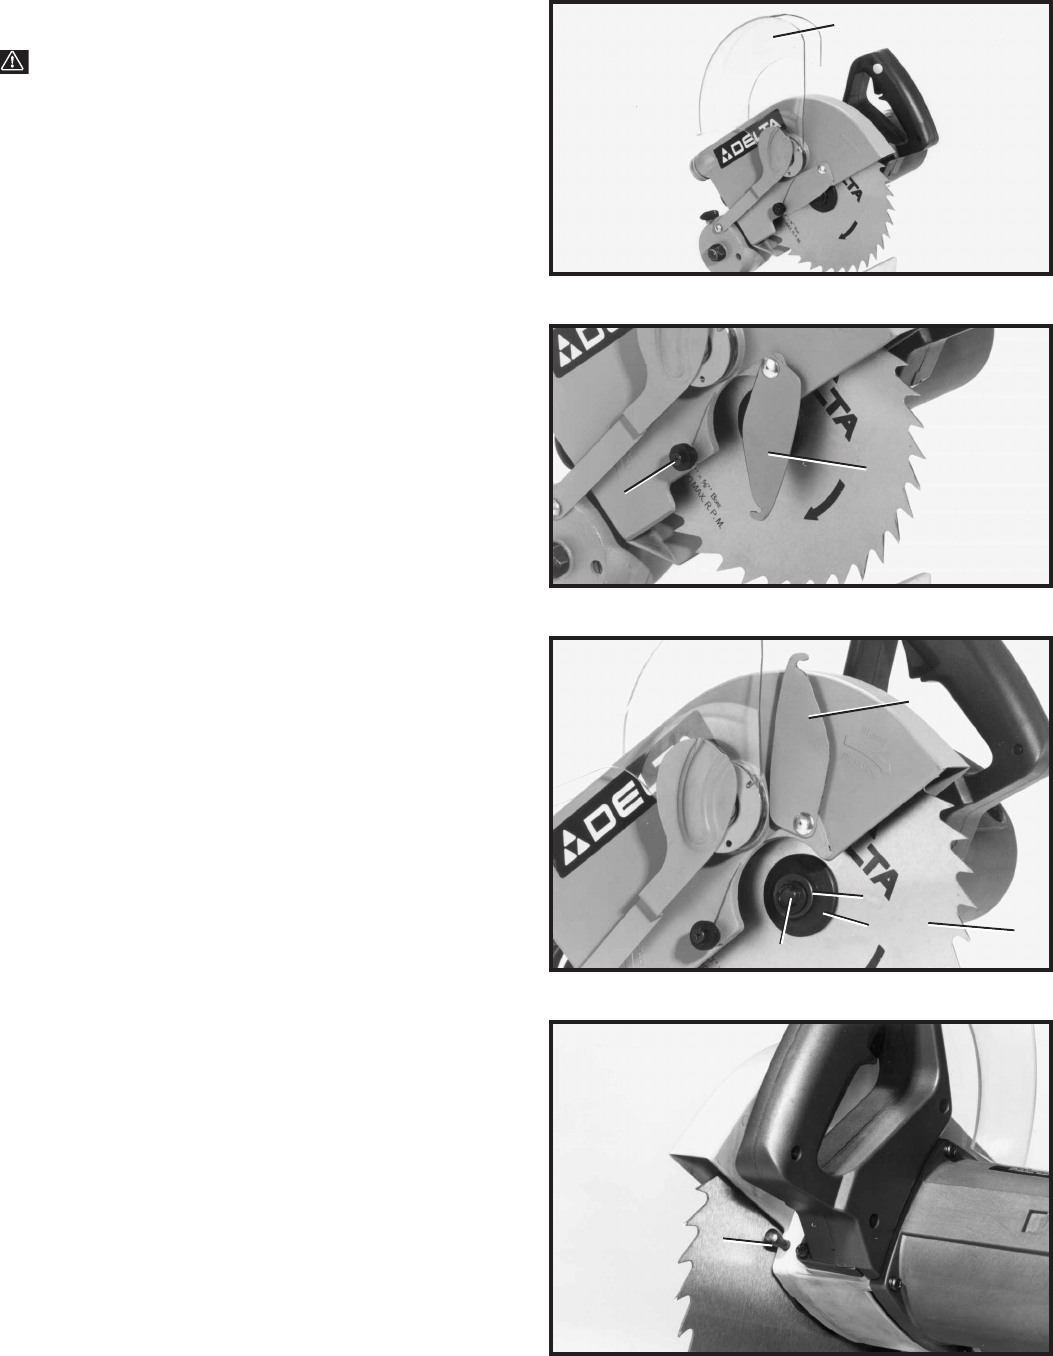
2. Rotate lower blade guard (A) Fig. 40, to the top posi-
tion as shown.
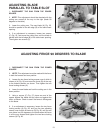
3. Loosen screw (B) Fig. 41, to free plate (C).
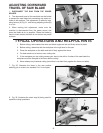
4. Rotate plate (C) Fig. 42, to the up position as shown.
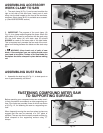
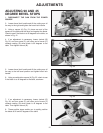
5. Remove arbor screw (D) Fig. 42, by turning screw (D)
clockwise and at the same time pressing in on arbor lock
(E) Fig. 43, to keep arbor from turning. Remove screw (D)
Fig. 42, arbor washer (F), outside blade flange (G), and
blade (H). Note the position of arbor washer (F) and out-
side blade flange (G) as they are removed. DO NOT
REMOVE INSIDE BLADE FLANGE.
6. Make sure the inside surfaces of both the inside and
outside blade flanges are clean and free from any foreign
substance.
7. Make sure the inside blade flange is completely on
arbor with the flats in the flange engaged with the flats on
the arbor.
8. Install new blade (H) Fig. 42, outside blade flange
(G), arbor washer (F) and arbor screw (D). Turn arbor
screw (D) counterclockwise to tighten while pressing in
on arbor lock (E) Fig. 43, to keep arbor from turning.
IMPORTANT: Make sure flats in outside blade flange (G)
Fig. 42, are engaged with flats on arbor shaft and that
teeth of saw blade (H) are pointing down at the front, as
shown in Fig. 42.
9. Rotate plate (C) Fig. 41, until hook in plate is
engaged under rubber washer and tighten screw (B).
10. Place lower blade guard (A) Fig. 40, in the down posi-
tion.
Fig. 40
Fig. 41
Fig. 42
A
C
B
C
H
F
G
D
E