


PAGE 19
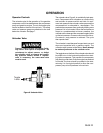
6. Reinstall the check valve. DO NOT OVER-
TIGHTEN.
SERVICING INTAKE AND EXHAUST VALVES
The intake and exhaust valves as well as the valve
plates and cylinder head will, over a period of time
accumulate residue of carbon-like material on their
surfaces. The material will decrease the efficiency
of the compressor. These components should be
inspected, whenever a problem is suspected, and
cleaned or replaced with new parts. Use the follow-
ing procedure to inspect the parts.
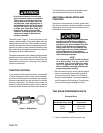
During service or repair activities
always disconnect the spark plug wire
before attempting repair maintenance
on compressor outfit. Make sure the
pressure is released from the air tank.
1. Disconnect the spark plug wire and drain
all air pressure from the air tank.
2. Service two stage compressor valves
as follows:
a. Remove the screws securing the
intercooler to the cylinder head and
remove the intercooler.
b. Disconnect the outlet line from the
aftercooler.
c. Remove the screws securing the
aftercooler to the cylinder head and
remove the aftercooler.
d. Remove the hardware securing the
cylinder head and remove the
cylinder head and valve plate.
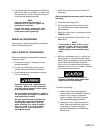
Many solvents are highly flammable
and a health hazard if inhaled. Always
observe the solvent manufacturers
safety instructions and warning.
e. Clean carbon deposits in head cavities and
valves plates with lacquer thinner or
other suitable solvent.
f. Remove the intake and exhaust valve
assemblies from the valve plate. Clean and
inspect the valves, and valve retainers.
Replace any defective components as
necessary.
g. Reassemble the intake and exhaust
valves.
NOTE
Do not use gasket cement on any
gasket surface as this may clog the
compressor valve cavities and flow
areas.
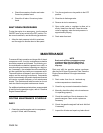
h. Reinstall the valve plate. Use a new
valve plate gasket.
i. Install the cylinder head. Use a new
head gasket. Snug the mounting screws
tight then torque to 35 foot-pounds
using a criss cross pattern when torquing.
j. Install a new after cooler gasket. Secure
the aftercooler with the mounting screws
removed.
k. Connect the outlet line to the aftercooler.
l. Install new intercooler gaskets and
secure the intercooler with the mounting
screws removed.
4. Connect the spark plug wire.