


22 TS 55 REQ
Adjustments
Matching Multiple Saws to Shared Guide Rails
If you own multiple saws that share common guide rails,
you will want all of your saws calibrated to the same blade
position. This will prevent one saw from cutting more guide
rail splinter guard than another saw.
Note: Depending on the cutting position of your
existing saw(s), it may be necessary to match your
existing saws to the cutting position of the TS 55
REQ. To prevent excessive misadjustment of the saw,
the TS 55 REQ limits the blade position adjustment to
be within 0.030” of the factory calibration. Older gen-
eration saws were not limited, and could potentially
be misadjusted beyond specication. If your existing
saws are adjusted beyond specication, they should
be adjusted to match the TS 55 REQ.
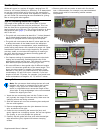
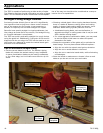
1. Place a workpiece on a stable surface, and overhanging
the edge so the saw blade can be set to maximum depth.
► For best results, the workpiece should be a near-homog-
enous material, such as a tight grained wood or Medium
Density Fiberboard (MDF).
► The workpiece can be any length, as long as it is at least
slightly longer than the saw.
► The thickness of the workpiece is not critical, but you
may have best results if it is between ¾” and 1¼”
2. Securely clamp a guide rail to the workpiece, so that the
guide rail will remain stationary as you switch between 2
or more saws.
► Clamping the guide rail is important. If the guide rail
moves during this procedure, you will have to start over.
3. Set the blade depth for all saws to their maximum depth.
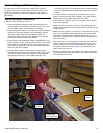
4. Using the primary saw that you want your other saw(s)
to match, cut the workpiece using a full-depth plunge.
Note: Before adjusting a saw, you should rst verify
whether it needs adjustment. Check the saw’s posi-
tion using the procedure below, except do not loosen
the adjustment screws.
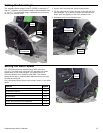
5. Unplug all saws for safety.
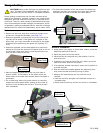
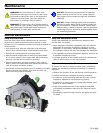
6. Slightly loosen the 4 bevel block mounting screws from
the underside of the saw. (These are located on the top
side of TS 55 EQ and TS 75 EQ saws.)
Mounting
Screws
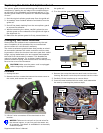
7. Note: The TS 55 REQ FastFix has a second stop position
which is near full depth. To activate it, plunge the blade
to full depth, then open the FastFix lever, and release the
plunge until it clicks in place.
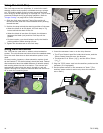
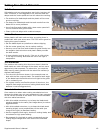
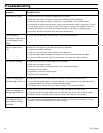
8. Without moving the guide rail, place the saw to be
adjusted on the guide rail, and press against a forward
tooth until it is touching the workpiece edge.
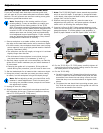
9. Insert a 0.15mm (0.006”) feeler gauge between a rear
tooth and the workpiece, and press the tooth against the
gauge/workpiece. If a feeler gauge is not available, a
piece of paper folded in half will equal 0.004” to 0.006”.
Feeler
Gauge
Touching
Workpiece
10. For the TS 55 EQ or TS 75 EQ saws, carefully tighten all
4 bevel block mounting screws; taking care to not move
the blade position in the process.
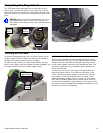
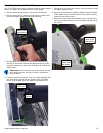
11. For the TS 55 REQ:
a. Carefully tighten the 2 forward bevel block mounting
screws. These are double-ended screws that are also
accessible from above the saw using a 2mm hex key.
Note that they turn counterclockwise to tighten from
above.
b. To tighten the rear bevel block mounting screws, care-
fully slide the saw to the rear of the guide rail until the
screws are accessible from below.
Top Side of
Mounting Screws
Thumbscrew
removed for clarity