


Making Measurements
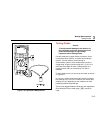
Measuring Current
3
3-17
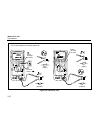
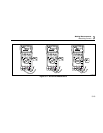
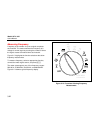
3. If you are using the A terminal, set the rotary switch to
mA/A. If you are using the mA/µA terminal, set the
rotary switch to µA for currents below 5000 µA
(5 mA), or mA/A for currents above 5000 µA.
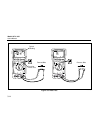
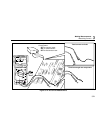
4. Open the circuit path to be tested. Touch the red
probe to the more positive side of the break; touch
the black probe to the more negative side of the
break. Reversing the leads will produce a negative
reading, but will not damage the meter.
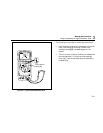
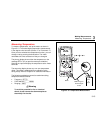
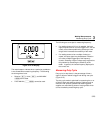
5. Turn on power to the circuit; then read the display. Be
sure to note the unit given at the right side of the
display (µA, mA, or A).
6. Turn off power to the circuit and discharge all high-
voltage capacitors. Remove the meter and restore the
circuit to normal operation.
Input Alert™ Feature
If a test lead is plugged into the mA/µA or A terminal, but
the rotary switch is not correctly set to one of the current
measuring positions, the beeper warns you by making a
chirping sound and the display shows "LEAd5".
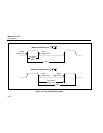
This Input Alert warning is intended to stop you from
attempting to measure voltage, continuity, resistance,
capacitance, or diode values when the leads are plugged
into a current terminal.
Placing the probes across (in parallel with) a powered
circuit when a lead is plugged into a current terminal can
damage the circuit you are testing and blow the meter’s
fuse. This can happen because the resistance through the
meter’s current terminals is very low, so the meter acts like
a short circuit.
Note
The beeper may sound in the presence of high
electical noise, such as that found near
Pulse
Width Modulation
(PWM) motor drives.