


Maintenance
Replacing the Fuses
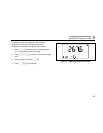
6
6-5
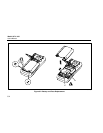
Replacing the Fuses
W Warning
To avoid electrical shock or damage to the
meter, only use replacement fuses specified
in Table 6-1.
Referring to Figure 6-2, examine or replace the meter’s
fuses as follows:
1. Turn the rotary switch to OFF and remove the test
leads from the terminals.
2. Remove the battery acccess door by using a
standard-blade screwdriver to turn the battery door
screws one-quarter turn counterclockwise.
3. Remove either fuse by gently prying one end loose,
then sliding the fuse out of its bracket.
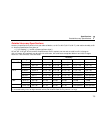
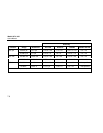
4. Install ONLY specified replacement fuses with the
amperage, voltage, and speed ratings shown in
Chapter 7.
5. Reinstall the battery door. Secure the door by turning
the screws one-quarter turn clockwise.
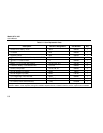
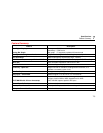
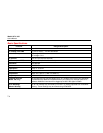
User-Replaceable Parts
User-replaceable parts are listed in Table 6-1. These parts
can be ordered by contacting Fluke. See “How to Contact
Fluke" in Chapter 1.
In Case of Difficulty
If the meter does not seem to work properly:
1. Examine the case for damage. If damage is detected,
contact Fluke. See “Contacting Fluke” in Chapter 1.
2. Check and replace (as needed) the batteries, fuses,
and test leads.
3. Review this manual to verify correct operation.
4. If the meter still does not work, pack it securely and
forward it, postage paid, to the location provided by
the appropriate Fluke contact. Include a description of
the problem. Fluke assumes no responsibility for
damage in transit.
A meter under warranty will be repaired or replaced (at
Fluke’s option) and returned at no charge. See the
registration card for warranty terms.