


10
Assembly
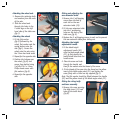
Stand set-up
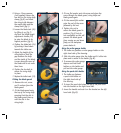
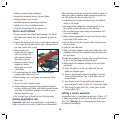
1. Place the table saw on the floor (fig A).
2. On the left hand side extension table which was packed
separately from the table saw remove the 2 self-tapping
screws from the end of each rod.
3. Fit the left hand side extension table into the 2
positioning holes on the left hand side of the table saw,
the extension table locking knobs (28) may need to be
loosened if it is a tight fit (fig B).
4. Replace the 2 self-tapping screws to prevent the side
extension table from sliding out (fig C).
Note: The guide rods can be rotated slightly to
gain access to the screw holes.
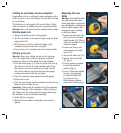
5. Ensure the left hand side extension table is fully
inserted and tighten the extension table locking
knobs to secure it in position (fig D).
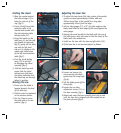
6. Using the handle on the table saw (4) and the
soft grip handle on the lower leg (5) gently tilt
the table saw onto its
left hand side.
7. Push the stand locking
lever (29) to the left
to disengage the stand
assembly and fold open
the stand legs (fig E).
8. Fully open the stand legs
and ensure that the stand
locking lever clicks back
into place indicating that
the stand legs are securely
open (fig F ).
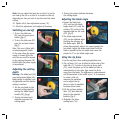
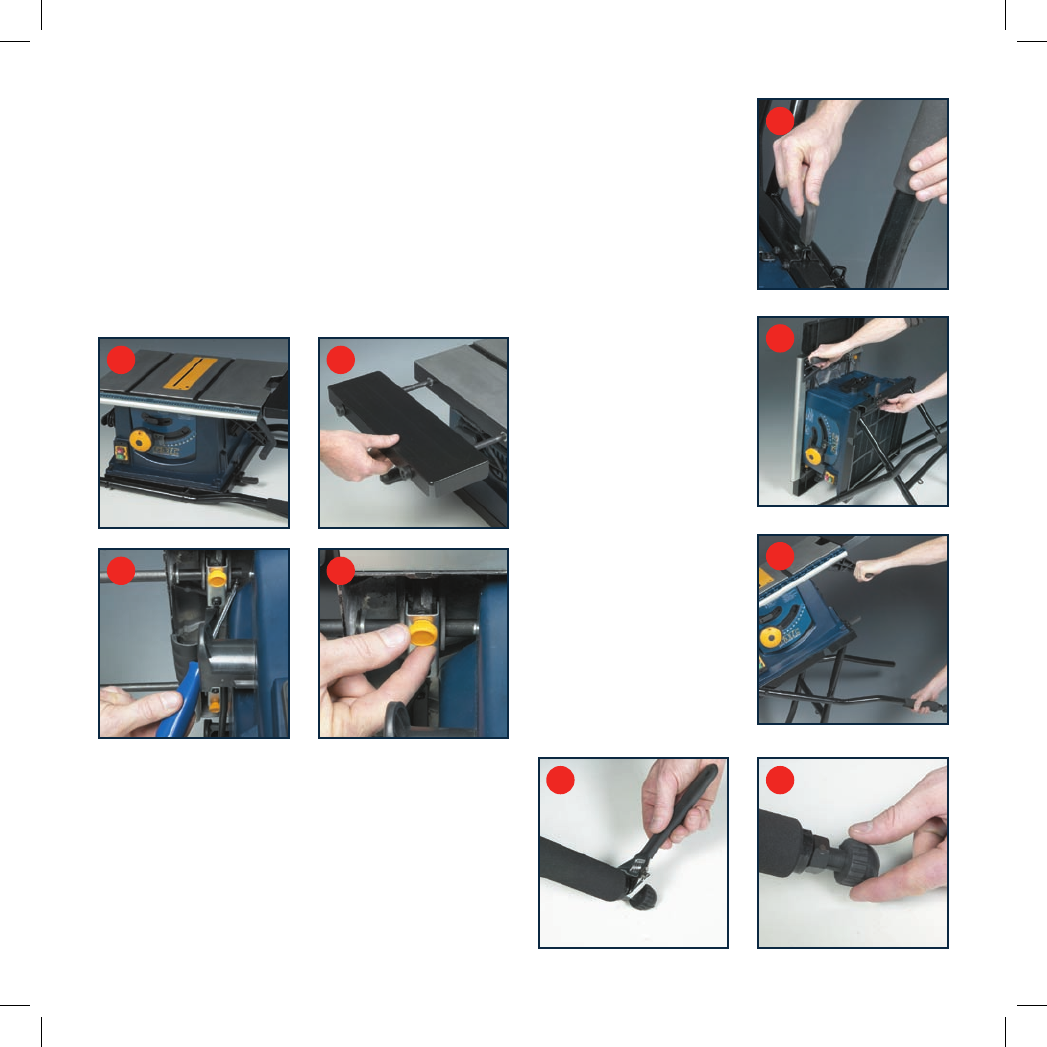
9. Using the handle on the
table saw (4) and the soft
grip handle on the lower
leg (5) tilt the table saw
onto its stand (fig G).
Important. Use both handles
when tilting the table onto
the stand. Push down on the
leg handle (5) and pull the
table handle (4).
10. Loosen the lock nut on
the adjustable foot (32)
and screw the foot in or
out until the table saw
is stable (fig H & I).
11. Tighten the lock nut.
BA
C D
E
F
G
H I