


Repair
311321H 23
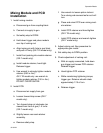
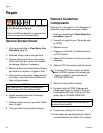
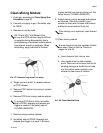
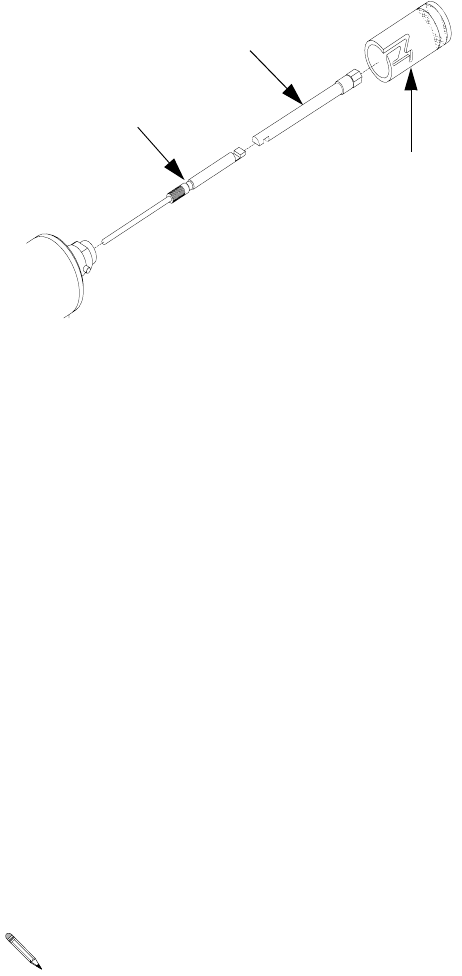
11.Remove valving rod.
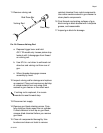
FIG. 24: Remove Valving Rod
a. Depress trigger lever and hold.
GX-7 DI model only: loosen piston stop
locknut until it disengages from thread
on valving rod.
b. Use 5/16 in. nut driver to unthread rod
draw bar and valving rod from rear of
gun.
c. When threads disengage remove
assembly by hand.
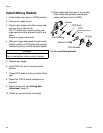
12.Inspect valving rod for damage and replace
as required. Clean and remove any buildup
of mixed material from rod using cloth
soaked in gun cleaner or fine steel wool.
13.Disconnect air supply.
14.Remove gun block retaining screw. Care-
fully slide gun block away from air cylinder.
If dried chemical is built up on gun block,
remove dried chemical before you remove
gun block.
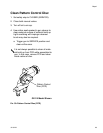
15.Clean all components thoroughly. Use
brushes and clean-out tools to remove
residual chemical from metal components.
Use cotton swabs soaked in gun cleaner to
clean plastic components.
16.Coat threads and mating surfaces of gun
block and gun block bracket with Lubriplate
grease, and reassemble.
17.Inspect gun block for damage.
If valving rod is replaced, it is recom-
mended to reset forward stop.
Rear Stop
Rod Draw Bar
Valving Rod