


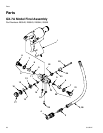
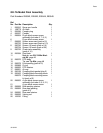

Repair
24 311321H
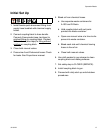
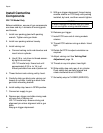
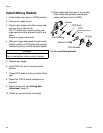
Install Centerline
Components
GX-7 DI Model Only
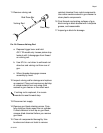
Before installation, ensure all gun components
are clean and dry. Lubricate all moving parts
and threads.
1. Install rear packing gland with packing
wrench. Tighten onto gun block.
2. Install rear packing retainer loosely.
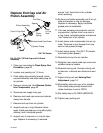
3. Install valving rod.
a. Connect valving rod to rod draw bar and
insert into air cylinder.
b. Use 5/16 in. nut driver to thread assem-
bly tight into end cap.
GX-7 DI model only: thread rod until
approximately 3/16 in. to 1/4 in.of
thread protrudes from end of piston rod.
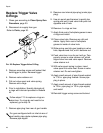
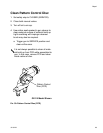
4. Thread locknut onto valving rod by hand.
5. Carefully slide gun block onto valving rod
toward air cylinder. Install gun block onto
gun block mounting bracket.
6. Install safety stop; leave in OPEN position.
7. Connect air supply to gun.
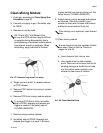
8. Depress gun trigger and slide mixing mod-
ule over end of valving rod.
GX-7 DI model only: ensure valving rod
alignment pin enters alignment slot in gun
block.
Keep gun trigger depressed.
9. With gun trigger depressed, thread mixing
module retainer or PCD body with packing
installed, by hand, and then wrench tighten.
10.Release gun trigger.
11.Install PCD over end of mixing module
retainer.
12.Thread PCD retainer onto gun block. Hand
tight.
13.Rotate flat PCD to adjust orientation as
required.
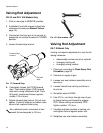
14.Adjust valving rod. See Valving Rod
Adjustment, page 16.
15.Thread air cap into place; hand tight.
16.Slide safety stop onto rear of air cylinder.
Push safety stop partially forward and
rotate clockwise to set to OPEN.
17.Set safety stop to CLOSED (SERVICE).
CAUTION
To avoid damage to module and gun block,
do not overtighten mixing module retainer.