


-39-
G0668 20" Vertical Metal-Cutting Bandsaw
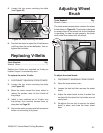
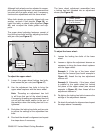
The lower wheel adjustment assemblies have
a locking hex bolt threaded into an adjustment
sleeve (see Figure 48).
Figure 48. Lower wheel adjustment assemblies.
Lower Wheel
Adjustment Assemblies
(3 of 4 shown)
Although both wheels can be adjusted to accom-
plish correct wheel alignment, we recommend that
you start with the upper wheel, and, if necessary,
continue the adjustments with the lower wheel.
When both wheels are correctly aligned with one
another, re-check V-belt tension (Page 36), re-
install the table, re-check table alignment (Page
40), and re-adjust the blade guides and sup
-
ports.
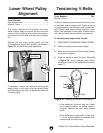
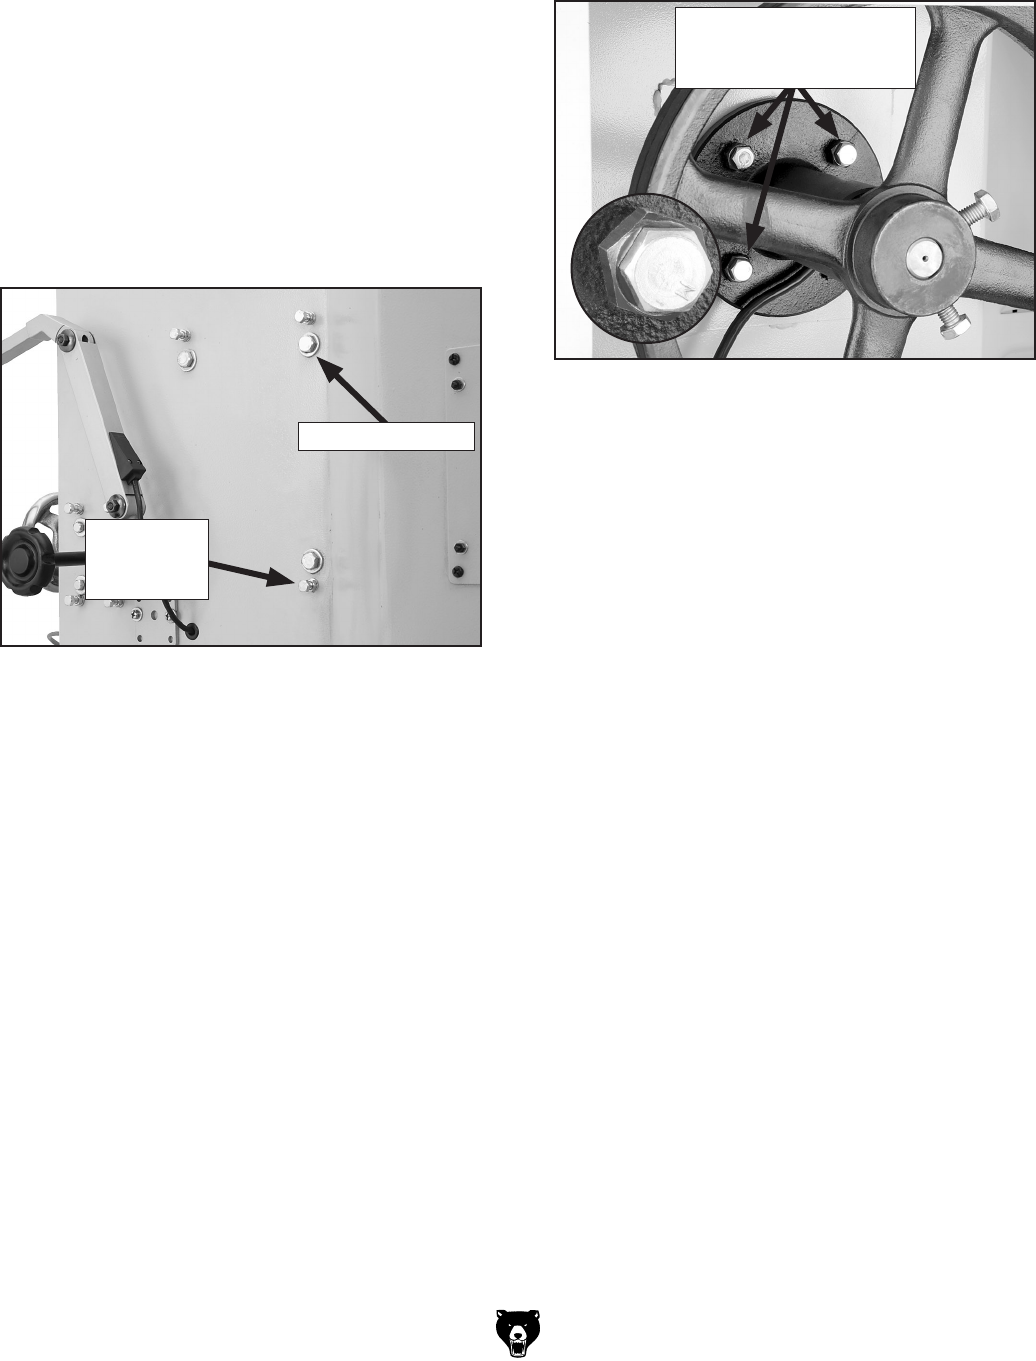
The upper wheel adjusting fasteners consist of
four locking hex bolts and four adjusting hex bolts
with jam nuts (see Figure 47).
Figure 47. Upper wheel adjusting fasteners.
Locking Hex Bolt
Adjustment
Hex Bolt
& Jam Nut
To adjust the upper wheel:
1. Loosen the upper wheel locking hex bolts,
then loosen the jam nuts (see
Figure 47).
2. Use the adjustment hex bolts to bring the
upper wheel coplanar with the lower wheel.
Note: Threading an adjustment hex bolt
in will force that part of the wheel forward.
Conversely, threading an adjustment hex bolt
out will pull that wheel section to the rear of
the machine when the locking hex bolt is re-
tightened.
3. Re-tighten the locking hex bolts and jam nuts
to secure the settings of the adjustment hex
bolts.
4. Re-check the wheels for alignment and repeat
the steps above if necessary.
To adjust the lower wheel:
1. Loosen the locking hex bolts of the lower
wheel.
2. Loosen or tighten the adjustment sleeves as
necessary to bring the lower wheel coplanar
with the upper wheel.
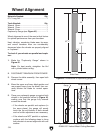
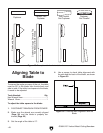
Example 1: If the top of the lower wheel
leans too far forward (see fourth example in
Figure 49), thread the top two adjustment
sleeves out.
Example 2: Alternately, if the lower wheel
is parallel to the upper wheel but behind
the plane of the upper wheel (see second
example in
Figure 49), then thread all four
adjustment sleeves in.
3. Re-tighten the locking hex bolts to secure the
settings of the adjustment sleeves.
4. Re-check the wheels for alignment and repeat
the steps above if necessary.